00:07: How do I set details for a course?
00:09: In Course Navigation, click the Settings link.
00:13: Click the Course Details tab.
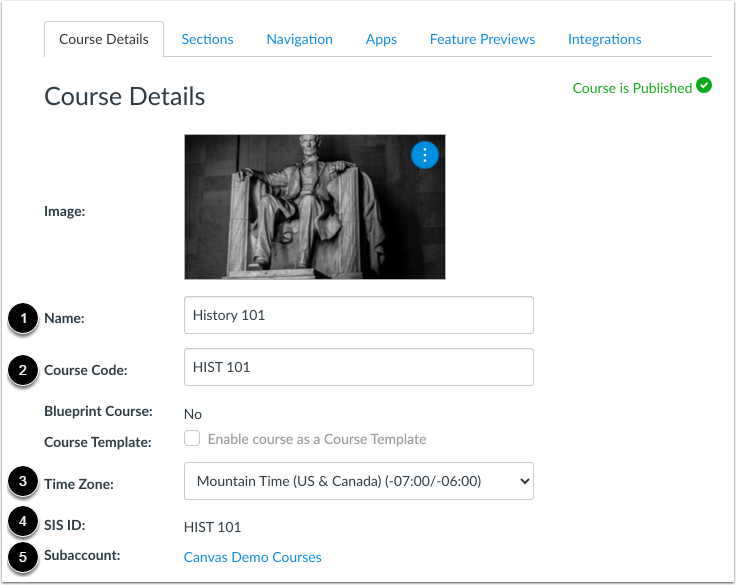
00:16: The first section of Course Details shows you an overview of your course, including the course
00:20: name and course code. Depending on your institution,
00:23: you may not be able to change your course name and code.
00:27: To change your course time zone, use the Time Zone drop-down menu.
00:32: If you can view SIS IDs, you can view the SIS ID
00:36: for the course. You can also view the assigned subaccount for the course.
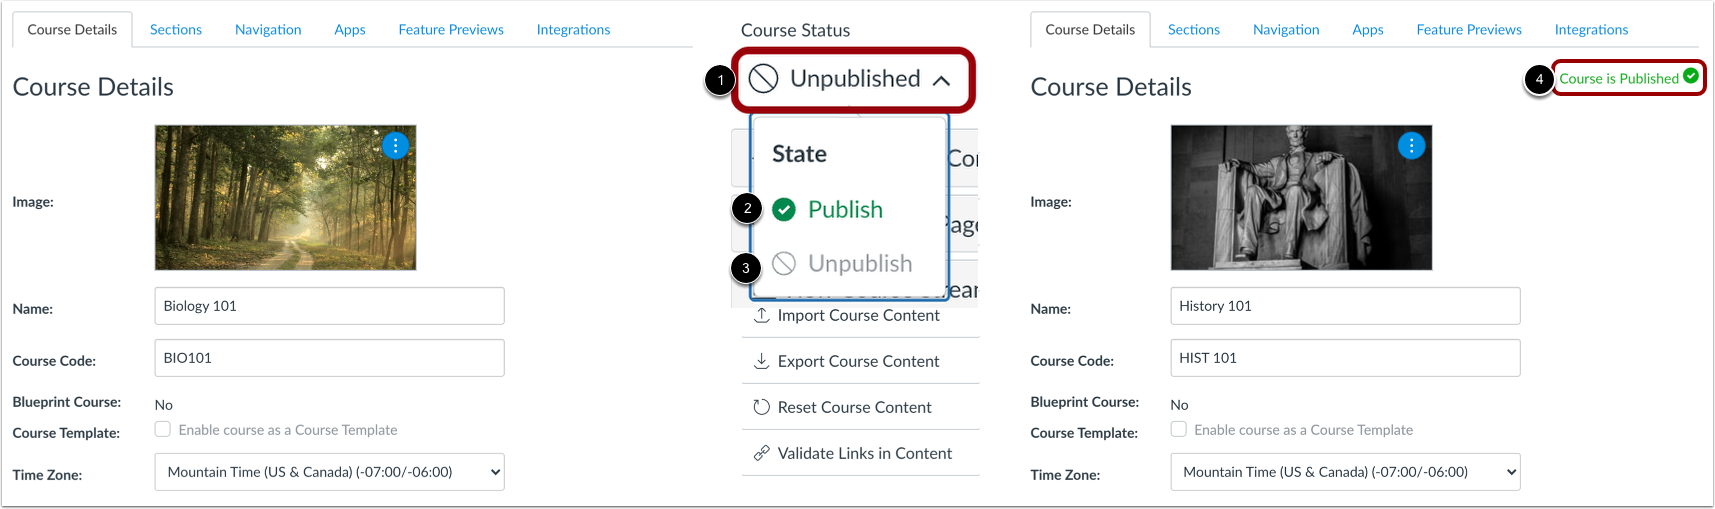
00:41: If you have permission to publish or unpublish courses, you can manage
00:45: your course, status in the sidebar to publish or unpublish, the course,
00:49: click, the course status drop down menu to publish the course,
00:53: click the publish button, to unpublish, your course, click
00:57: the unpublished button, if you do not have permission to modify your
01:01: course status or if your course has been published and includes grades,
01:05: you cannot modify. The courses published status.
01:08: Take note that you must publish a course before students can
01:12: access it and its contents. Students cannot see unpublished courses
01:16: and content publishing. A course, is a course permission.
01:19: If you cannot publish your course, your institution has restricted this
01:23: feature. If you are using a free for Teacher account, you cannot publish
01:27: a course until you have verified your email address.
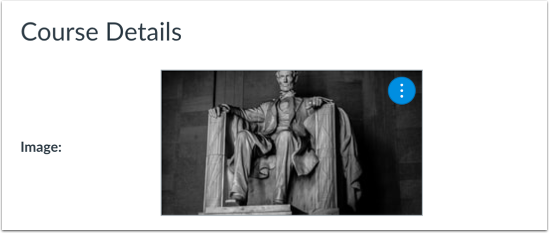
01:31: If your institution allows you to add an image to a course card in the Dashboard, you
01:35: can add or replace the course image.
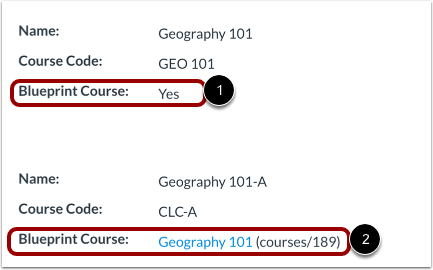
01:39: Your course, details tab indicates. Whether the course has been enabled as a blueprint
01:43: course and displays. Yes or no.
01:46: If your course, is associated with a blueprint.
01:48: Course, your course details tab indicates the name of the blueprint.
01:52: Course, the course name also includes the course, ID as a reference
01:56: example, courses slash XXX.
02:00: If you have been enrolled in the Blue, Print course, as an instructor or ta the
02:04: name of the blueprint course, will contain a link to access the blueprint course.
02:09: Most commonly your course, will be associated with the blueprint course and you can only
02:13: manage unlocked content in your course.
02:15: If your course is a blueprint, course, you can lock and sync course content
02:20: to Associated courses.
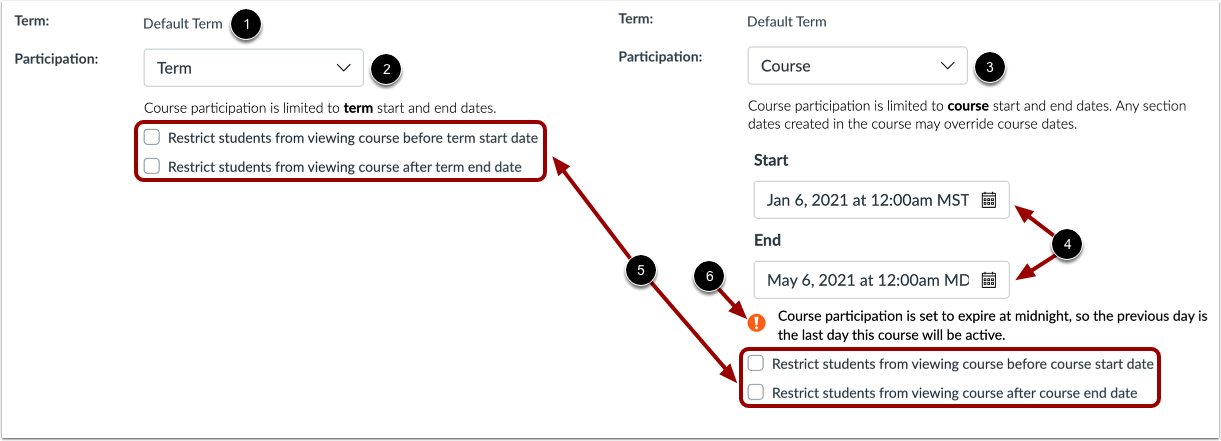
02:22: Courses may be assigned to the Default Term or a specific term. By
02:27: default, your students will be able to participate in the course within the term dates.
02:32: If needed, you can allow students to participate within course dates and
02:36: set specific course start and end dates.
02:39: However, changing course dates may override term availability
02:43: settings and placement in the Courses page and Dashboard.
02:47: Please confirm term dates before adding course participation dates.
02:51: You may also be able to change student access settings to allow or restrict
02:55: students from viewing your course before the start or end date.
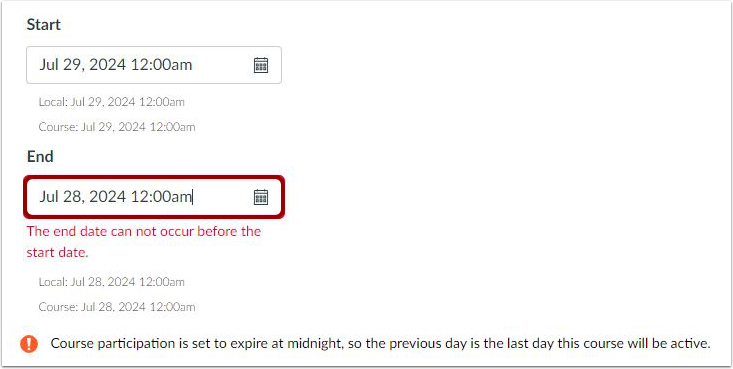
03:00: If a course participation end date is set to midnight, a warning message
03:04: displays.
03:06: If the selected date for the End date occurs before the Start date, a
03:10: warning message displays.
03:12: If allowed by your admin, you can restrict the view of quantitative data.
03:16: When selected, this setting limits the view of course quantitative
03:21: (numeric) grading data. Students and observers only see
03:25: qualitative data, which includes letter grades and comments.
03:29: Points are converted to a letter grade and points possible are hidden.
03:32: All other grading information is visible. Take note that... If
03:37: the course does not have a custom grading scheme, the Default Canvas Grading Scheme is used.
03:41: When the setting is enabled, Admins, Instructors, and
03:45: TAs can still see quantitative data.
03:47: The setting is visible only if your admin enables the quantitative
03:51: data restriction setting in the account.
03:54: You can set a default due time for all assignments in your course.
03:58: Updating the default due time does not change existing assignments with set due
04:03: times.
04:04: You can set a specific language for your course.
04:06: By default the language is set to Not set, English
04:11: (US). Selecting a language for your course will override user
04:15: language preferences and is only recommended for courses conducted in the selected
04:19: language.
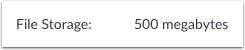
04:20: You can view the storage file size allowed in your course. File storage
04:25: consists of all files in course files and assignment submissions. Administrators
04:30: at your institution set the file storage quota for each course. Take
04:34: note that... Canvas course imports count against course
04:37: quotas. If a course import fails, verify the size of the file
04:41: against your course file storage quota. If necessary, contact
04:45: your Canvas admin to request a larger course quota. Copied
04:50: Canvas courses and course items do not count against course file storage quotas.
04:54: You can copy existing Canvas courses and course items from the
04:58: original course into your new course without impacting your course file storage
05:02: quota.
05:04: You can enable the option to launch speedgrader filtered by student group in
05:08: your course. When this setting is enabled, you must choose a
05:12: student group. When opening speed grader, this setting is disabled by default.
05:18: You can enable a grading scheme for your course.
05:20: A grading scheme is a set of criteria that measures varying
05:24: levels of achievement in a course. You can also view the current existing grading
05:28: scheme, if any. This setting is disabled by default.
05:32: You can view the license for your course. By default
05:35: all content is considered private and copyrighted, but you can also
05:39: release your content to the public domain or choose a Creative
05:43: Commons license. When making your course public, you will most likely
05:47: want to set a license for your course.
05:50: You can view the file copyright setting for your course.
05:52: If this option is enabled, usage right information must be selected
05:56: for all course files before they can be published.
05:59: This setting is disabled by default. Take note that... If
06:03: the option to manage file usage rights cannot be changed,
06:06: your institution has locked this setting.
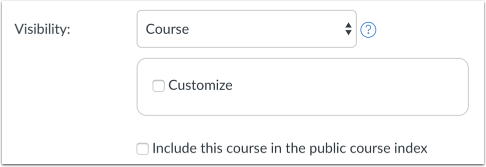
06:09: You can view any visibility settings for your course.
06:12: Each visibility option is independent of the others.
06:15: You can customize course visibility, customize content visibility,
06:20: and include the course in the public course index.
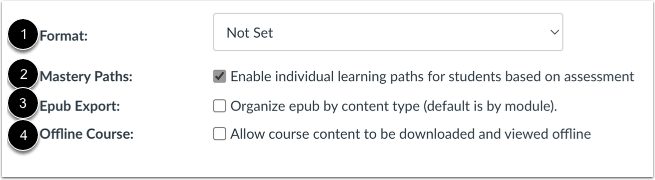
06:24: You can set the format for your course in the format menu.
06:27: This setting specifies the intended format of the course to
06:31: change. The course format. Click the format drop-down menu.
06:34: If Mastery paths has been enabled by your institution, you
06:38: can enable Mastery paths for your course, Mastery paths allows
06:42: you to customize learning experiences for students based on performance.
06:46: You can also allow users to download your course, for offline viewing using
06:50: one of two options if ePub exporting is enabled in your course,
06:54: you can view the Epub export checkbox and change the Epub
06:58: format if your course displays an offline course checkbox, your
07:02: institution has enabled. Course, content to be viewed offline as an HTML
07:06: file by default this Chuck box will be selected, however,
07:11: you can manage all, flying course, access by deselecting, the checkbox.
07:14: At any time, take note that if Mastery paths
07:19: is locked at the account level. The setting cannot be managed at the course, level,
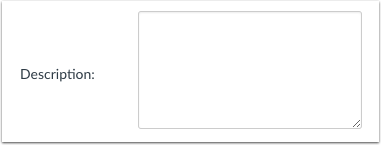
07:24: If your course is part of the public course index, you can include a description for
07:28: your course in the description field.
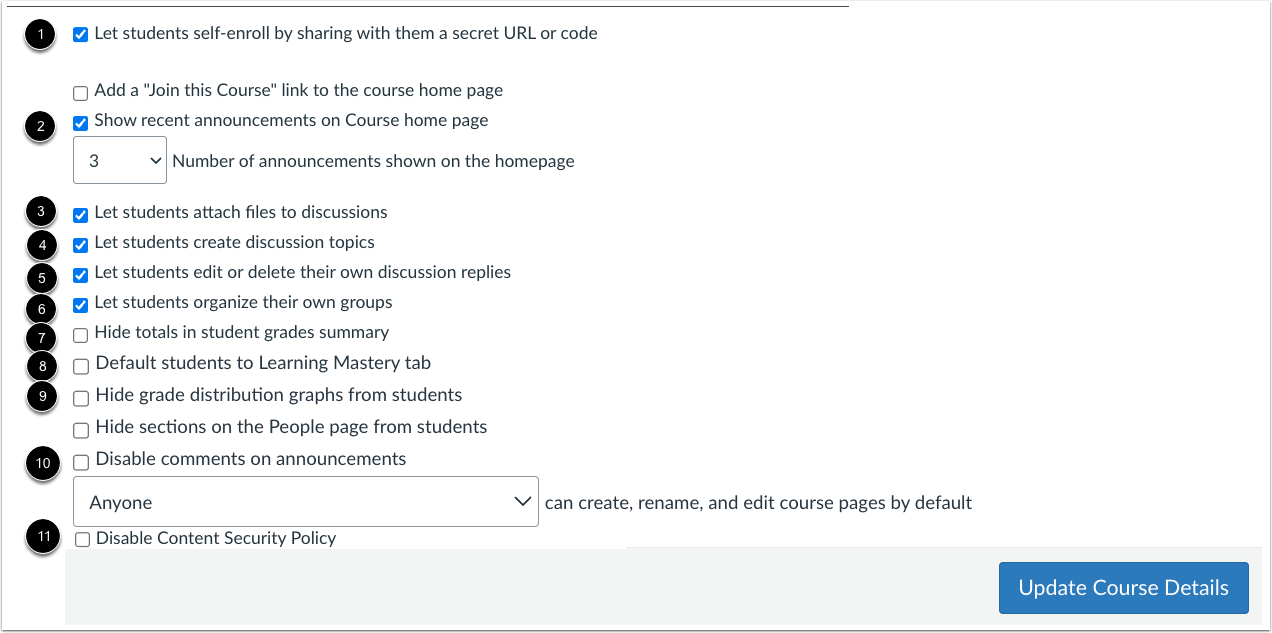
07:30: You can grant additional course privileges for students by selecting the appropriate checkbox.
07:35: Allow students to self enroll by clicking.
07:37: The let Student Self enroll by sharing with them a secret URL or code
07:41: checkbox. This is disabled by default.
07:45: Show recent announcements on the course. Homepage by clicking the show, recent announcements,
07:49: on course, homepage checkbox. This is disabled by default.
07:52: Allow students to attach files to discussion replies by clicking.
07:56: The let students attach files to discussions checkbox.
07:59: This is enabled by default. Allow students to create new discussion,
08:03: Topics by clicking. The let students create discussion topics checkbox.
08:07: This is enabled by default allow students to edit or delete
08:11: their own discussion replies by clicking. The let students edit or delete their
08:15: own discussion replies, checkbox. This is enabled by default allows
08:19: students to create their own student groups. By clicking the, let's students organize
08:23: their own groups checkbox. This is enabled by default.
08:27: Hide student grade totals in the grades Page by clicking the high totals in student grades
08:31: summary checkbox. This is disabled by default, hide the grade
08:35: distribution graphs in the grades Page by clicking, the hide grade distribution graphs
08:39: from students. Checkbox. This is disabled by default, disabled
08:43: comments on announcements by clicking the disable comments on announcements checkbox,
08:48: depending on your institutions preference.
08:50: This option may already be selected for you.
08:52: Allow students to edit course Pages by default, by selecting the edit
08:57: course Pages. Drop down menu. If the content security policy is enabled
09:01: in an account. Admins can disable the content security policy for a course,
09:05: by clicking the disable content security policy checkbox, if the box
09:09: is checked, the policy is disabled for this course.
09:13: Click the Update Course Details button to save changes.
09:17: This guide covered how to set details for a course.