00:07: How do I create a peer review discussion?
00:10: In Course Navigation, click the Discussions link.
00:14: To create a new discussion, click the Add Discussion button.
00:19: Create a graded discussion by selecting the Graded checkbox.
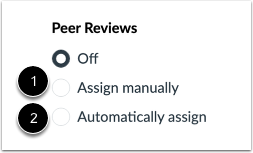
00:24: Determine if you are going to manually assign peer reviews or automatically
00:28: assign peer reviews. Select the radio button next to the option
00:32: you prefer.
00:34: If you automatically assign peer reviews, the menu will expand. In
00:38: the Reviews Per Student field, enter the number of reviews each student will
00:42: be required to complete.
00:44: In the Assign Reviews field, use the calendar icon to select a date or manually
00:49: enter a date for when peer reviews will be assigned to students.
00:53: To allow intra-group peer reviews, click the Allow intra-group peer reviews checkbox.
00:59: If you are ready to publish your discussion, click the Save and Publish button.
01:04: If you want to create a draft of your discussion and publish it later, click the Save
01:09: button.
01:10: When your discussion is saved in a draft state, you can return to the page
01:14: and publish it at any time by clicking the Publish button.
01:19: View the published discussion.
01:21: You can also attach a rubric to the discussion for students to fill out,
01:25: when completing peer reviews to add a rubric to the graded discussion, click
01:30: the options icon, then click the add rubric link.
01:34: This guide covered how to create a peer review discussion.