You can attach a file to an announcement for users to download.
View the video transcript
00:07: How do I attach a file to an announcement in a course?
00:11: In course, navigation, click the announcements link
00:15: Click the add announcement button.
00:18: Click the attach link.
00:20: Choose the file, you want to attach?
00:23: To attach the file to the announcement, click the open Button.
00:28: If required by your institution, you will need to select usage right settings
00:32: for your attachment. To manage usage, right settings, click
00:36: the set usage rights icon.
00:39: In the usage, right? Drop-down menu, select one of five usage rights.
00:44: If you are an instructor and are not sure which usage write applies to your file, please
00:48: consult your institutional admin for guidance.
00:51: The options include. I hold the copyright, original content
00:56: created by you, I have obtained permission to use the file authorized
01:00: permission by the author. The material is in the public domain.
01:03: Explicitly assigned to public domain cannot be copyrighted
01:07: or is no longer protected by copyright.
01:10: The material is subject to an exception.
01:13: Example. Fair, use the right to quote, or others under
01:17: applicable, copyright laws eggs or summary used for commentary.
01:21: News, reporting research or analysis in education.
01:24: The material is licensed under Creative.
01:27: Commons, this option also requires setting, a specific Creative,
01:31: Commons license,
01:34: If known enter the copyright holder information in the copyright holder field,
01:40: To save your usage. Right settings, click the save button, you can edit
01:44: usage right settings by clicking the set usage rights icon.
01:49: Click the publish button.
01:51: View, the attachment in the announcement.
01:54: This guide covered how to attach a file to an announcement in a course.
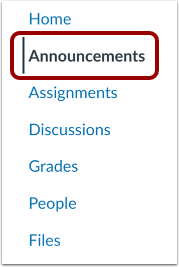
Open Announcements
In Course Navigation, click the Announcements link.
Add Announcement
Click the Add Announcement button.
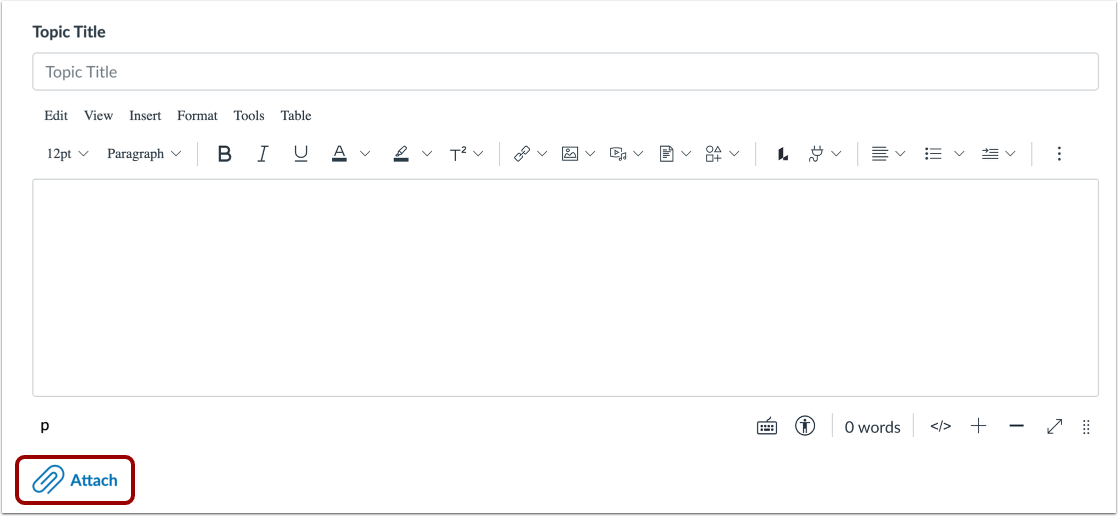
Attach File
Click the Attach link.
Note: You can attach only one file when you click the Attach link.
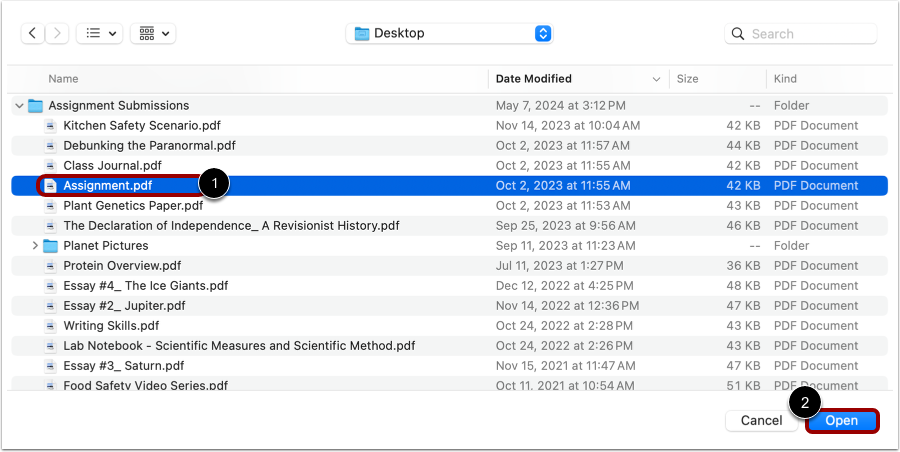
Browse for File
Choose the file you want to attach [1]. To attach the file to the announcement, click the Open button [2].
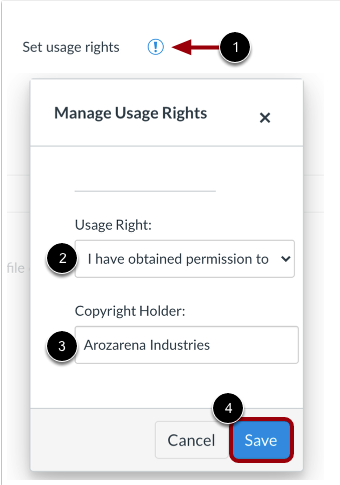
Set Attached File Usage Rights
If required by your institution, you will need to select usage right settings for your attachment. To manage usage right settings, click the Set usage rights icon [1].
In the Usage Right drop-down menu [2], select one of five usage rights. If you are an instructor and are not sure which usage right applies to your file, please consult your institutional admin for guidance:
- I hold the copyright (original content created by you)
- I have obtained permission to use the file (authorized permission by the author)
- The material is in the public domain (explicitly assigned to public domain, cannot be copyrighted, or is no longer protected by copyright)
- The material is subject to an exception - e.g. fair use, the right to quote, or others under applicable copyright laws (excerpt or summary used for commentary, news reporting, research, or analysis in education)
- The material is licensed under Creative Commons; this option also requires setting a specific Creative Commons license
If known, enter the copyright holder information in the Copyright Holder field [3].
To save your usage right settings, click the Save button [4]. You can edit usage right settings by clicking the Set usage rights icon.
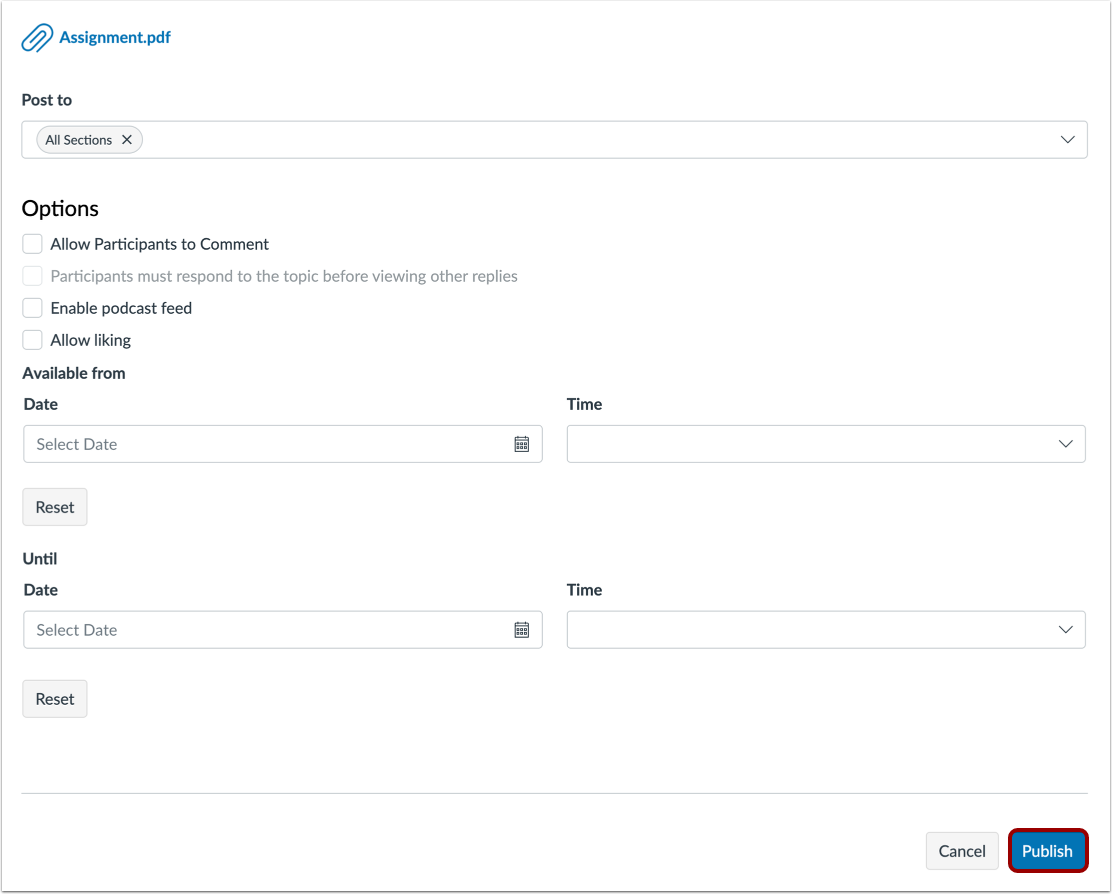
Publish Announcement
Click the Publish button.
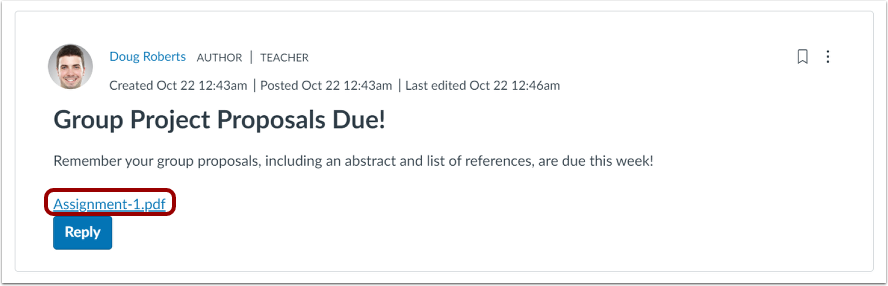
View Announcement
View the attachment in the announcement.
Attach Multiple Files
To attach or upload more files, click the Insert button [1]. Hover over the Document submenu [2] and click the Upload Document button [3].
Note: Select the Image submenu to upload an image, and select the Media submenu to upload videos and other recordings.
Select and upload the file [1] you want to embed, select the usage rights from the Usage Right drop-down menu [2], and enter the copyright in the Copyright Holder field [3] if needed. Click the Submit button [4] to apply your changes.
View the embedded file [1] in the content field.
To edit the embedded file, click the document name link [1], then click the Link Options button [2].
To change the embedded file name, edit the text in the Text field [3].
To update the link, edit the Link field [4].
To change the preview settings, select options in the Display Options section [5].
Click the Done button [6] to apply your changes.
View Files
View the embedded attachments in the announcement.