00:07: How do I create a discussion as an instructor?
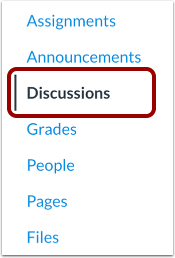
00:10: In Course Navigation, click the Discussions link.
00:15: Click the Add Discussion button.
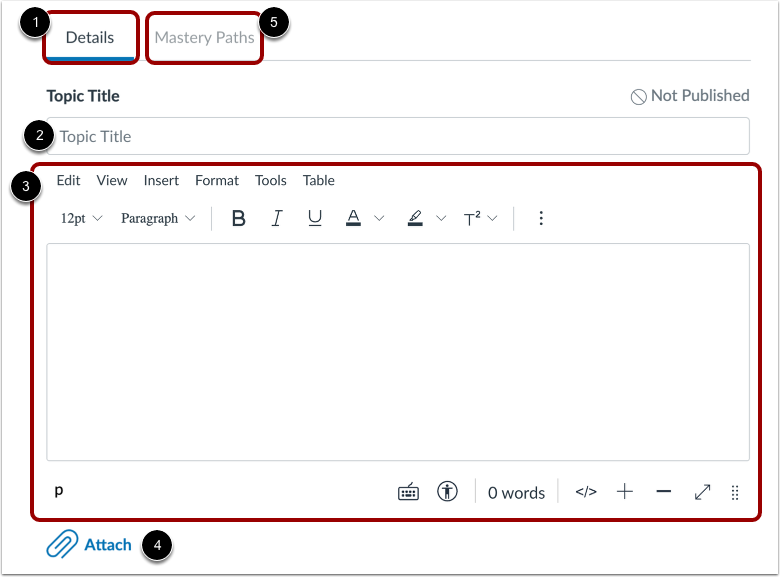
00:17: By default, the Details tab is selected.
00:20: Enter a discussion title in the Topic Title field.
00:25: Add discussion content using the Rich Content Editor.
00:29: You can also attach files to your discussion.
00:32: To add Mastery Paths to a graded discussion, click the Mastery Paths
00:37: tab.
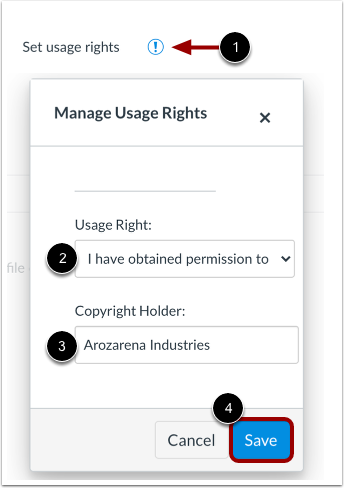
00:38: If required by your institution, you will need to select usage right settings
00:42: for your attachment. To manage usage
00:45: right settings, click the Set usage rights icon.
00:49: In the Usage Right drop-down menu, select one of five usage rights.
00:53: If you are an instructor and are not sure which usage right applies
00:57: to your file, please consult your institutional admin for guidance. Select
01:01: “I hold the copyright option” if
01:04: you created the original content. “I have obtained permission
01:08: to use the file” if you obtained permission from the author. “The
01:13: material is in the public domain” if explicitly assigned to public domain, cannot
01:18: be copyrighted, or is no longer protected by copyright) “The
01:23: material is subject to an exception - example: fair use,
01:27: the right to quote, or others under applicable copyright laws”
01:31: if the content is an excerpt or summary used for commentary,
01:35: news reporting, research, or analysis in education.
01:40: Or “The material is licensed under Creative Commons” which
01:44: also requires setting a specific Creative
01:46: Commons license.
01:48: If known, enter the copyright holder information in the Copyright Holder field.
01:52: To save your usage right settings, click the Save button. You
01:57: can edit usage right settings by clicking the Set usage rights icon.
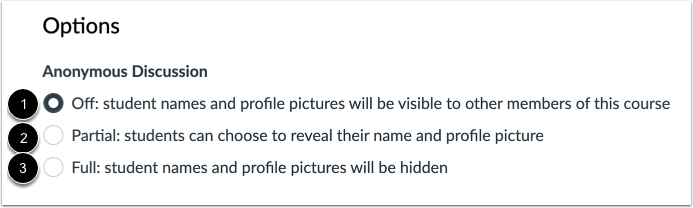
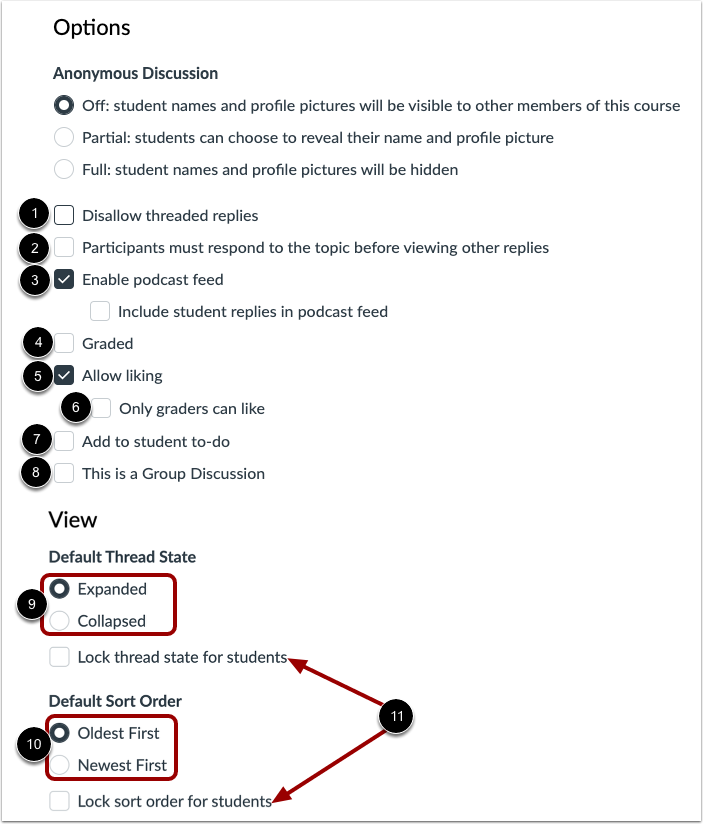
02:02: By default discussions are not Anonymous student names and
02:06: profile pictures display.
02:09: To allow students to decide whether to display their names and profile pictures,
02:14: click the Partial: students can choose to reveal their name and profile
02:18: picture option.
02:20: To enable anonymous discussions and hide student names and profile pictures,
02:24: click the Full: student names and profile pictures will be hidden option.
02:30: To allow only replies to the discussion topic and prevent users from replying
02:34: to replies, click the Disallow threaded replies checkbox.
02:39: To require students to reply to the discussion before they can see any other replies,
02:43: click the Participants must respond to the topic before viewing other
02:48: replies checkbox. Students see a "You must post before
02:52: seeing replies" message when they view the Discussion topic.
02:56: To enable a discussion podcast feed,
02:58: click the Enable podcast feed checkbox.
03:02: To create a graded assignment, click the Graded checkbox. When creating
03:06: a graded assignment, additional options display, where you can select a
03:10: number of points, add peer reviews, and select other options.
03:13: Learn more about creating a graded assignment for everyone, individual
03:18: students, course sections, or for course groups.
03:21: To allow users to like discussion replies,
03:24: click the Allow liking checkbox. To limit the liking functionality
03:28: to only graders in the course, click the Only graders can like checkbox.
03:32: Only users with the Edit Grades permission
03:35: can see the Like link. However, all users still see the total number of likes
03:39: for each reply.
03:41: To add an ungraded, discussion to, the student to do list.
03:44: Click the add to student to do checkbox student to do items display
03:48: in the course, calendar in the student specific list view dashboard.
03:52: And in the global and course, homepage to-do lists, graded discussions
03:56: automatically display in a students to-do list.
03:59: To make the discussion a group discussion,
04:01: click the This is a Group Discussion checkbox.
04:05: To set and lock the default thread view option for students, click Default
04:09: Thread State. For the default sort option, click Default Sort Order.
04:14: If these settings are locked, students will not be able to change the view or
04:19: sort discussion replies.
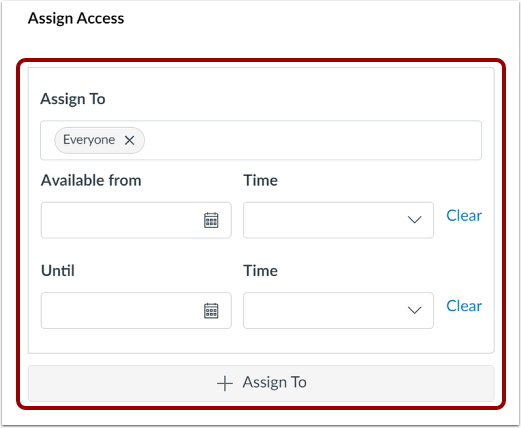
04:21: By default all sections and students in your course can view and participate in
04:25: the discussion to specify specific sections or users for
04:29: your discussion at a Siamese and availability dates.
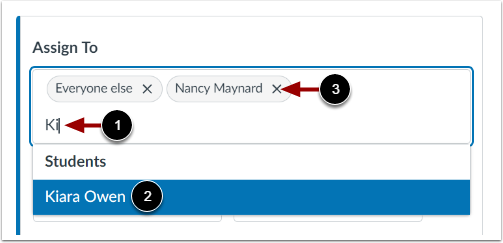
04:34: To change the assignees, click the Assign To field. Then, select
04:38: one or more assignees. You can assign to everyone, a course
04:43: section, or an individual student.
04:45: To find a student or section more easily and to a few letters of the name and select
04:49: the name from a filtered list.
04:52: To remove an assignee, click the Remove icon.
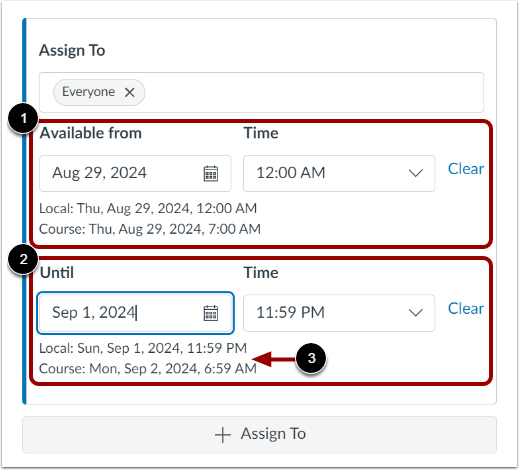
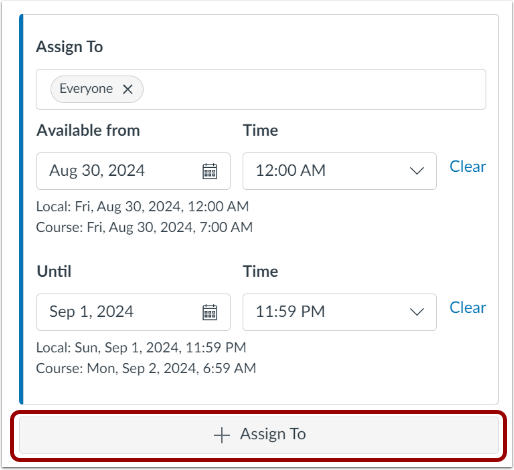
04:57: By default students can access the discussion at any time during the course
05:01: or section dates, however, to provide specific dates and
05:05: times for the due date and discussion of availability, and her dates and or times
05:09: in the available from and until areas.
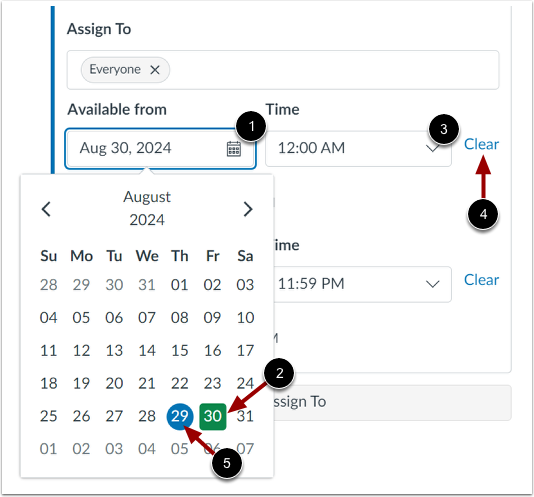
05:13: To set dates, enter a date in the Available from or Until field.
05:17: Or, click the field and select a date from the calendar.
05:21: To set times enter a time or click the time, drop down menu and select
05:25: a Time.
05:27: To assign to other students or sections with different dates and times, click
05:31: the Assign To button. Then, enter additional assignees and availability
05:36: dates.
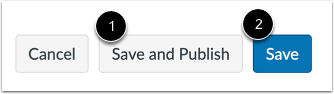
05:37: If you are ready to publish your discussion, click the Save and Publish button.
05:43: To create a draft of your discussion and publish it later, click the Save
05:47: button.
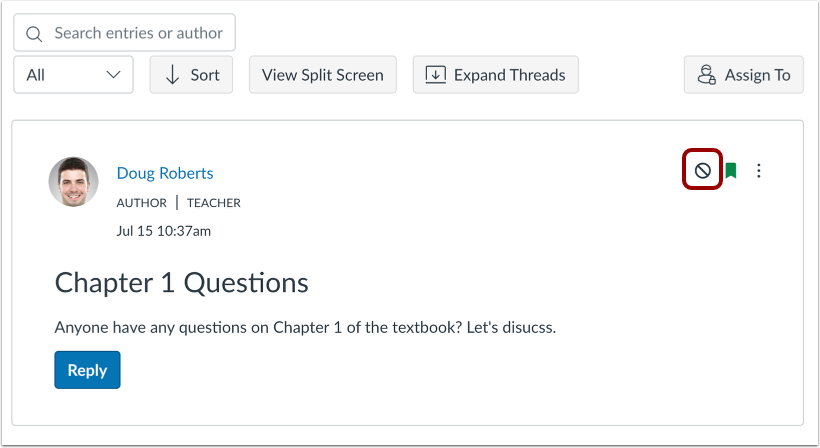
05:48: If you saved your discussion as a draft, you can publish it at any time
05:52: by clicking the Publish icon.
05:55: This guide covered how to create a discussion as an instructor.