View the video transcript
00:07: How do I automatically assign students to groups?
00:11: In Course Navigation, click the People link.
00:14: Click the name of the group set.
00:17: Confirm you have created all the groups for this group set.
00:20: If you need more groups, you can create additional groups manually.
00:25: Click the Options menu [1], then click the Randomly Assign Students link
00:29: [2].
00:31: If you want to require group members to be in the same section, select the Require
00:35: group members to be in the same section checkbox.
00:39: When the required group members to be in the same section checkbox is selected.
00:43: A tooltip displays the message.
00:45: Students, who are enrolled in multiple sections will be put in a
00:50: group by themselves. Click the okay button.
00:54: View the group assignments. You can move students between groups if
00:58: necessary.
01:00: This guide covered how to automatically assign students to groups.
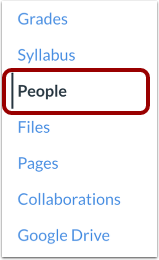
Open People
In Course Navigation, click the People link.
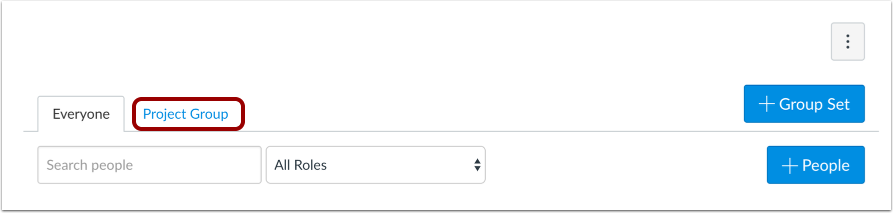
Open Group Set
Click the name of the group set.
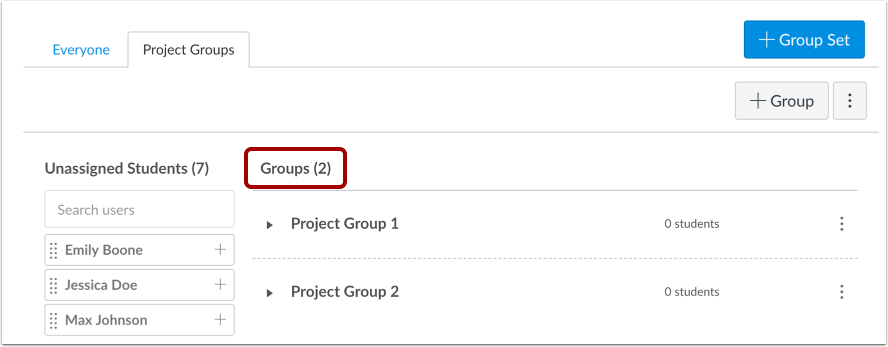
Confirm Groups
Confirm you have created all the groups for this group set. If you need more groups, you can create additional groups manually.
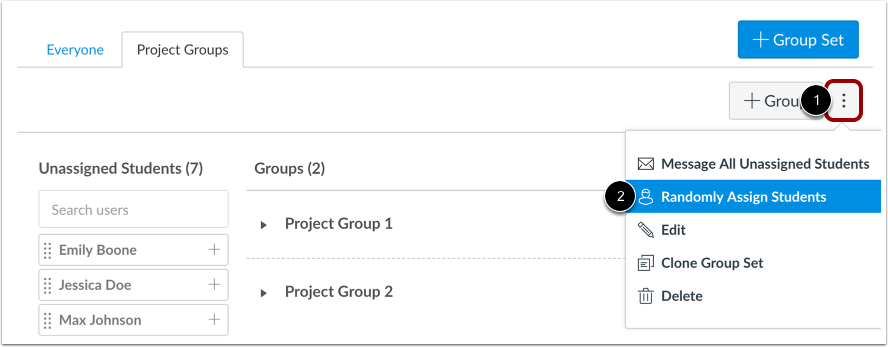
Randomly Assign Students
Click the Options menu [1], then click the Randomly Assign Students link [2].
If a course allows self-enrollment and groups are already set up, newly enrolled users are not automatically added to groups. You must run Randomly Assign Students to include these users.
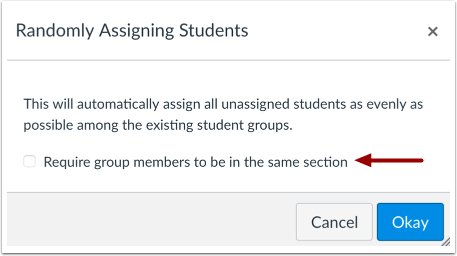
Require Same Section for Groups
If you want to require group members to be in the same section, select the Require group members to be in the same section checkbox.
When the Require group members to be in the same section checkbox is selected, a tool tip displays the message: Students who are enrolled in multiple sections will be put in a group by themselves.
Click the Okay button.
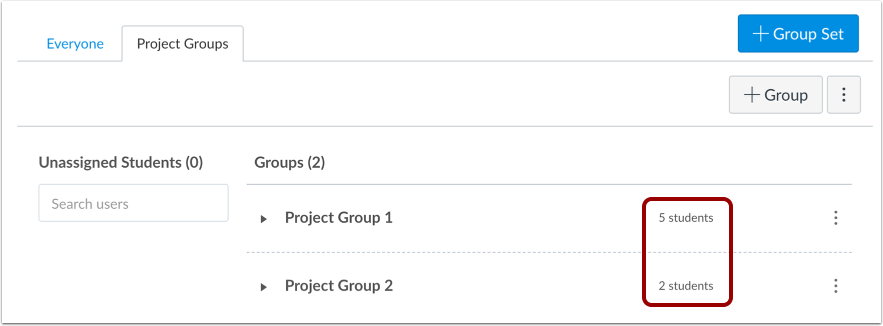
View Groups
View the group assignments. You can move students between groups if necessary.