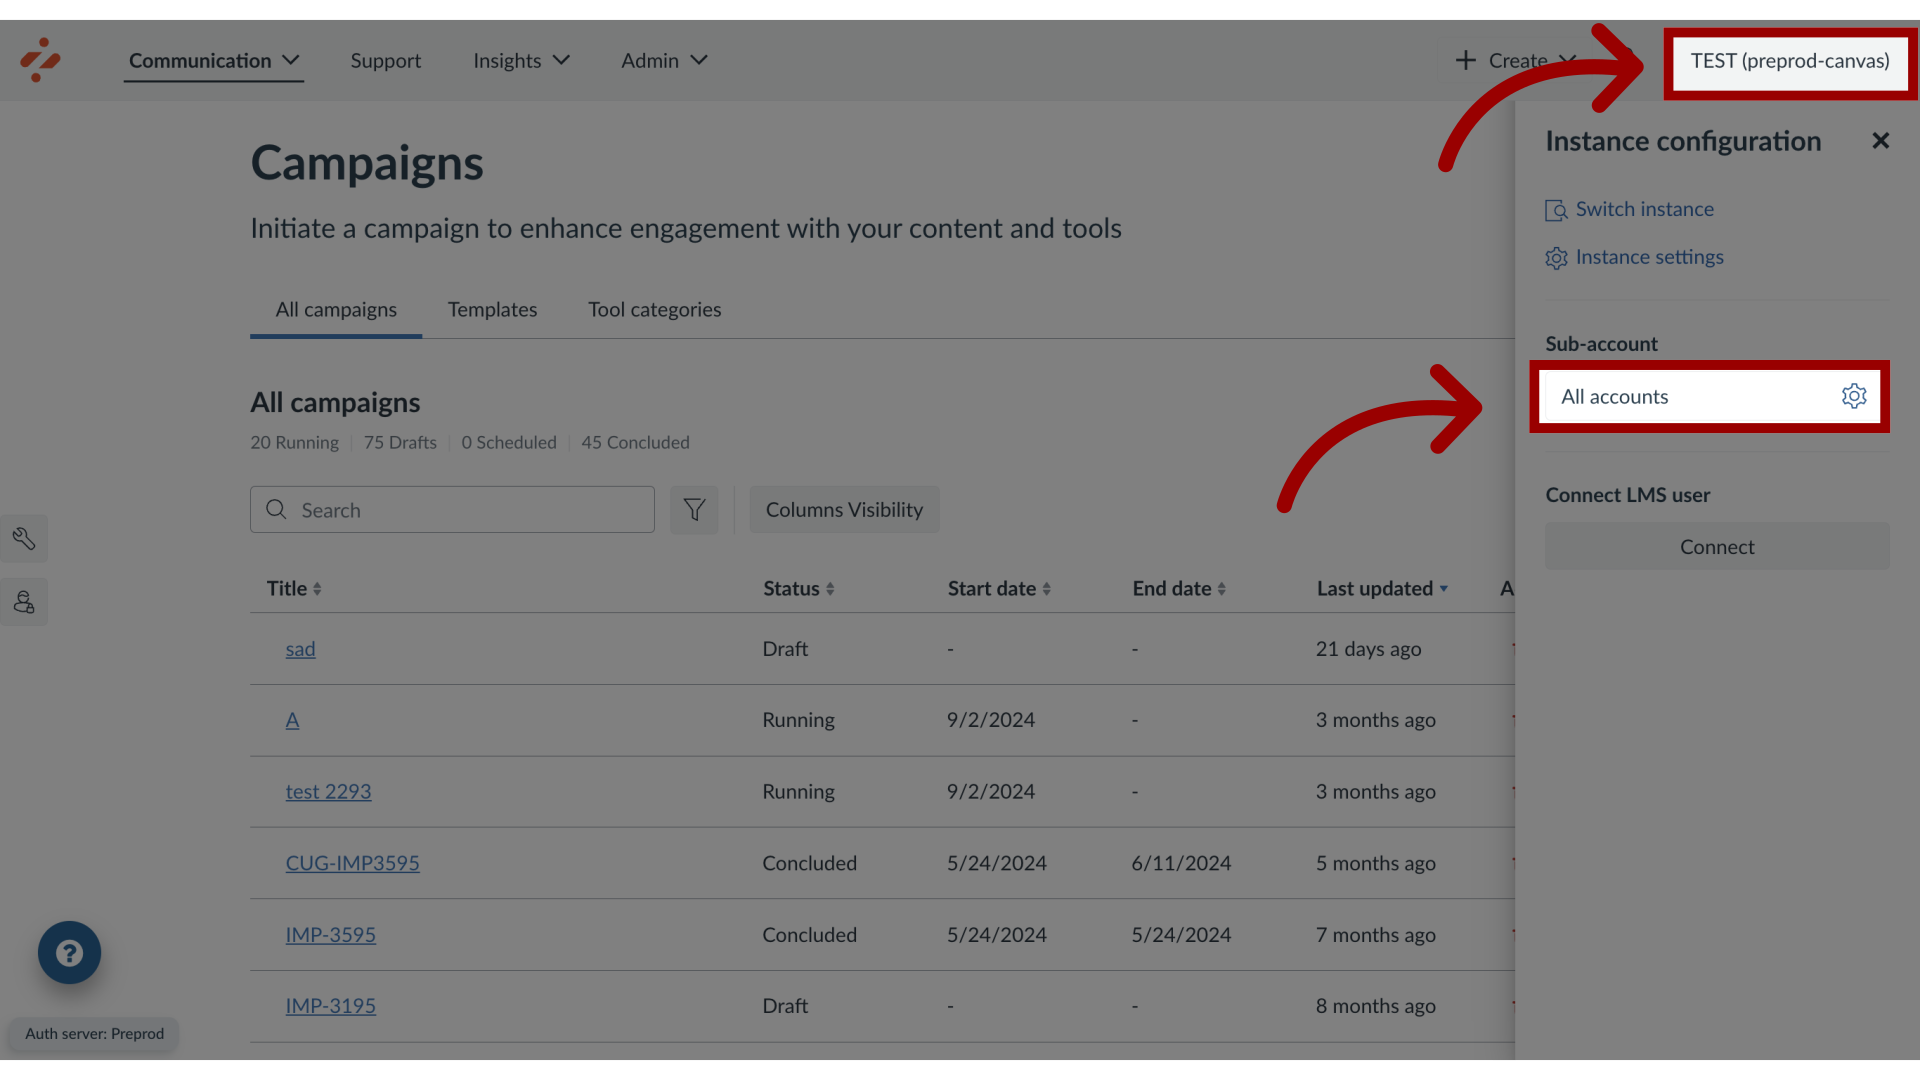
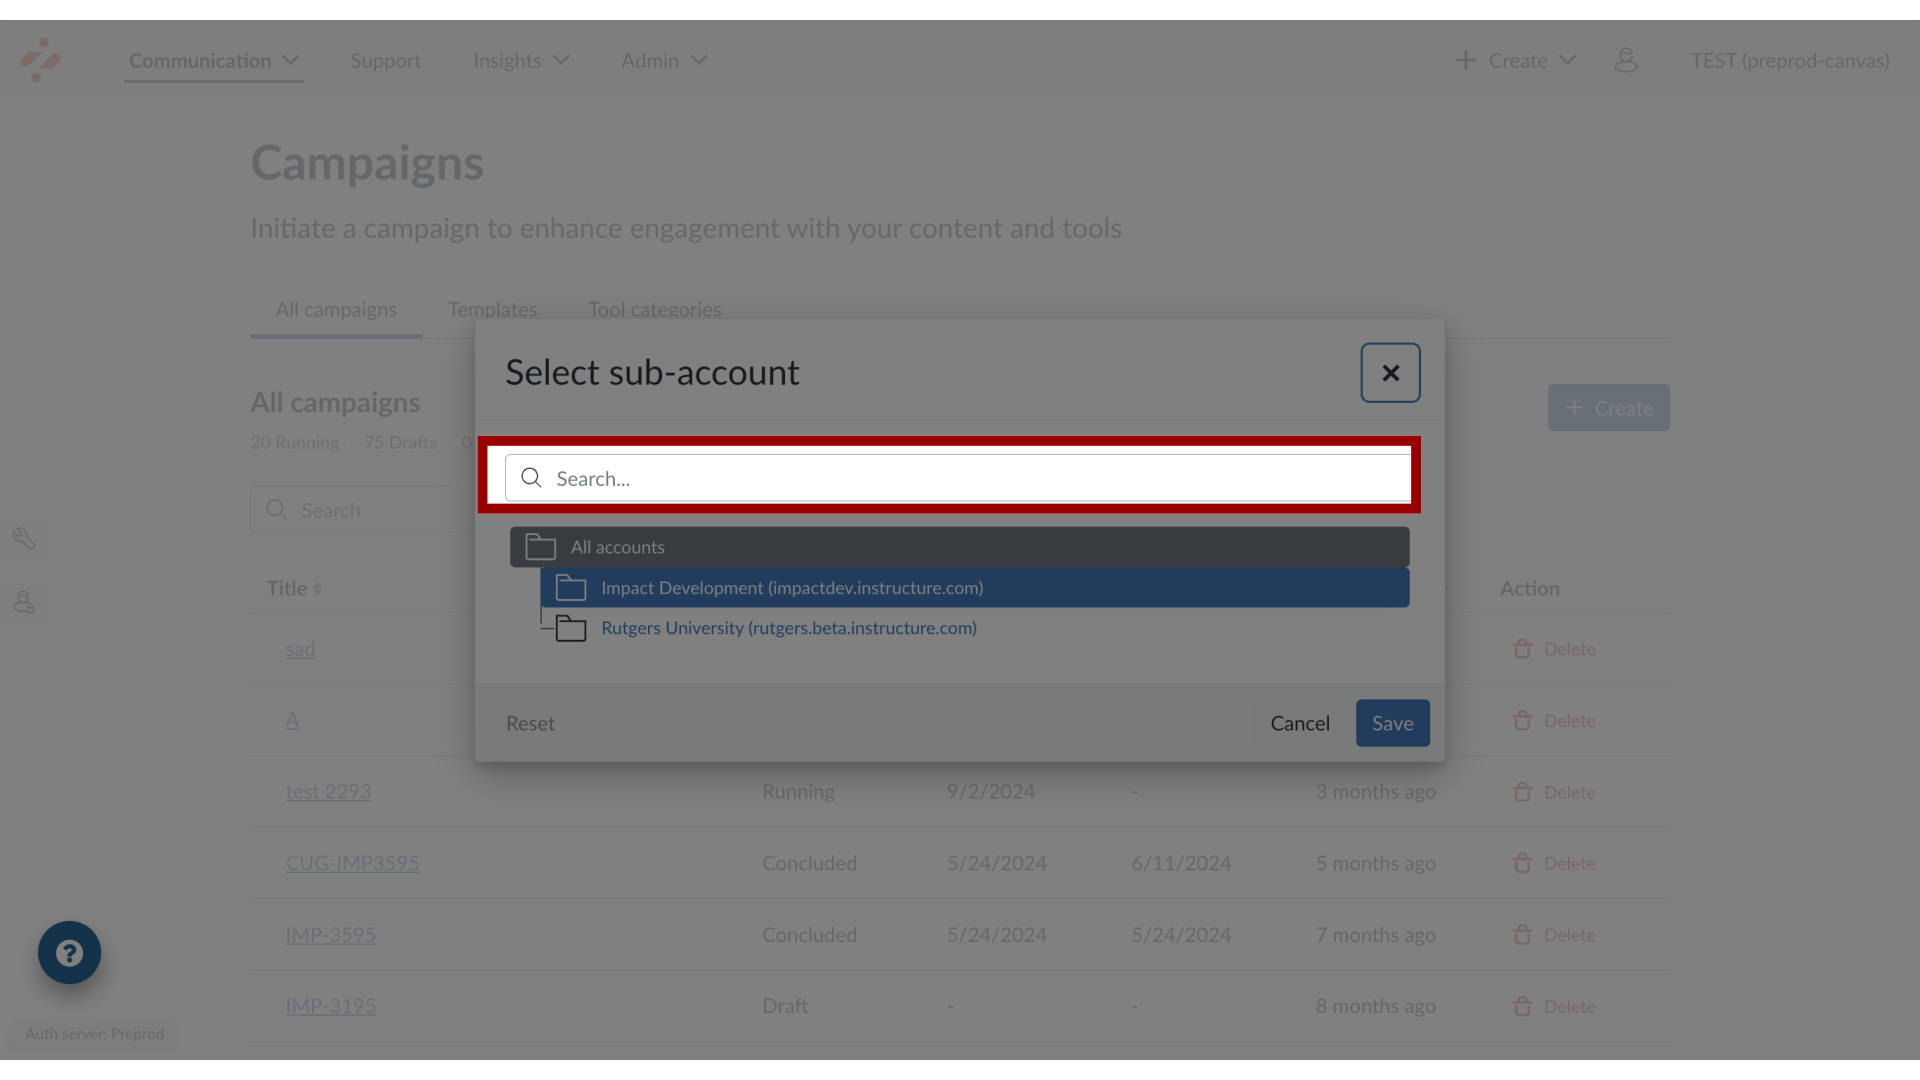
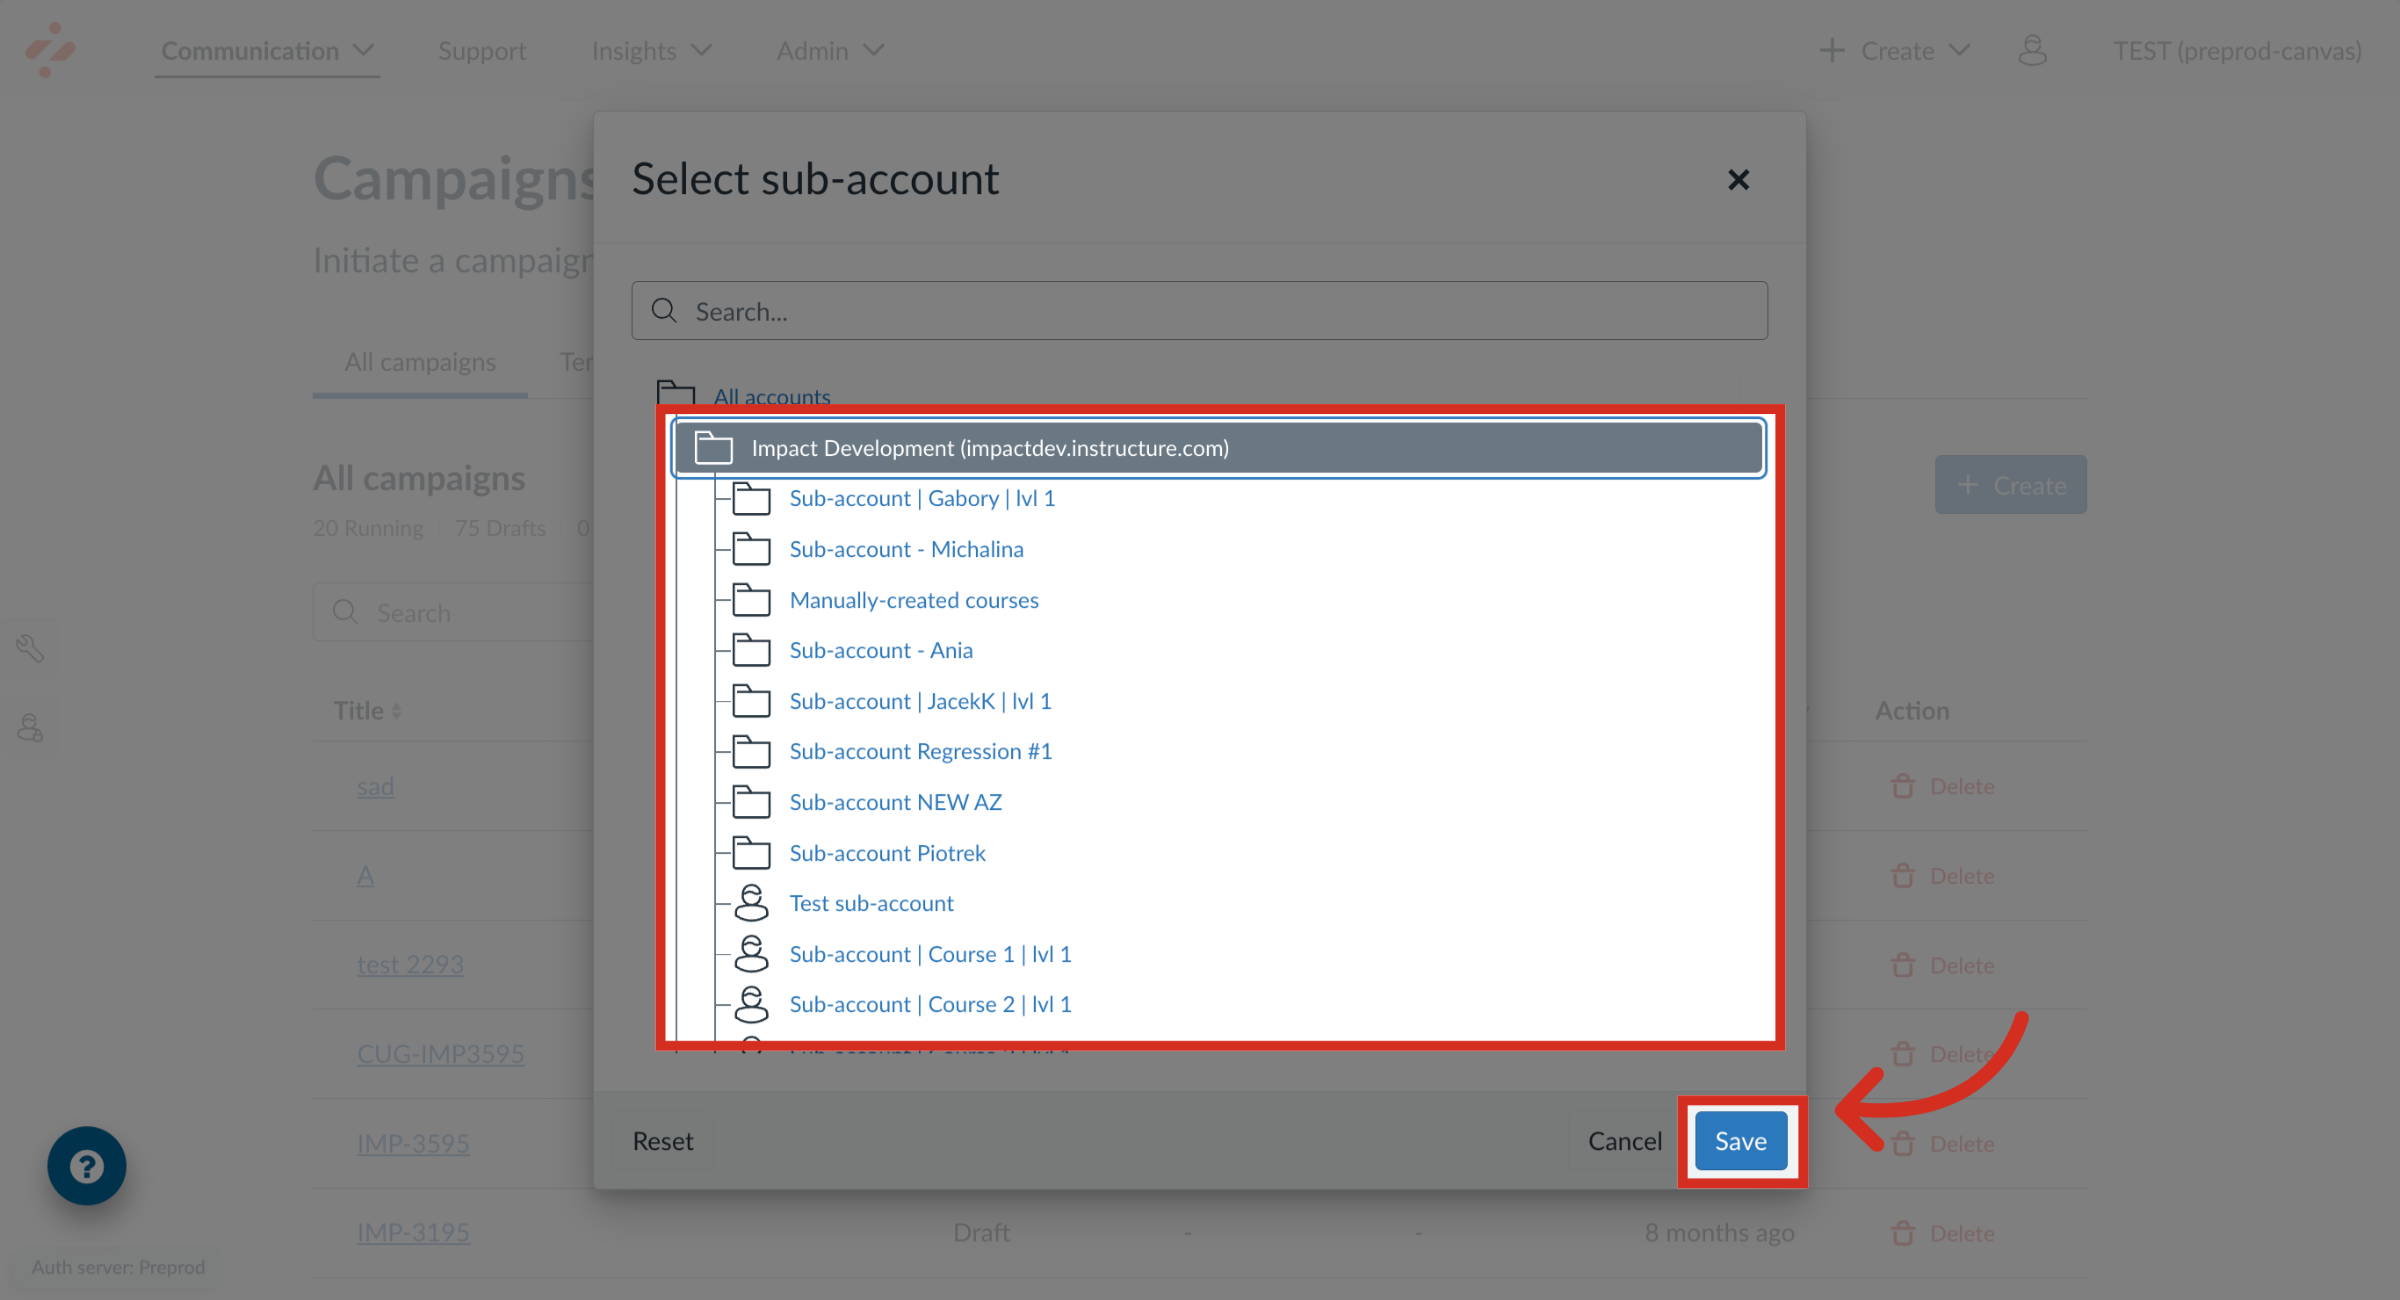
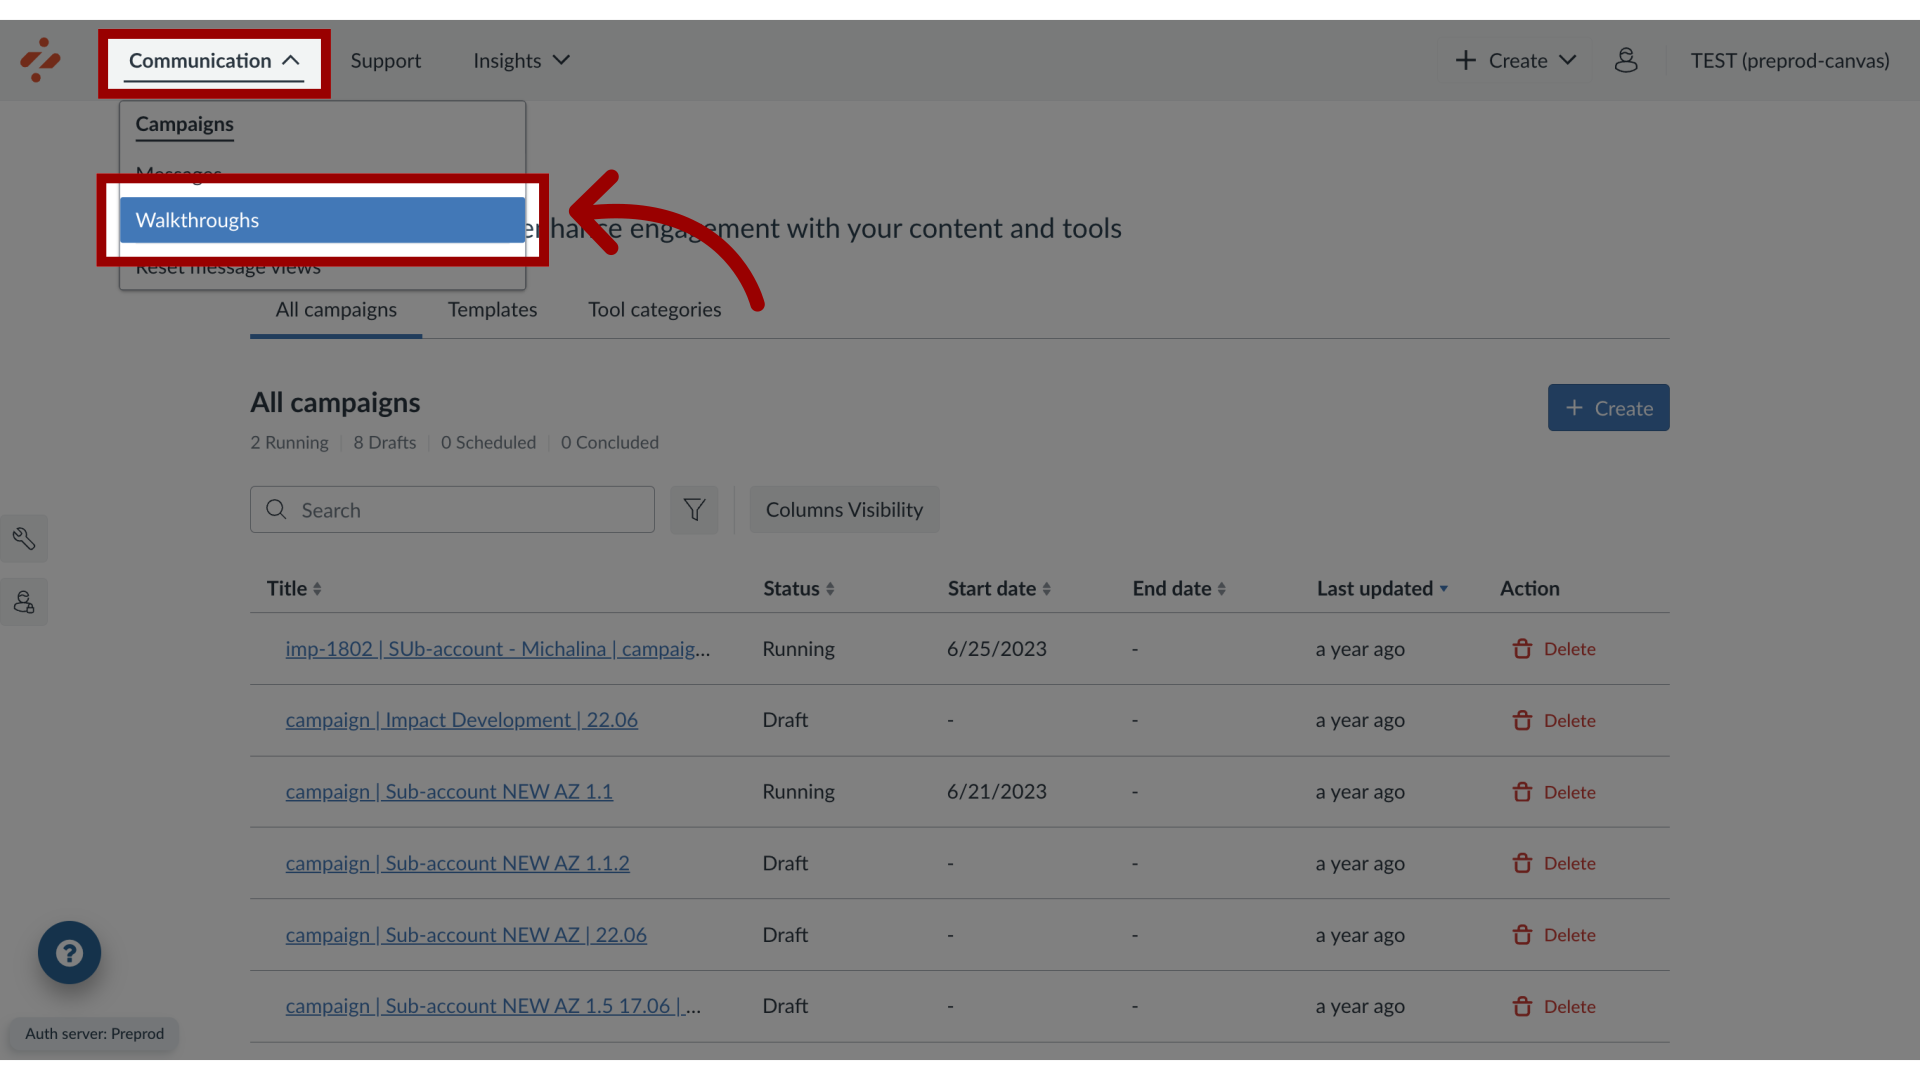
Impact walkthroughs can be assigned to sub-accounts in your learning application. By assigning sub-accounts to a walkthrough, you control which audience sees your walkthrough.Note: This feature is only available to Canvas customers.How do I create a walkthrough for a sub-account?1. Open Account SettingsIn the Global Navigation, click the Instance Configuration link. Then, click the Sub-account Settings button.2. Search Sub-AccountsYou can search for sub-accounts using the Search field.3. Switch Sub-AccountsYou can select the admin account to locate the sub-account. To switch sub-accounts, click the name of the sub-account. Then click the Save button4. Open WalkthroughsIn Global Navigation, click the Communication link. Then click the Walkthroughs link.5. Create New WalkthroughClick the Create button.6. Open SettingsIn the sidebar, select the Settings tab.7. View Assigned Sub-AccountIn the sidebar, locate and open the Sub-account section. By default, the walkthrough is created on the sub-account you are currently using.8. Target User GroupsLocate and open the Target User Groups section. Use the drop-down menus to select among the types of users.9. Publish Your WalkthroughNow that your walkthrough content and settings are all set up, you can continue by the following options:Publish: Publishing your walkthroughSave as Draft: Saving your walkthrough as a draft allows you to publish the walkthrough another time but save your current changesCancel: Canceling your walkthrough deletes your walkthrough content and settings or any unsaved changes