How do I use campaign templates in the Impact Dashboard?
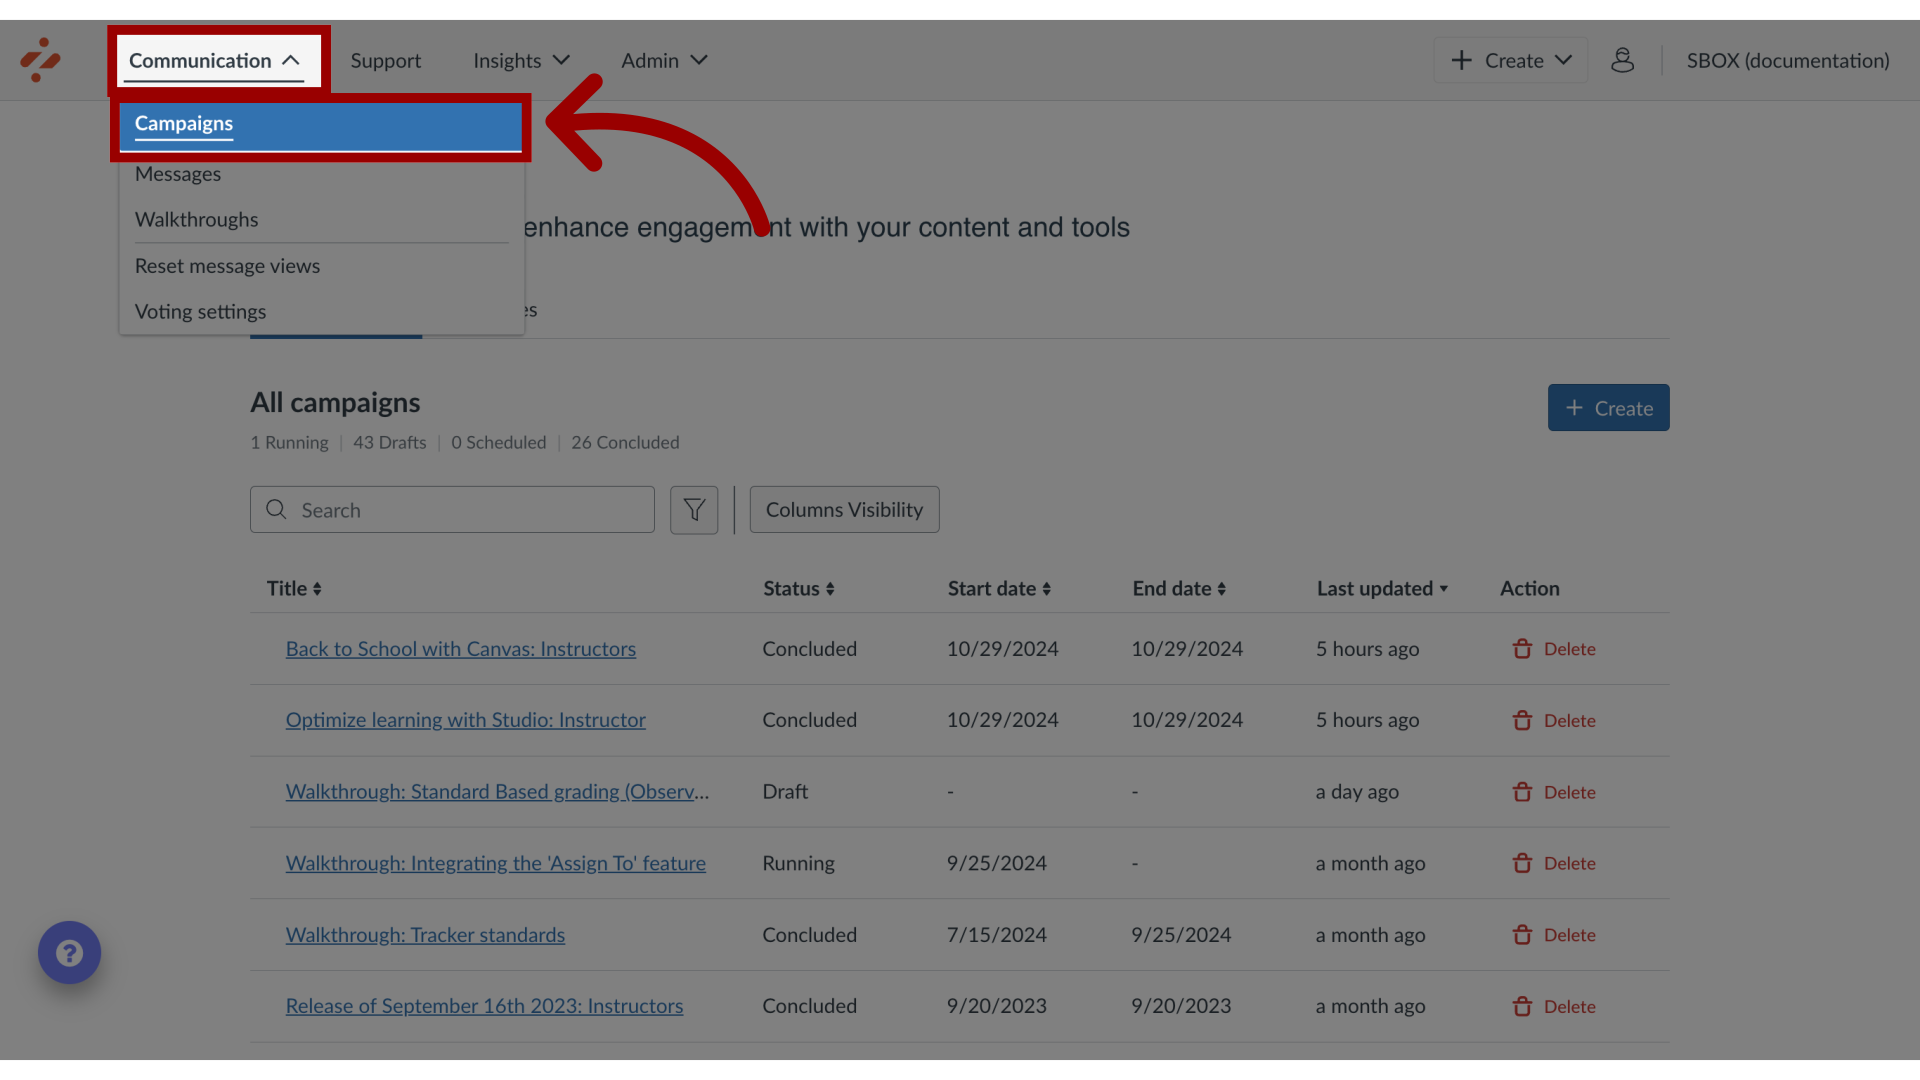
1. View Campaigns
In the global navigation, click the Communication dropdown menu. Then click the Campaigns link.
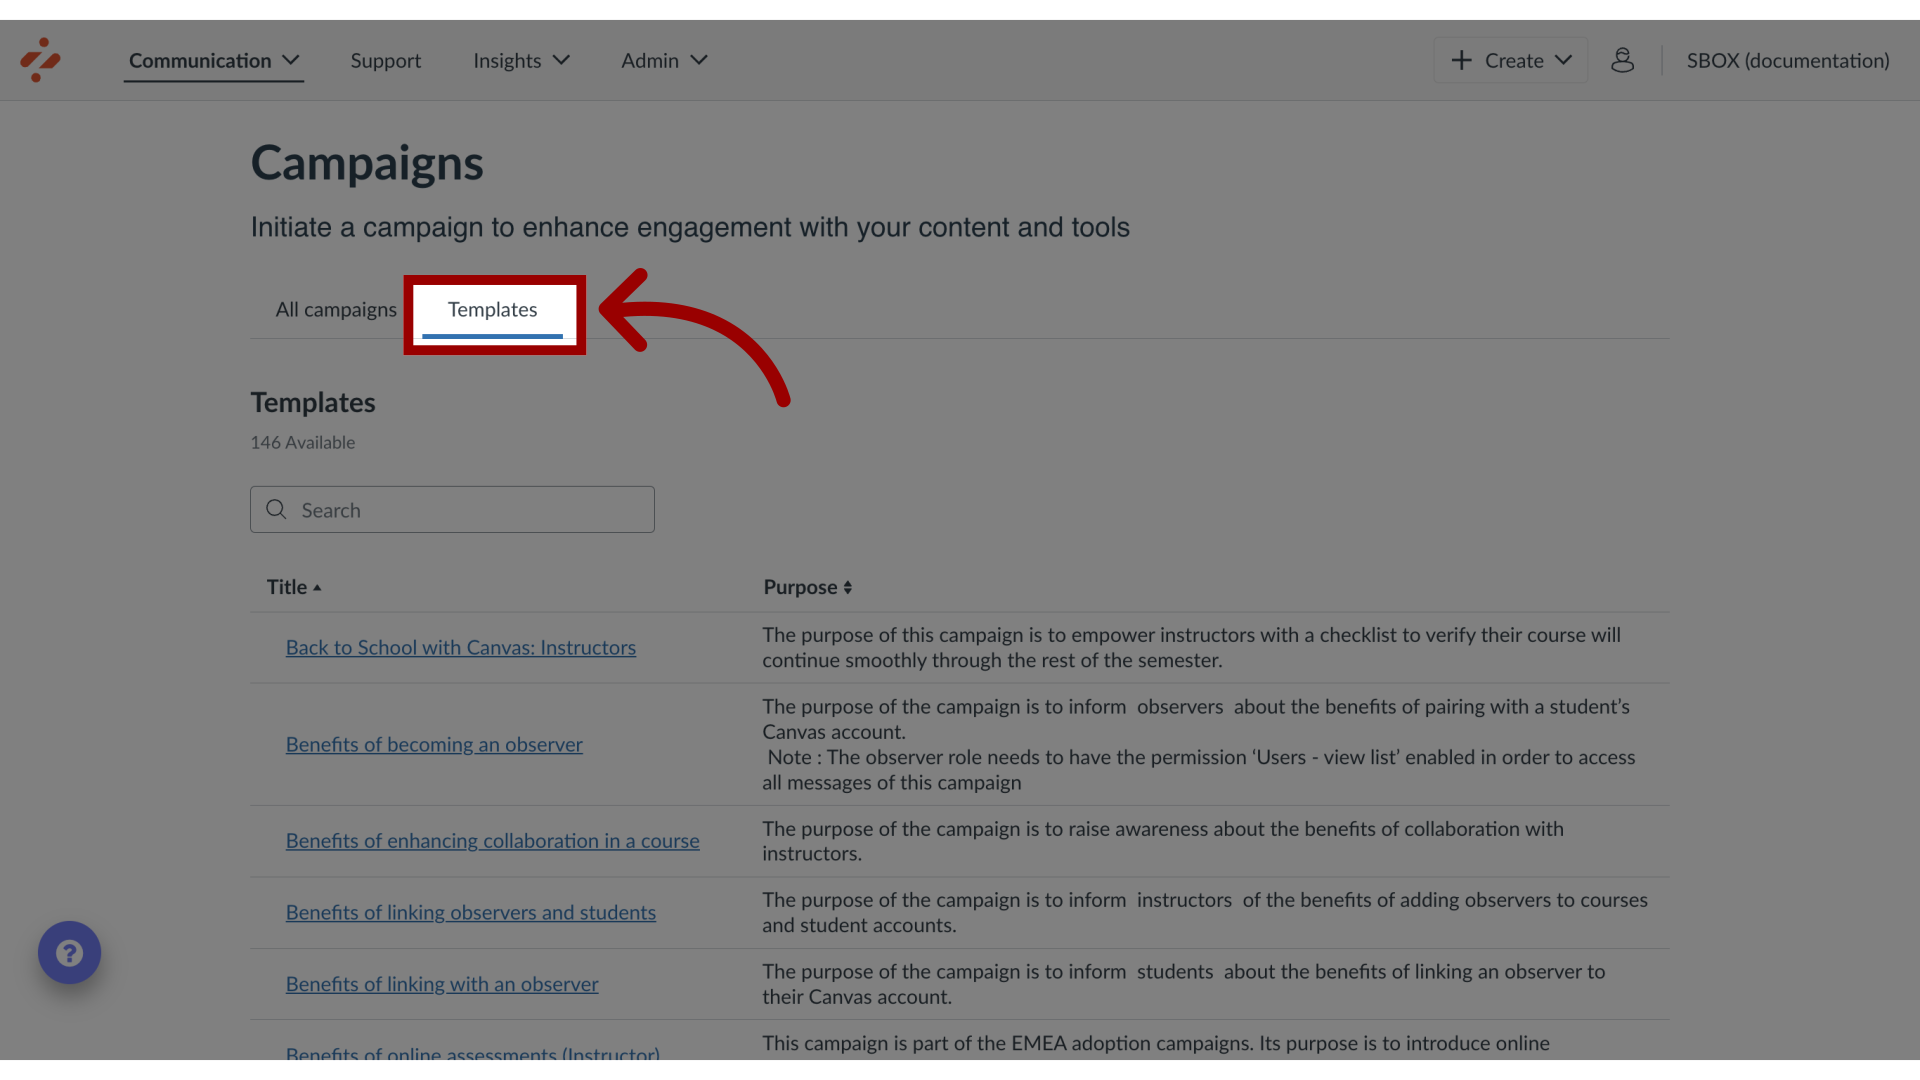
2. View Templates
Then click the Templates tab.
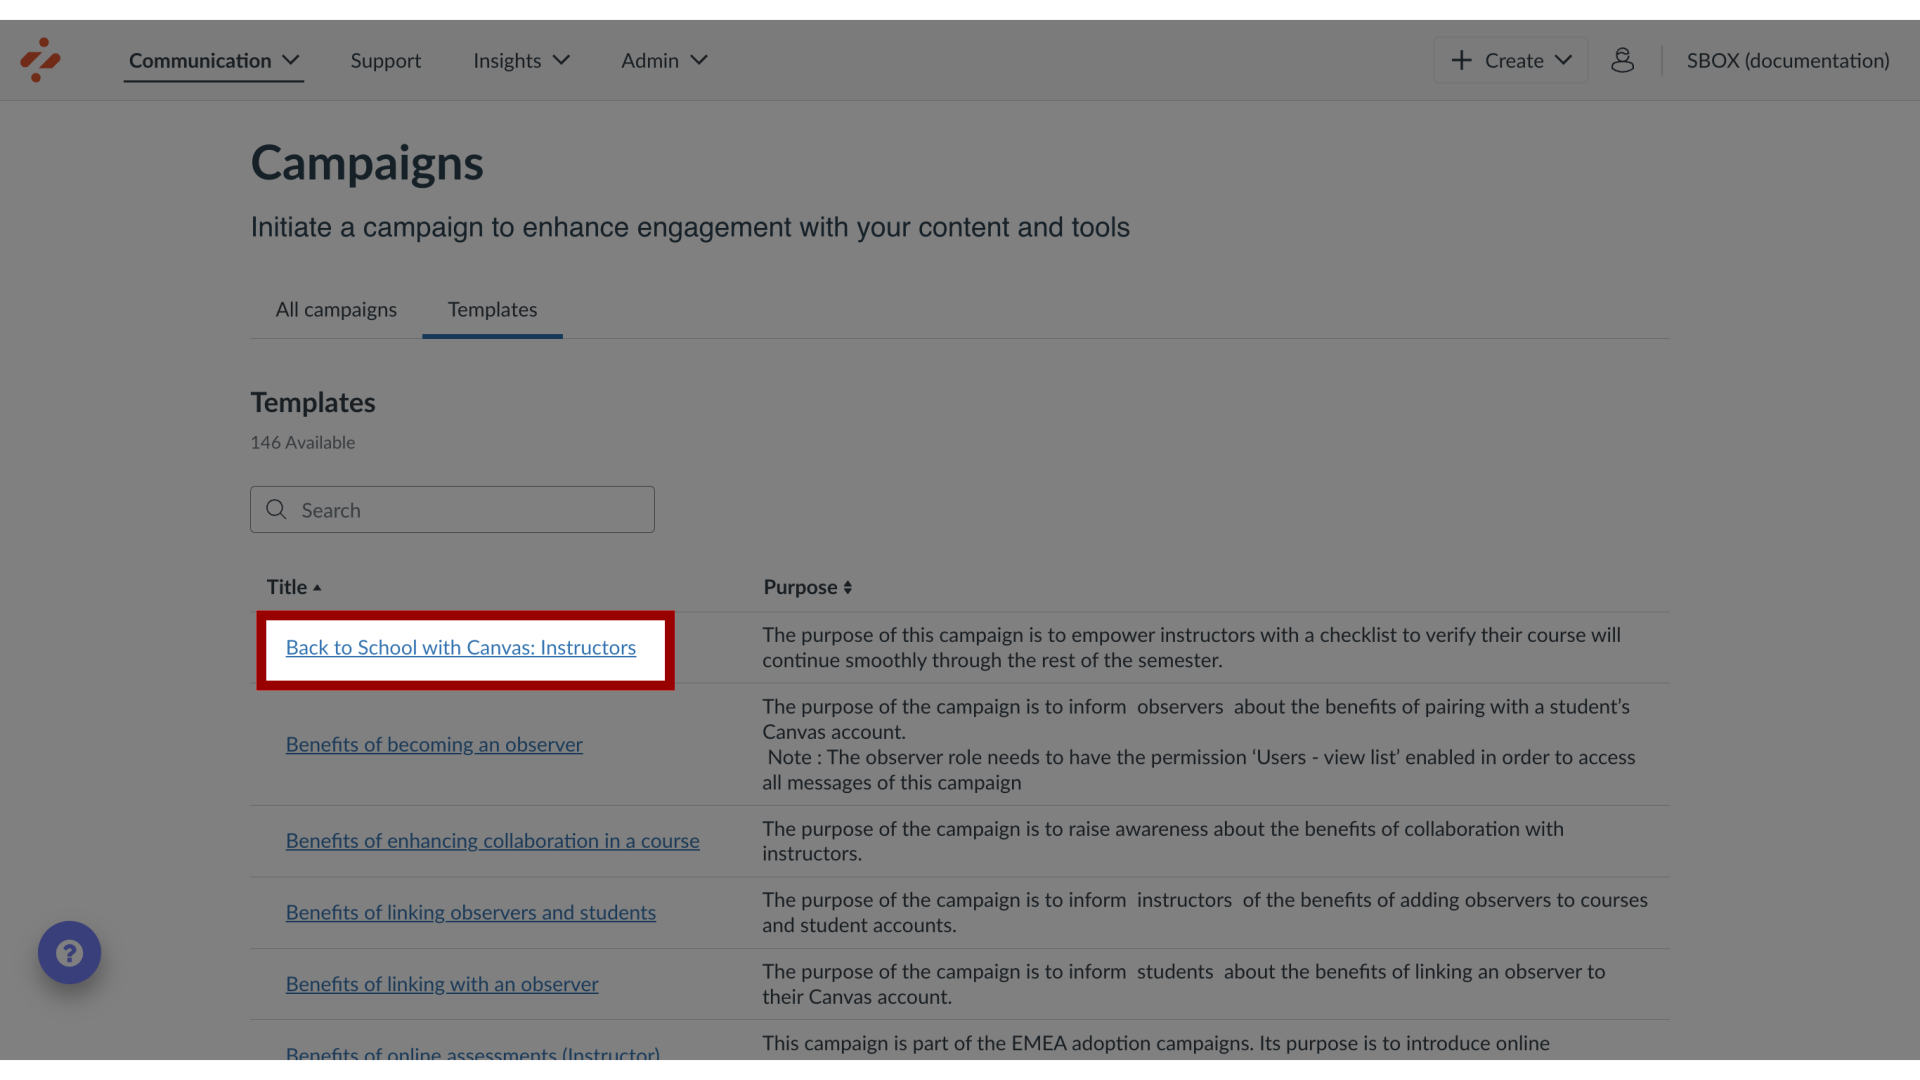
3. Open Templates
Locate and select the campaign template you are interested in using. Depending on the contents of the campaign template, there may be separate campaigns for students, instructors, or other user groups.
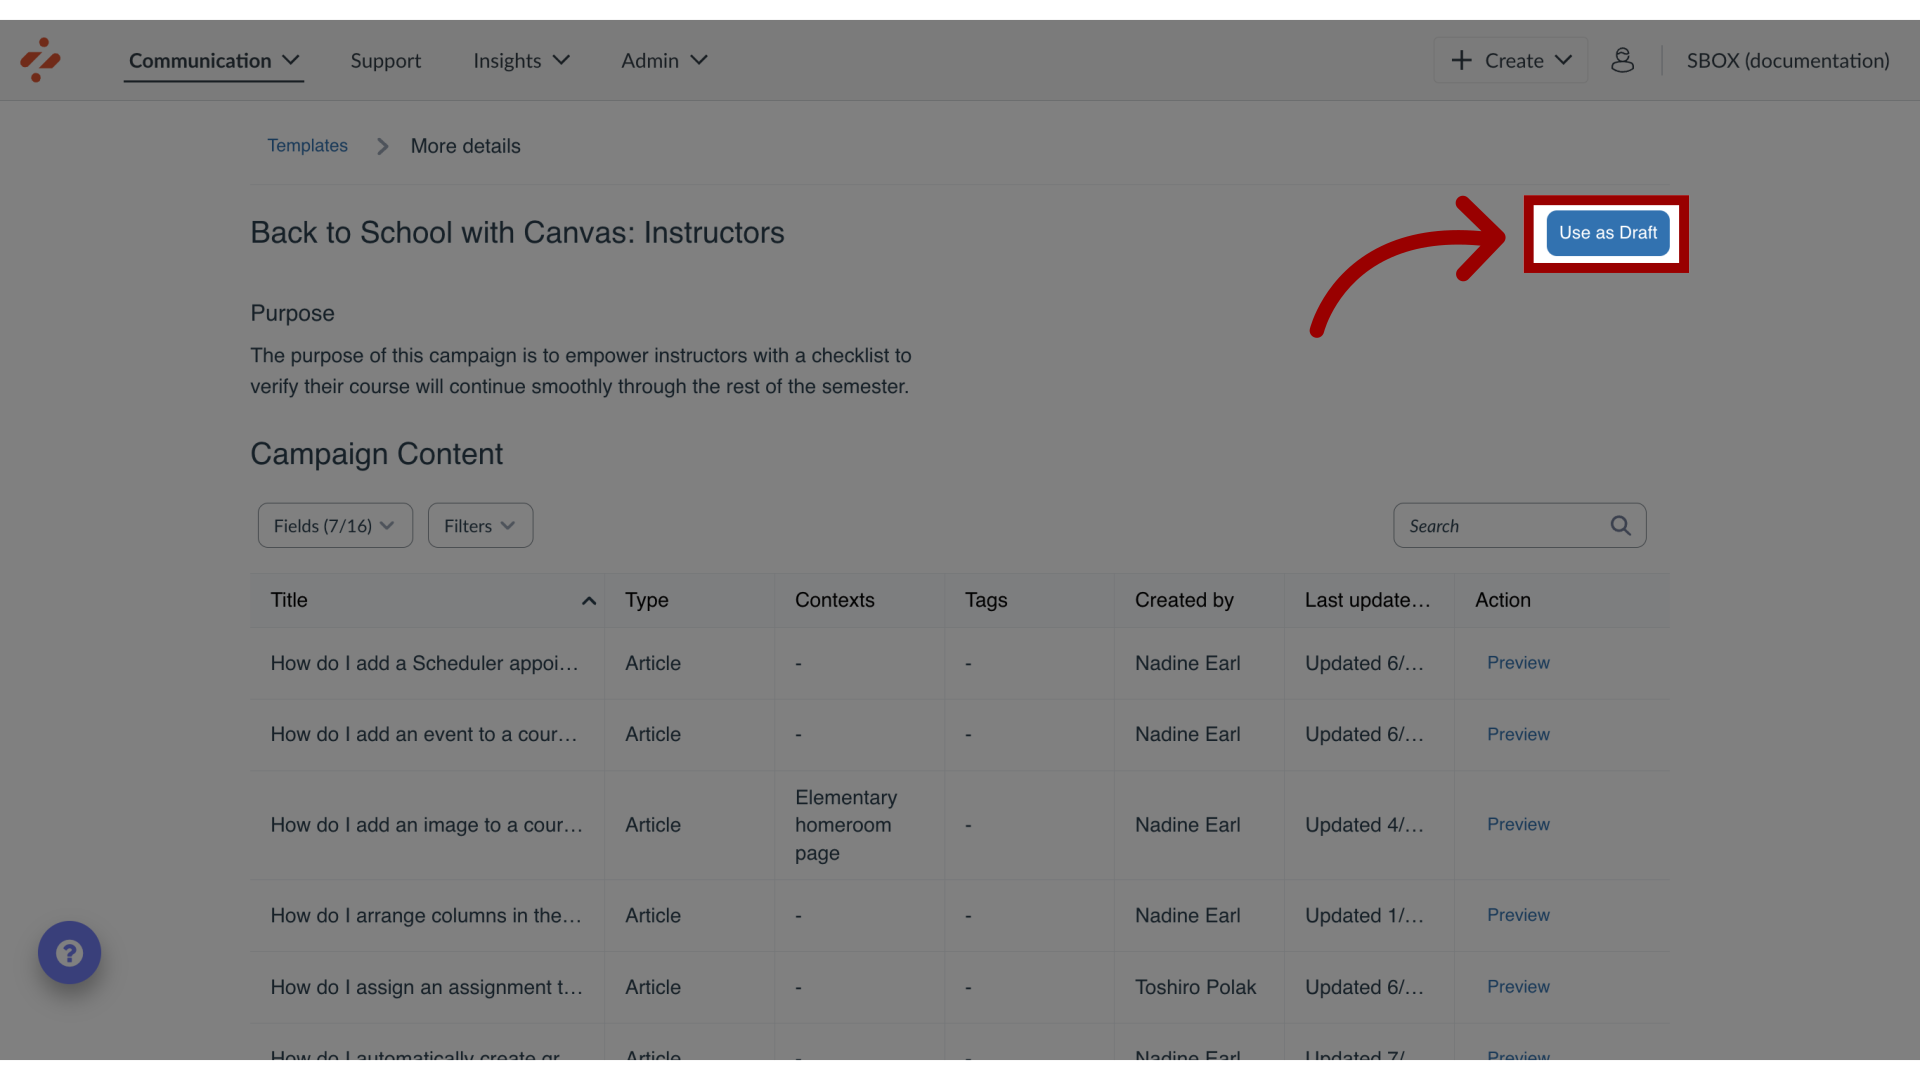
4. Use as Draft
Click the Use as Draft button.
This does not mean that your campaign is active yet. you need to customize and start the campaign.
Note(s):
Depending on the contents of the release, there may be separate campaigns for students and instructors.
If the content of the release is the same for both user groups or only applicable to one set of users, only one campaign will be available.
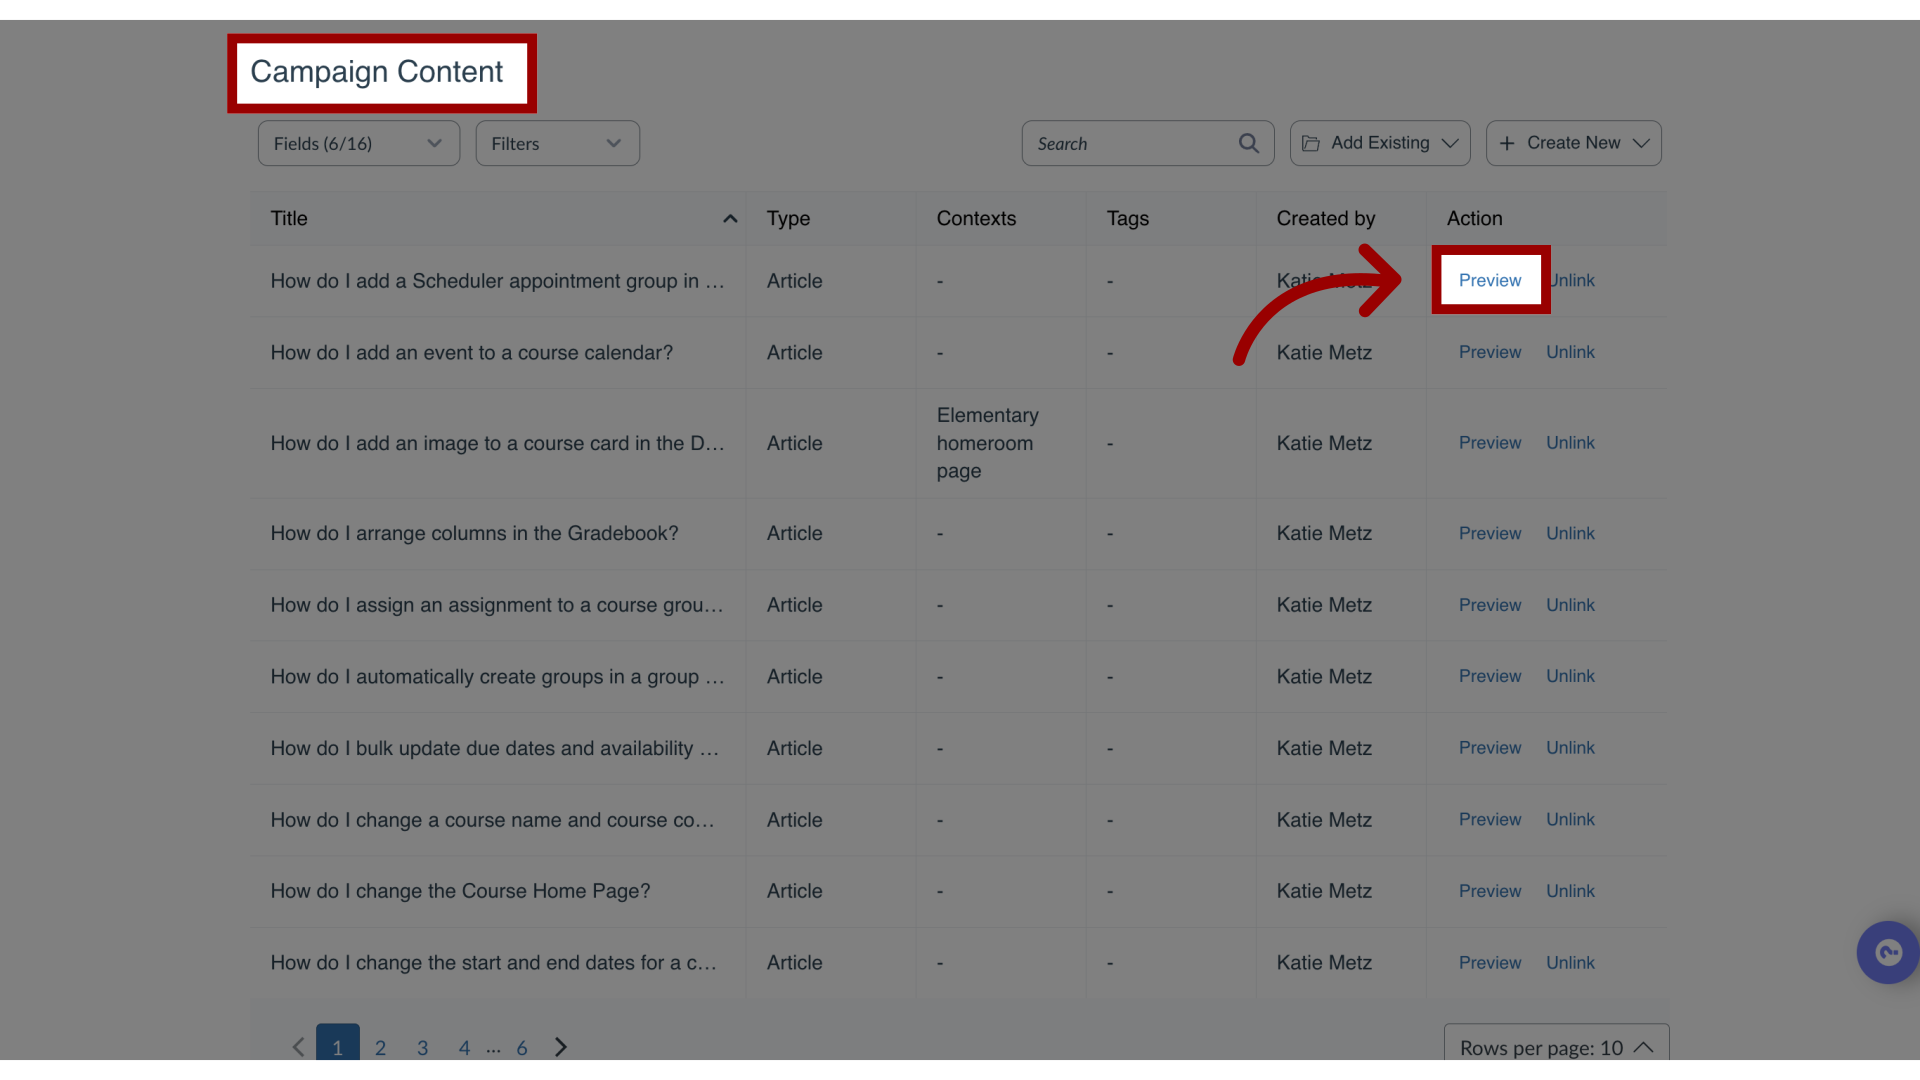
5. Review Campaign Content
Open the campaign and scroll down to see Campaign Content. Click the Preview button for each item to see its contents.
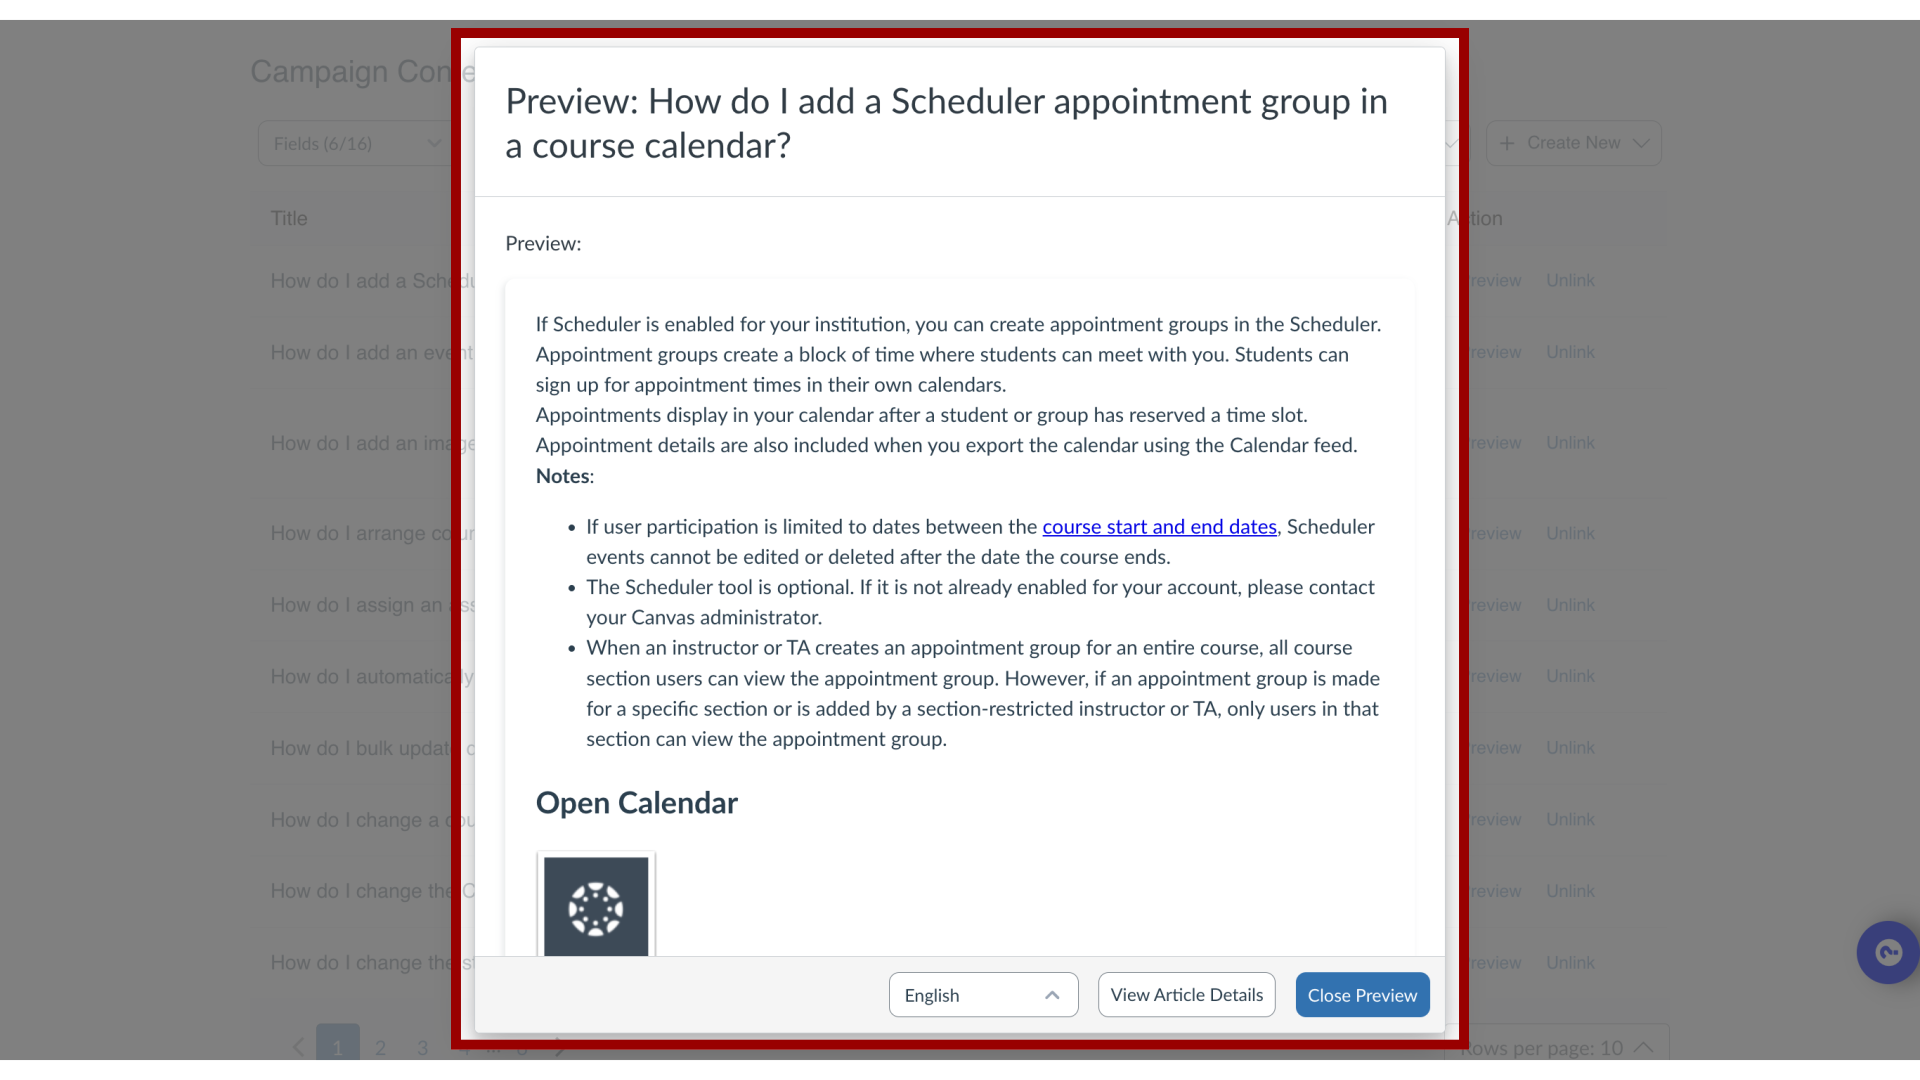
6. View Preview
You will see a modal with your help item preview.
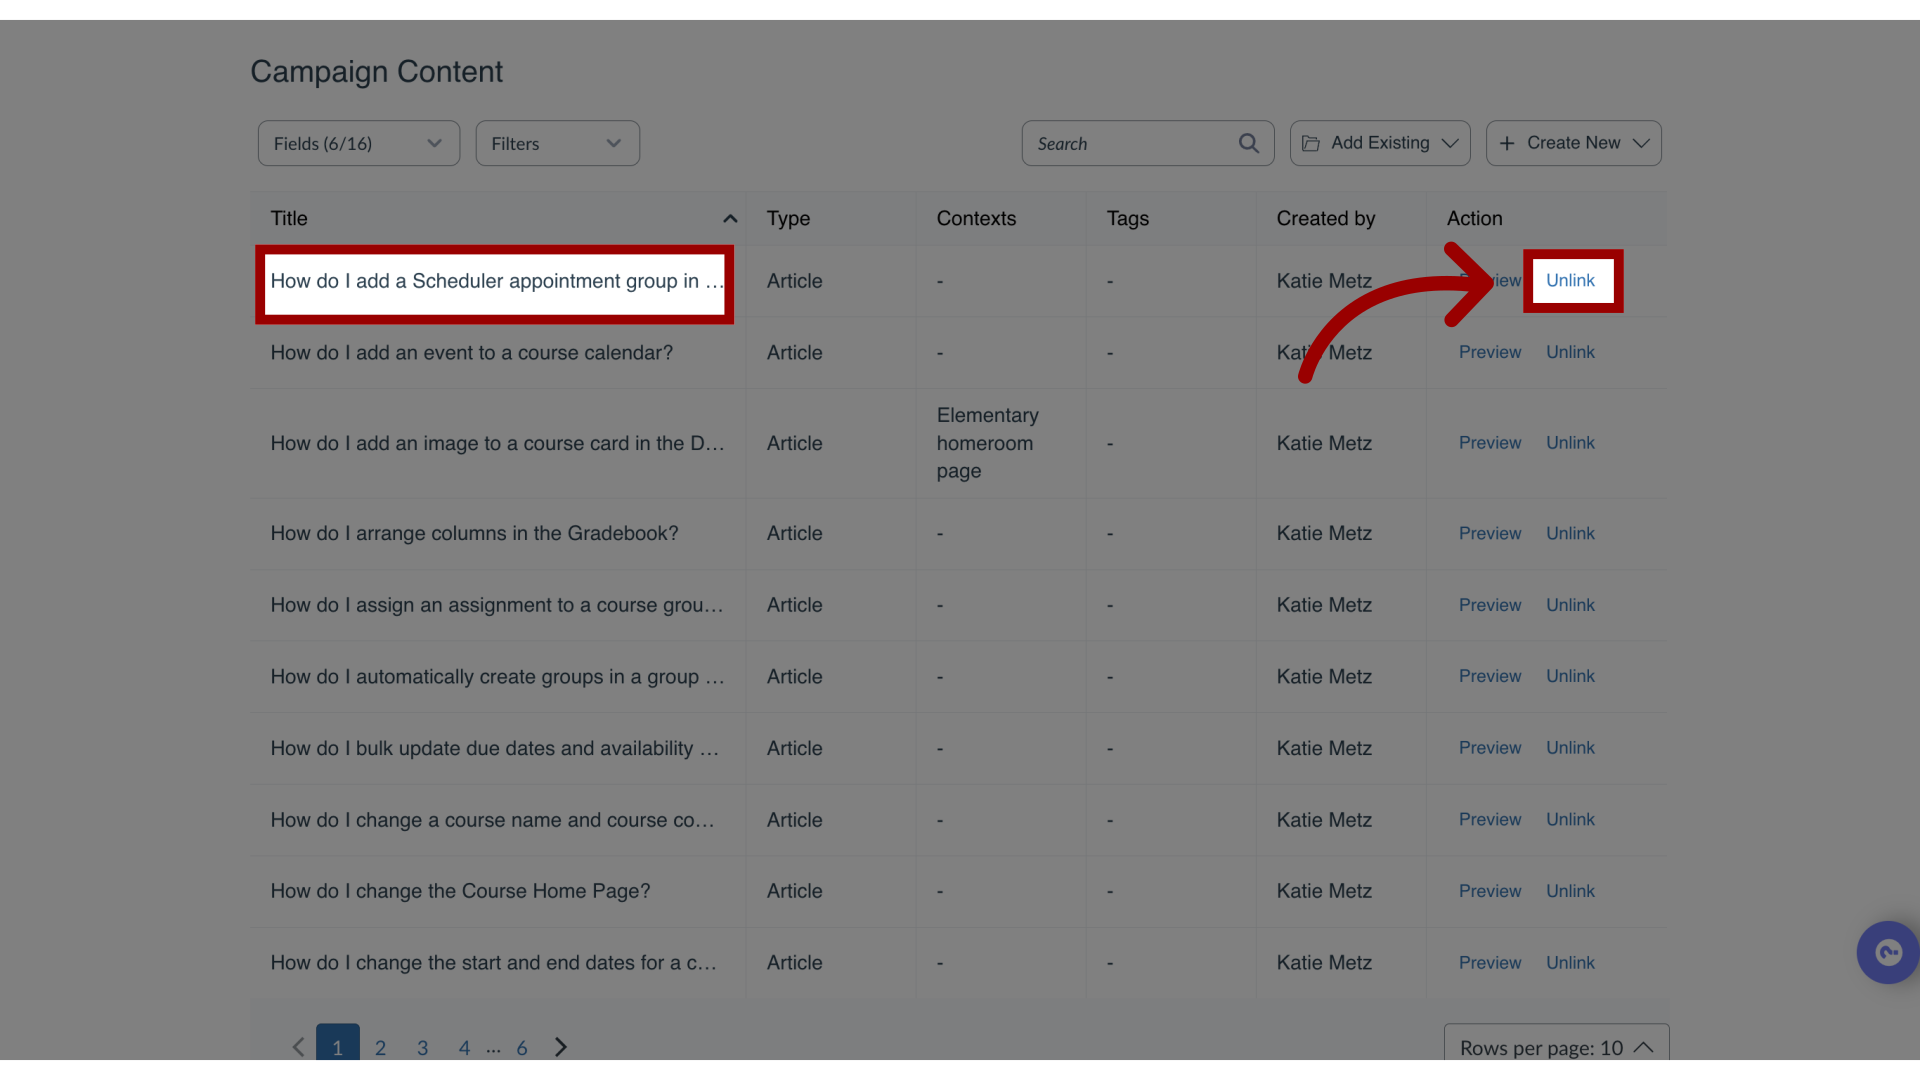
7. Remove Content from the Campaign
If any of the articles do not apply to your institute, locate the item name. Click the Unlink button.
Be sure to remove any links to this removed article from any of the included messages if needed.
Note: For more information about links between messages and support articles, visit How do I add a support article to a message in the Impact Dashboard?
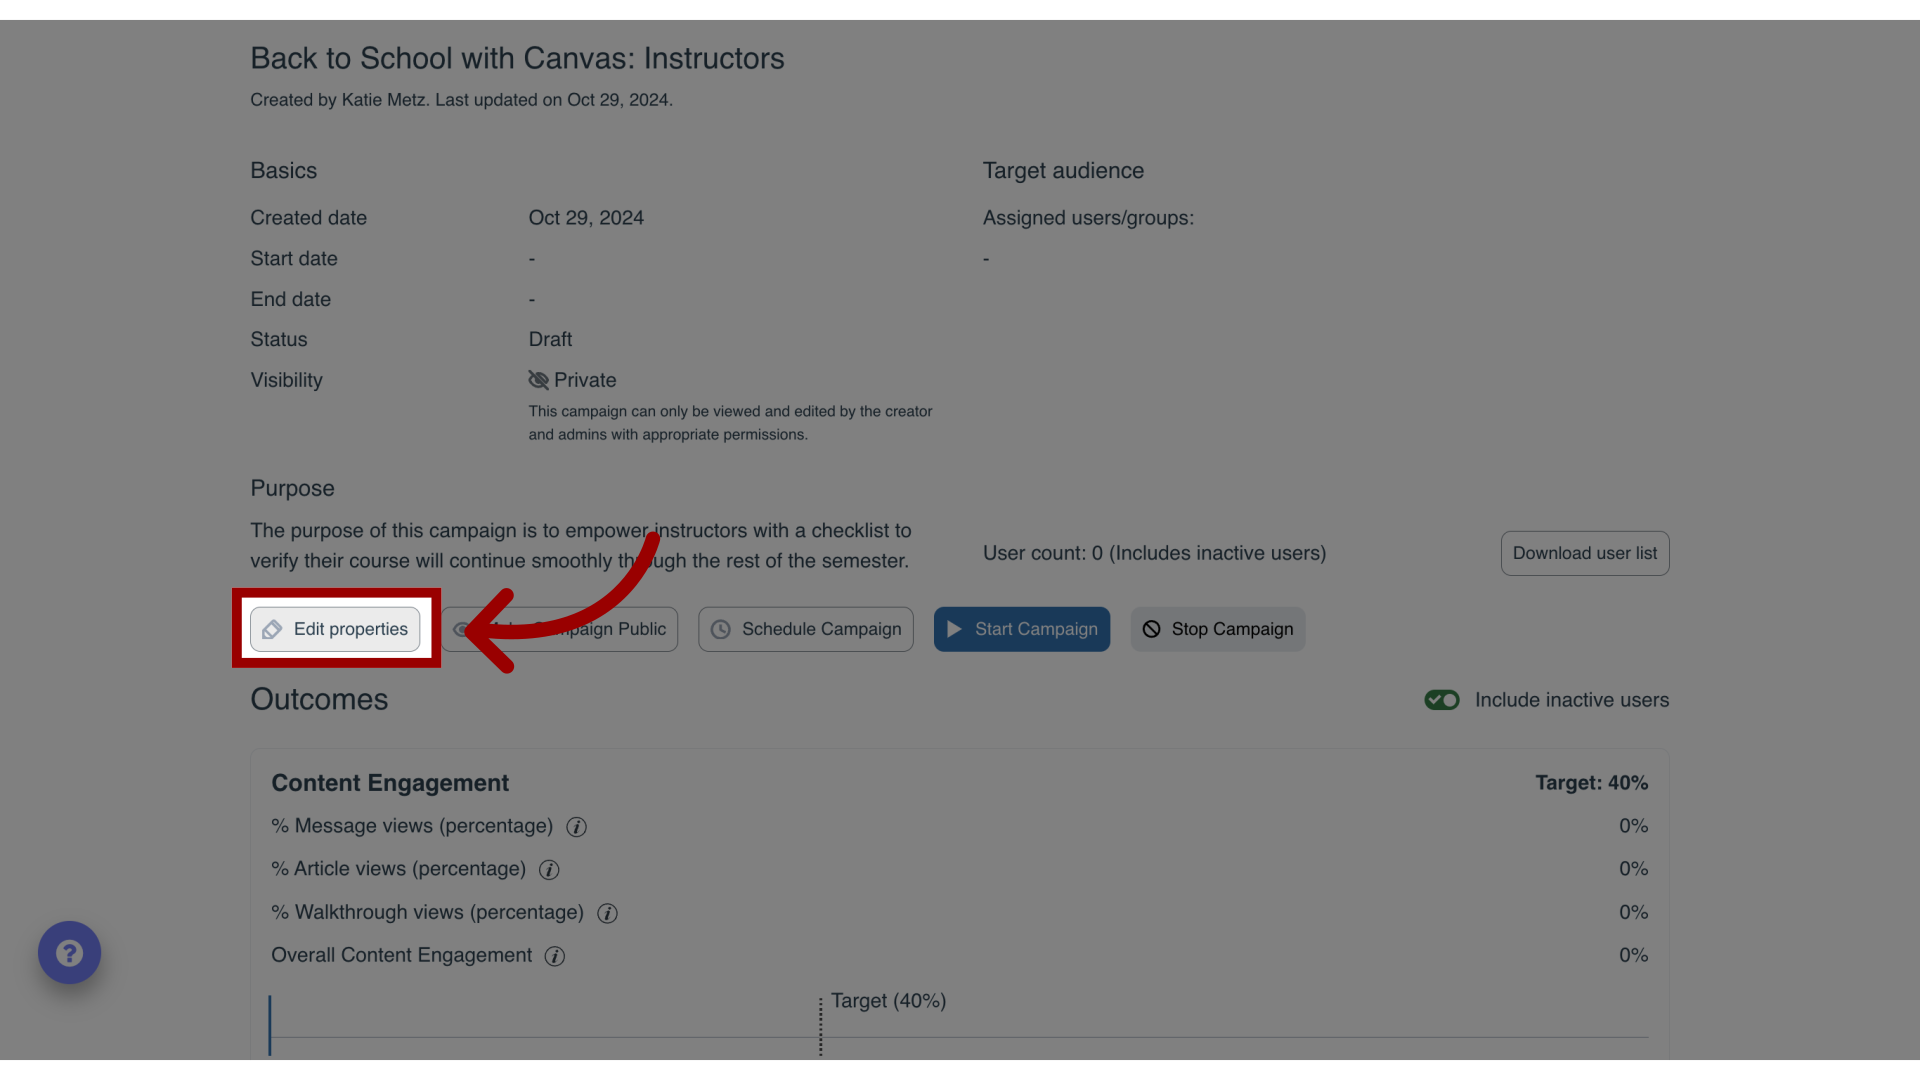
8. Activate Campaign
Make sure you are happy with the content before you start or schedule the campaign. Once you’re happy with the content of the campaign, click the Edit Properties button.
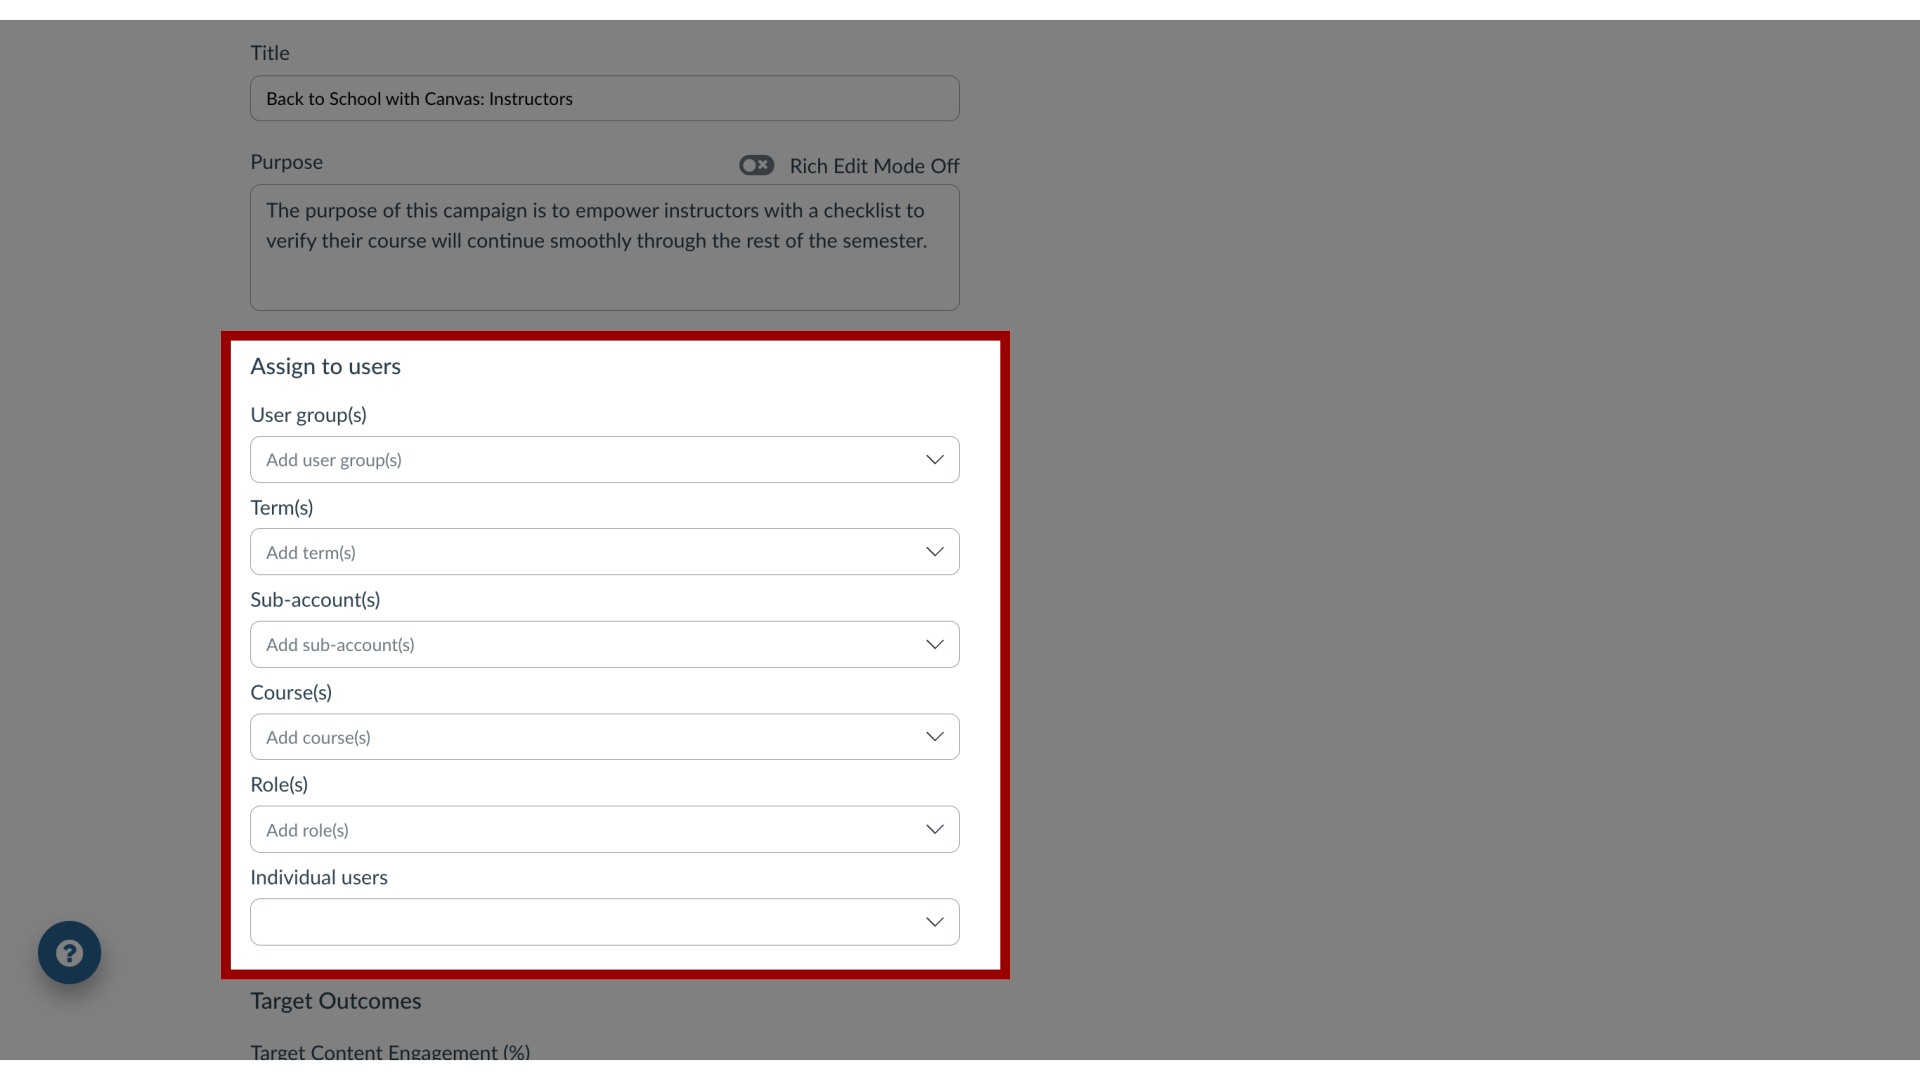
9. Edit Target Audience
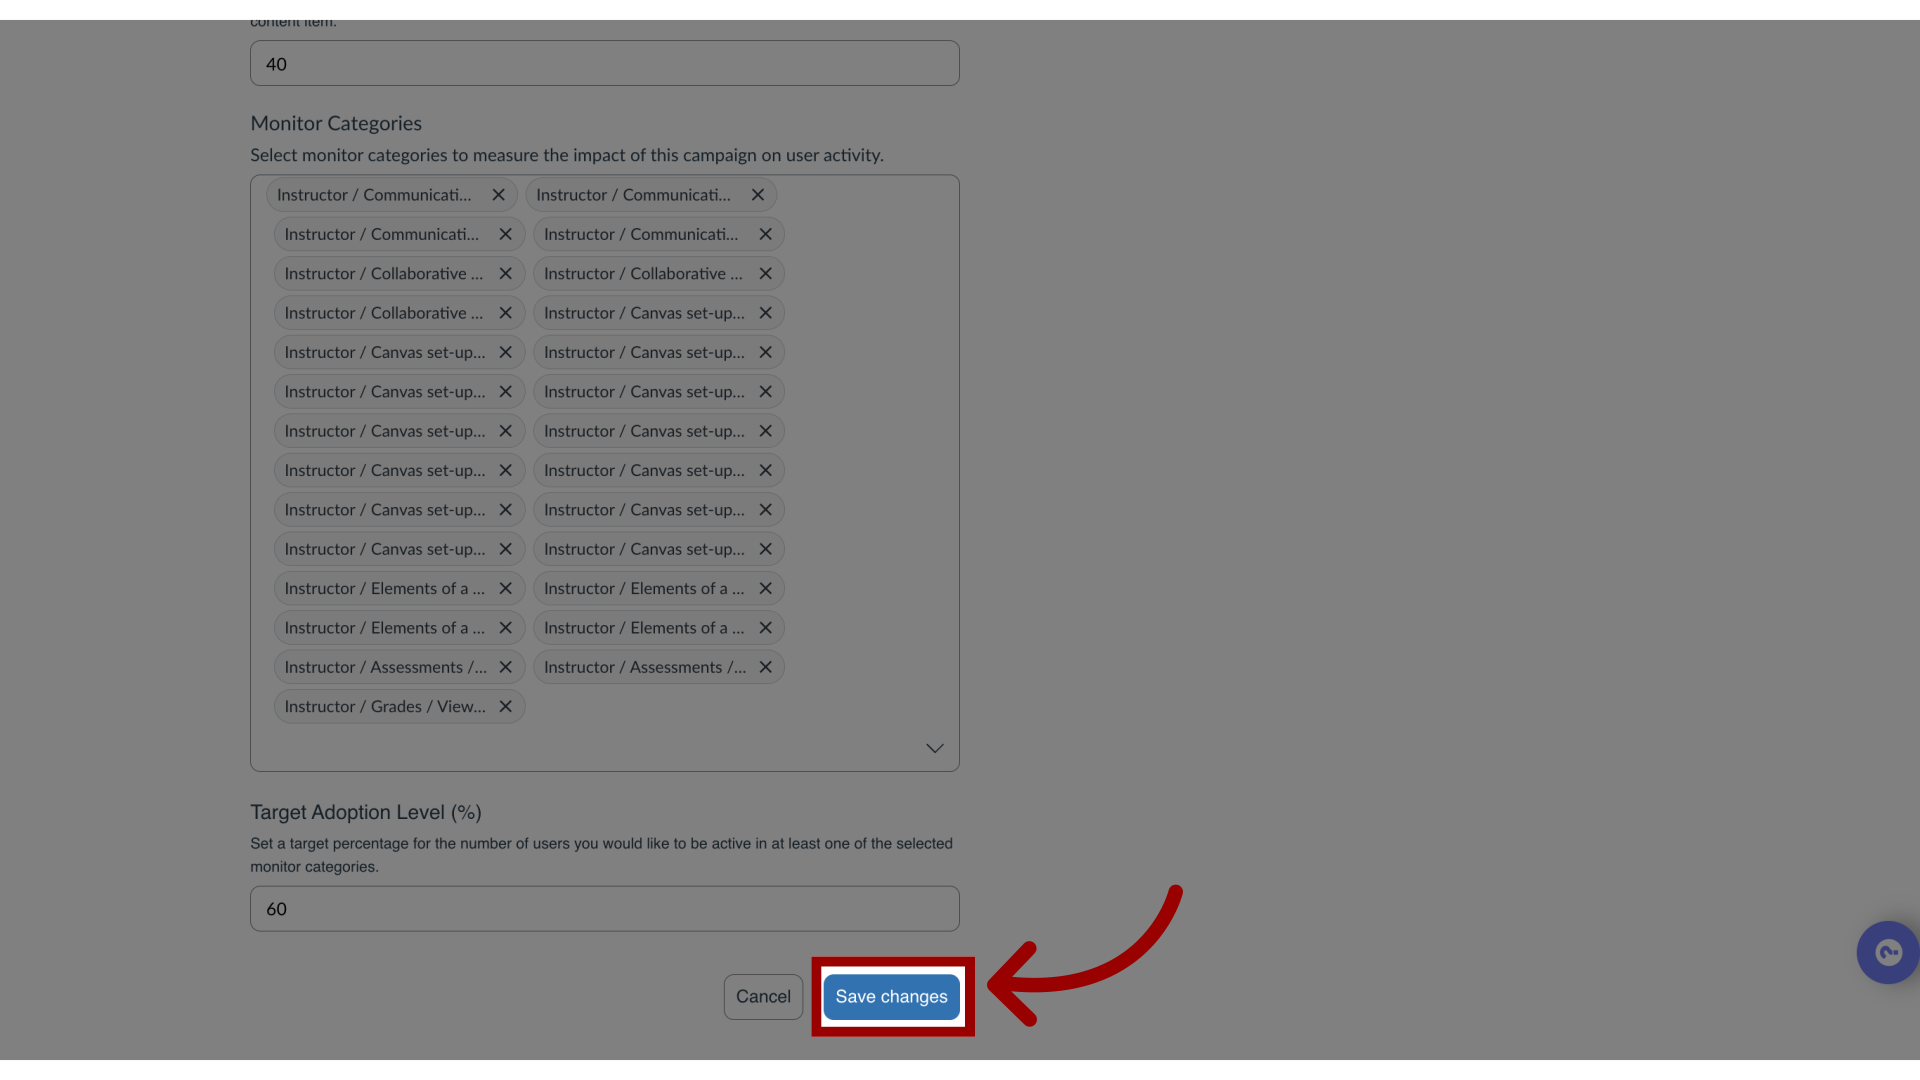
10. Save Changes
To save changes, click the Save Changes button.
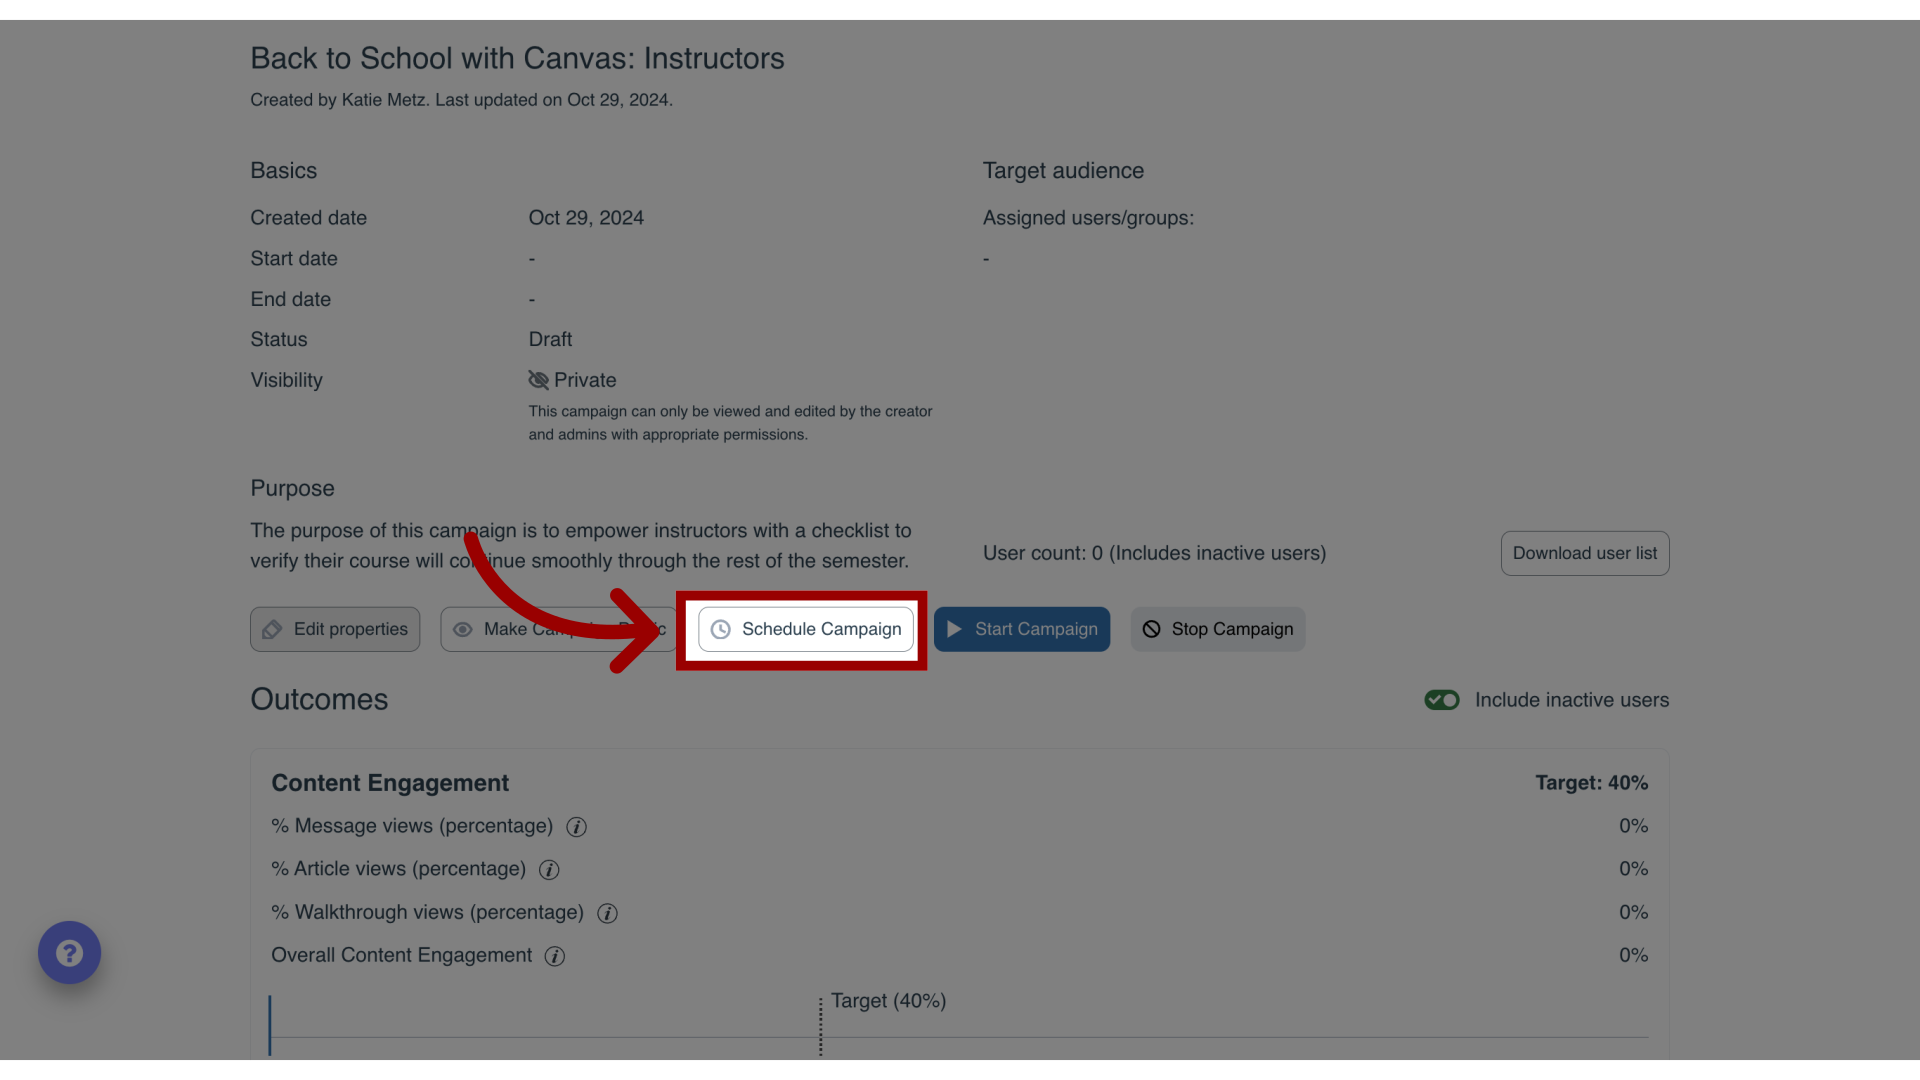
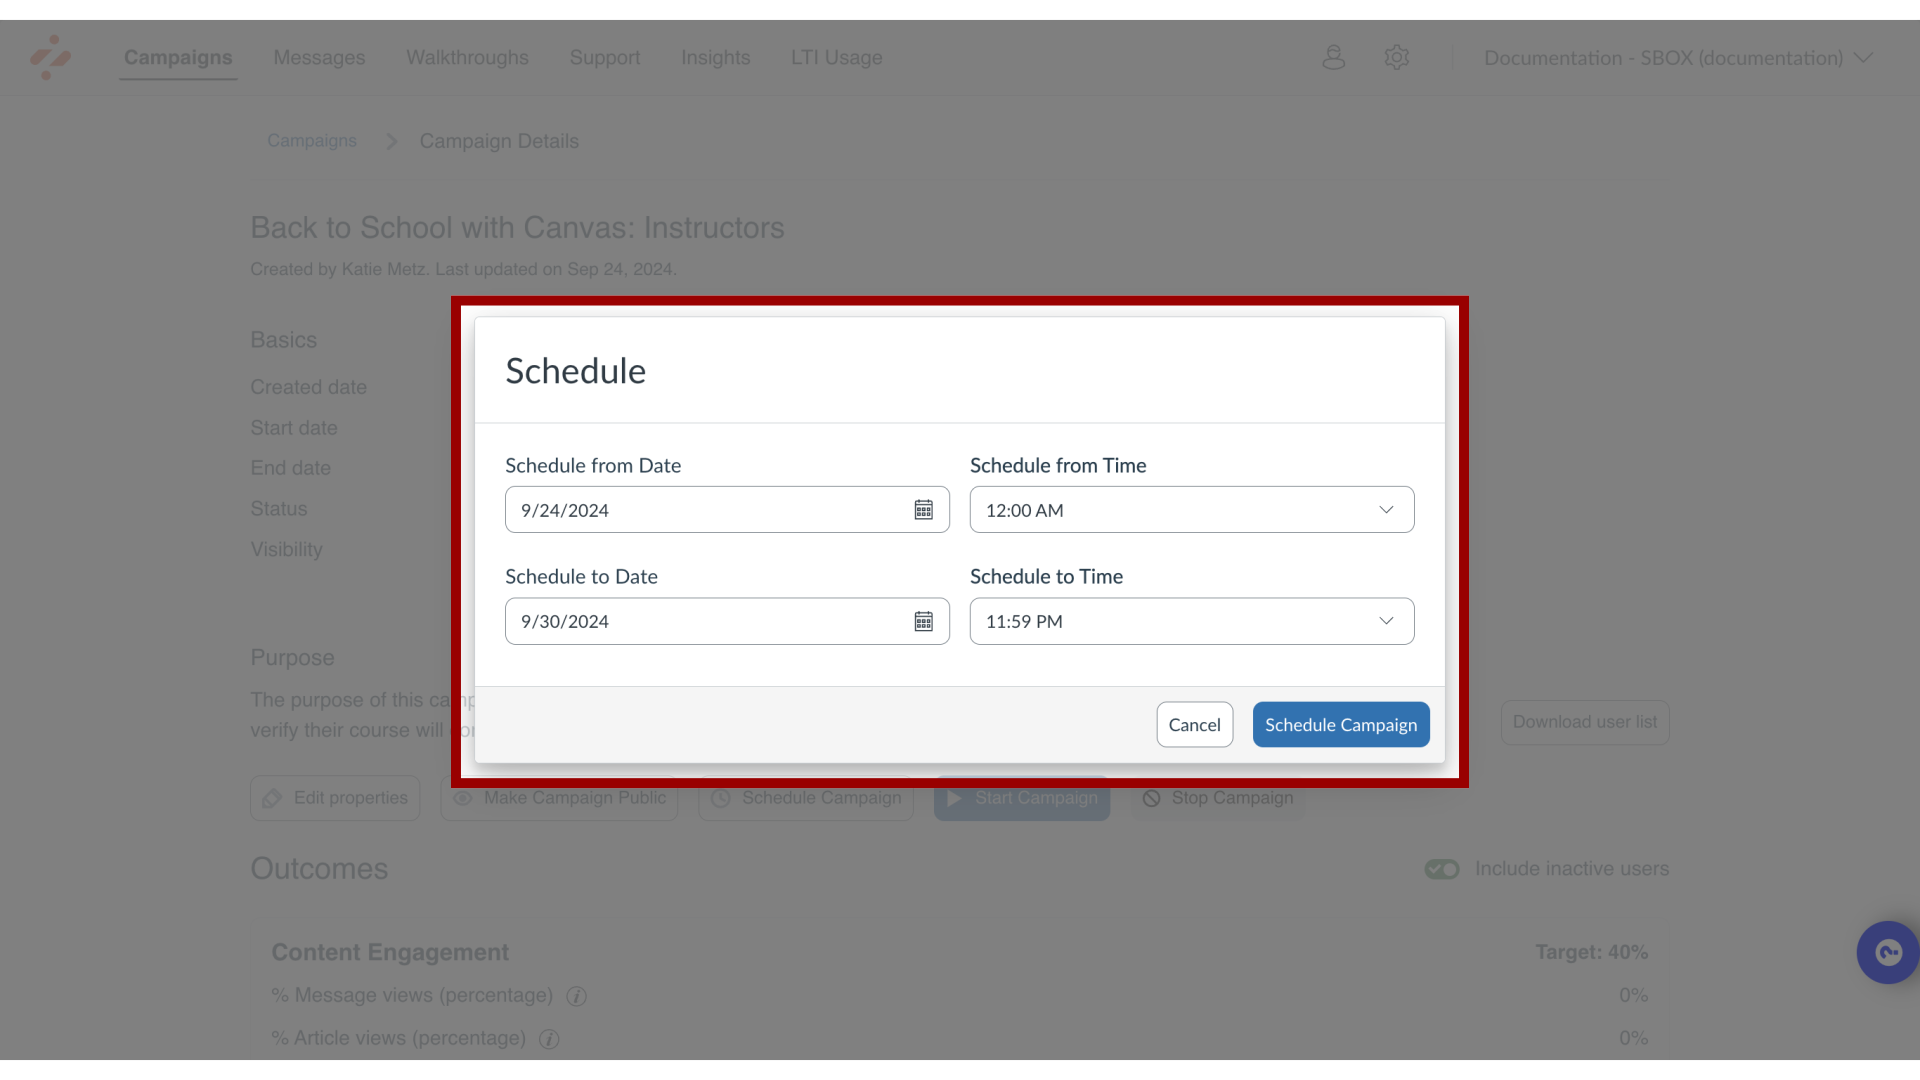
11. Schedule Campaign
To schedule a campaign, click the Schedule Campaign button.
12. Add Scheduled Dates
Assign start and end dates/times from the pop-up modal. Click the ScheduleCampaign button.
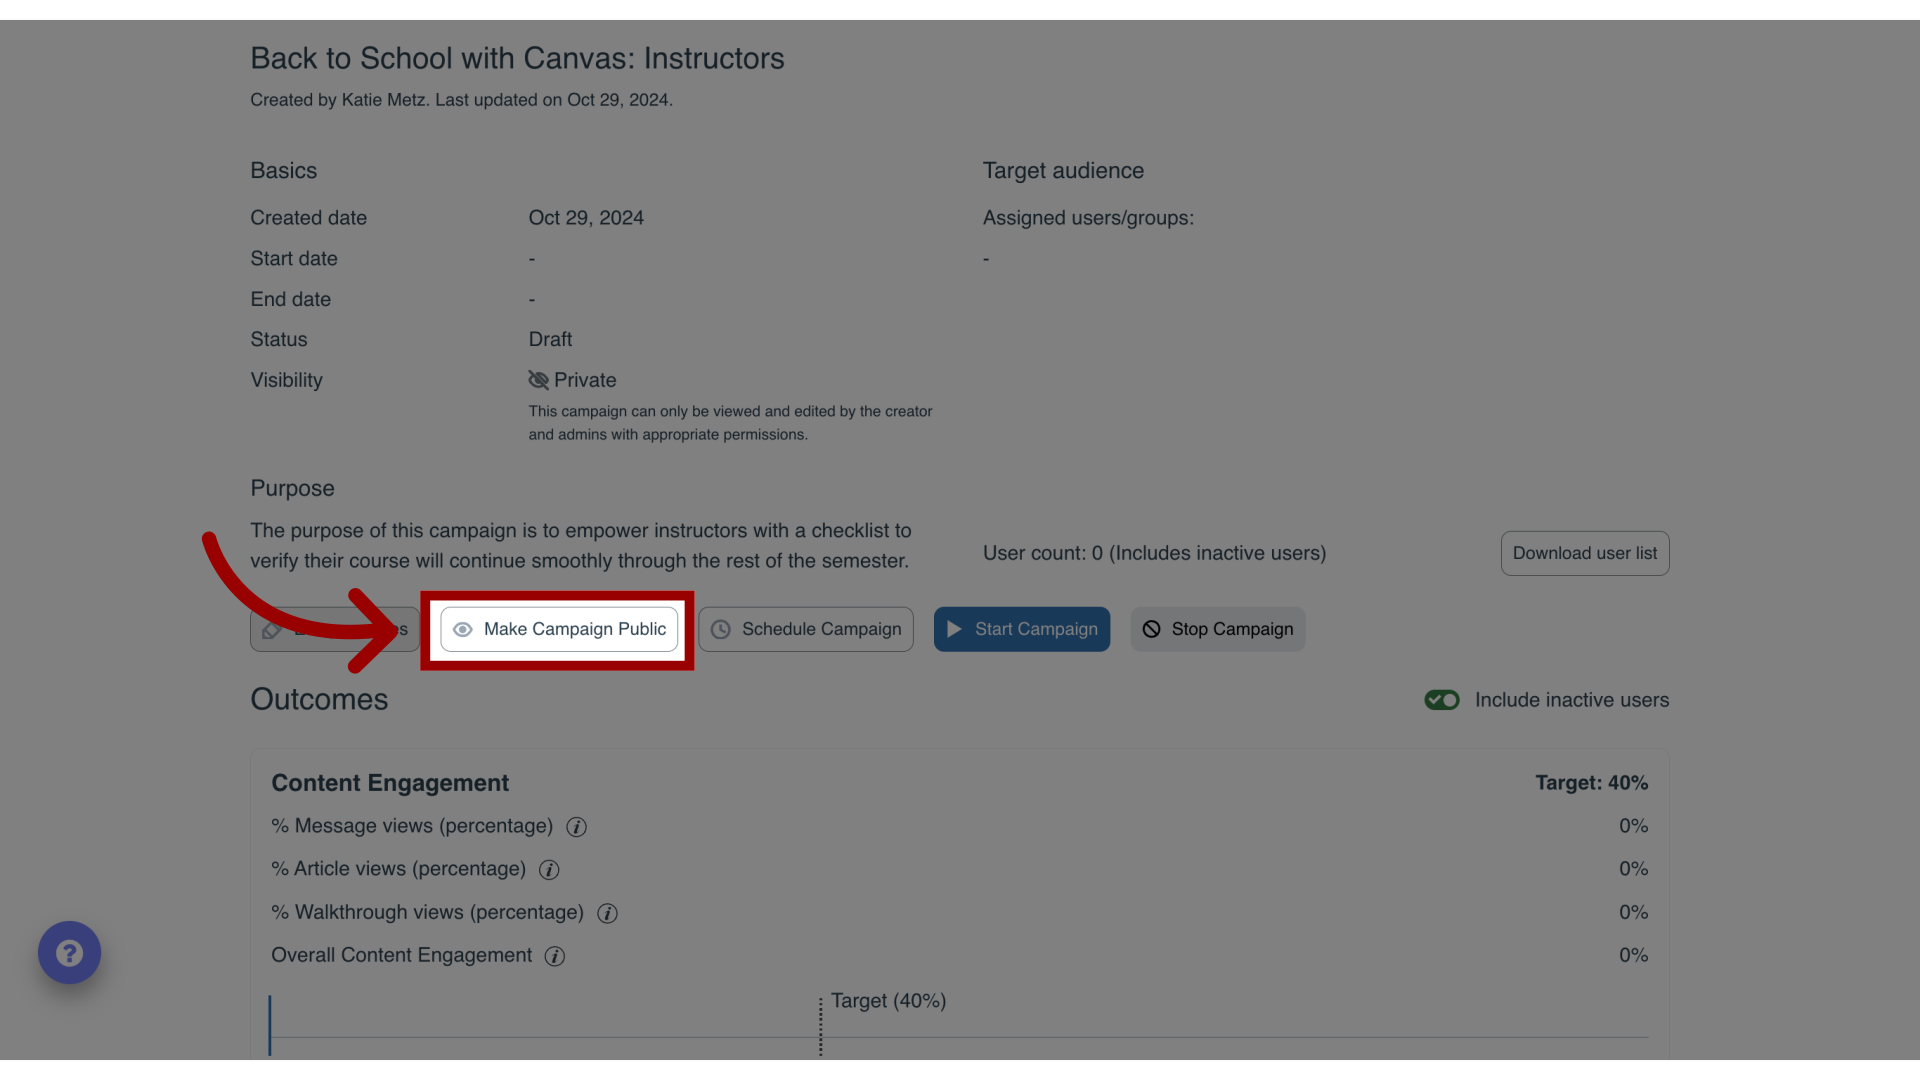
13. Share Campaign
To share and make a campaign public, click the MakeCampaignPublic button.
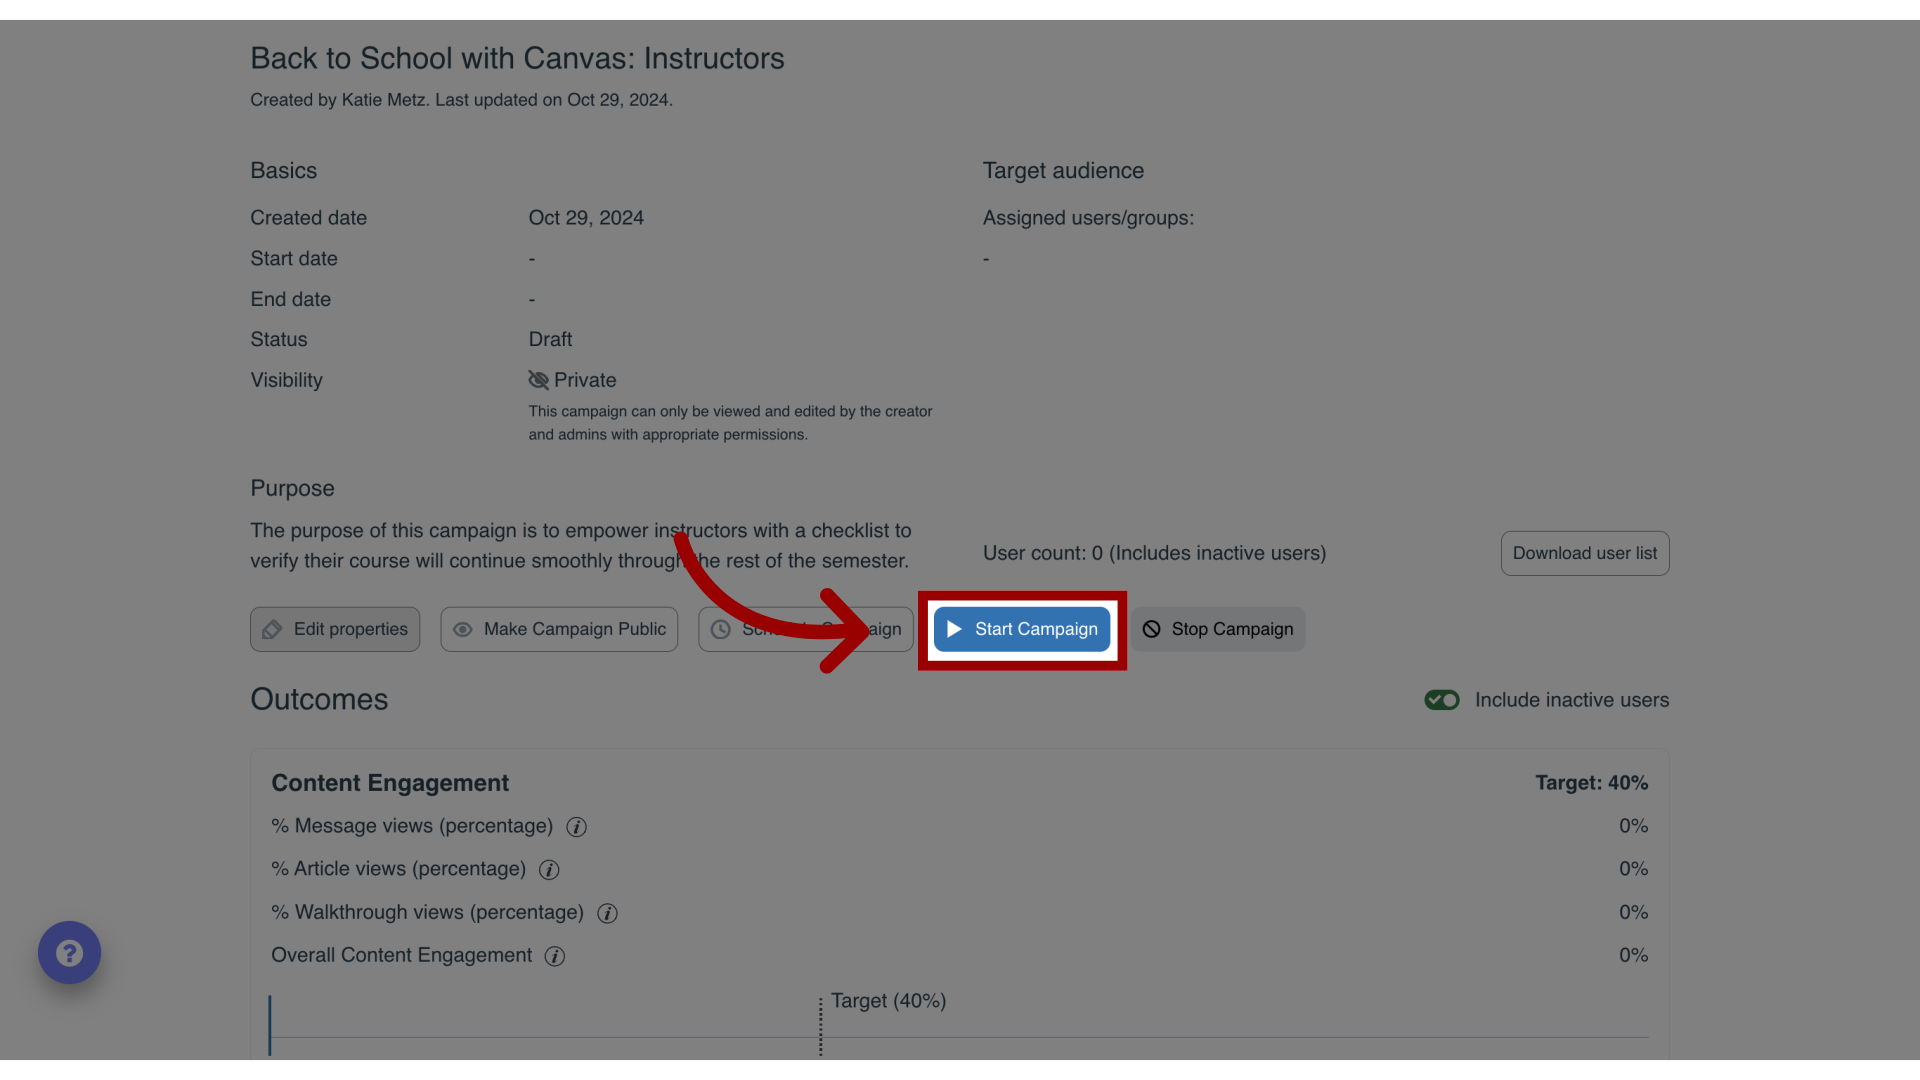
14. Start Campaign
To start a campaign, click the StartCampaign button.
Your campaign content will appear on the LMS pages of your selected user groups during the scheduled dates you have selected.
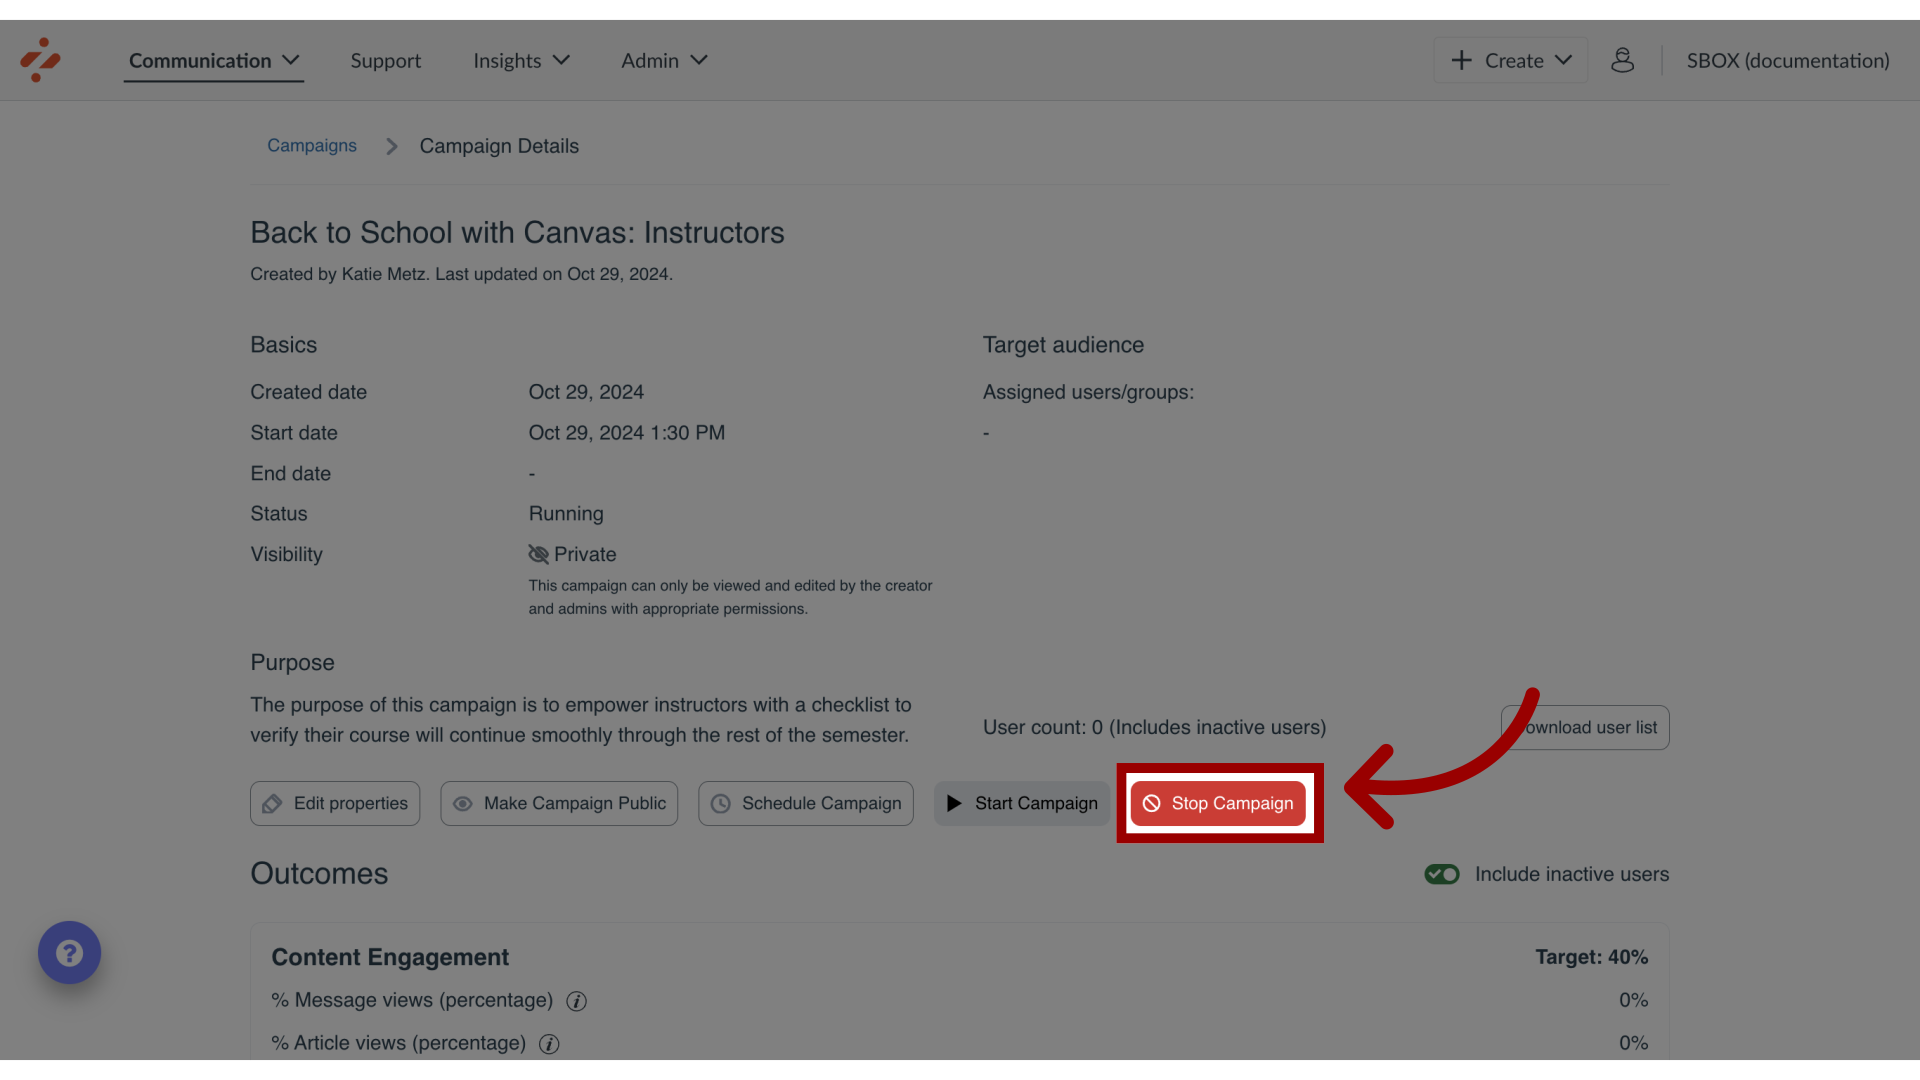
15. Stop Campaign
If you wish to end the campaign, click the Stop Campaign button, which populates the end date with the current date and time.
While the campaign messages or walkthroughs do not appear to your users anymore, the support articles remain in the support center unless you manually remove them or turn off the tool category to which it is associated.
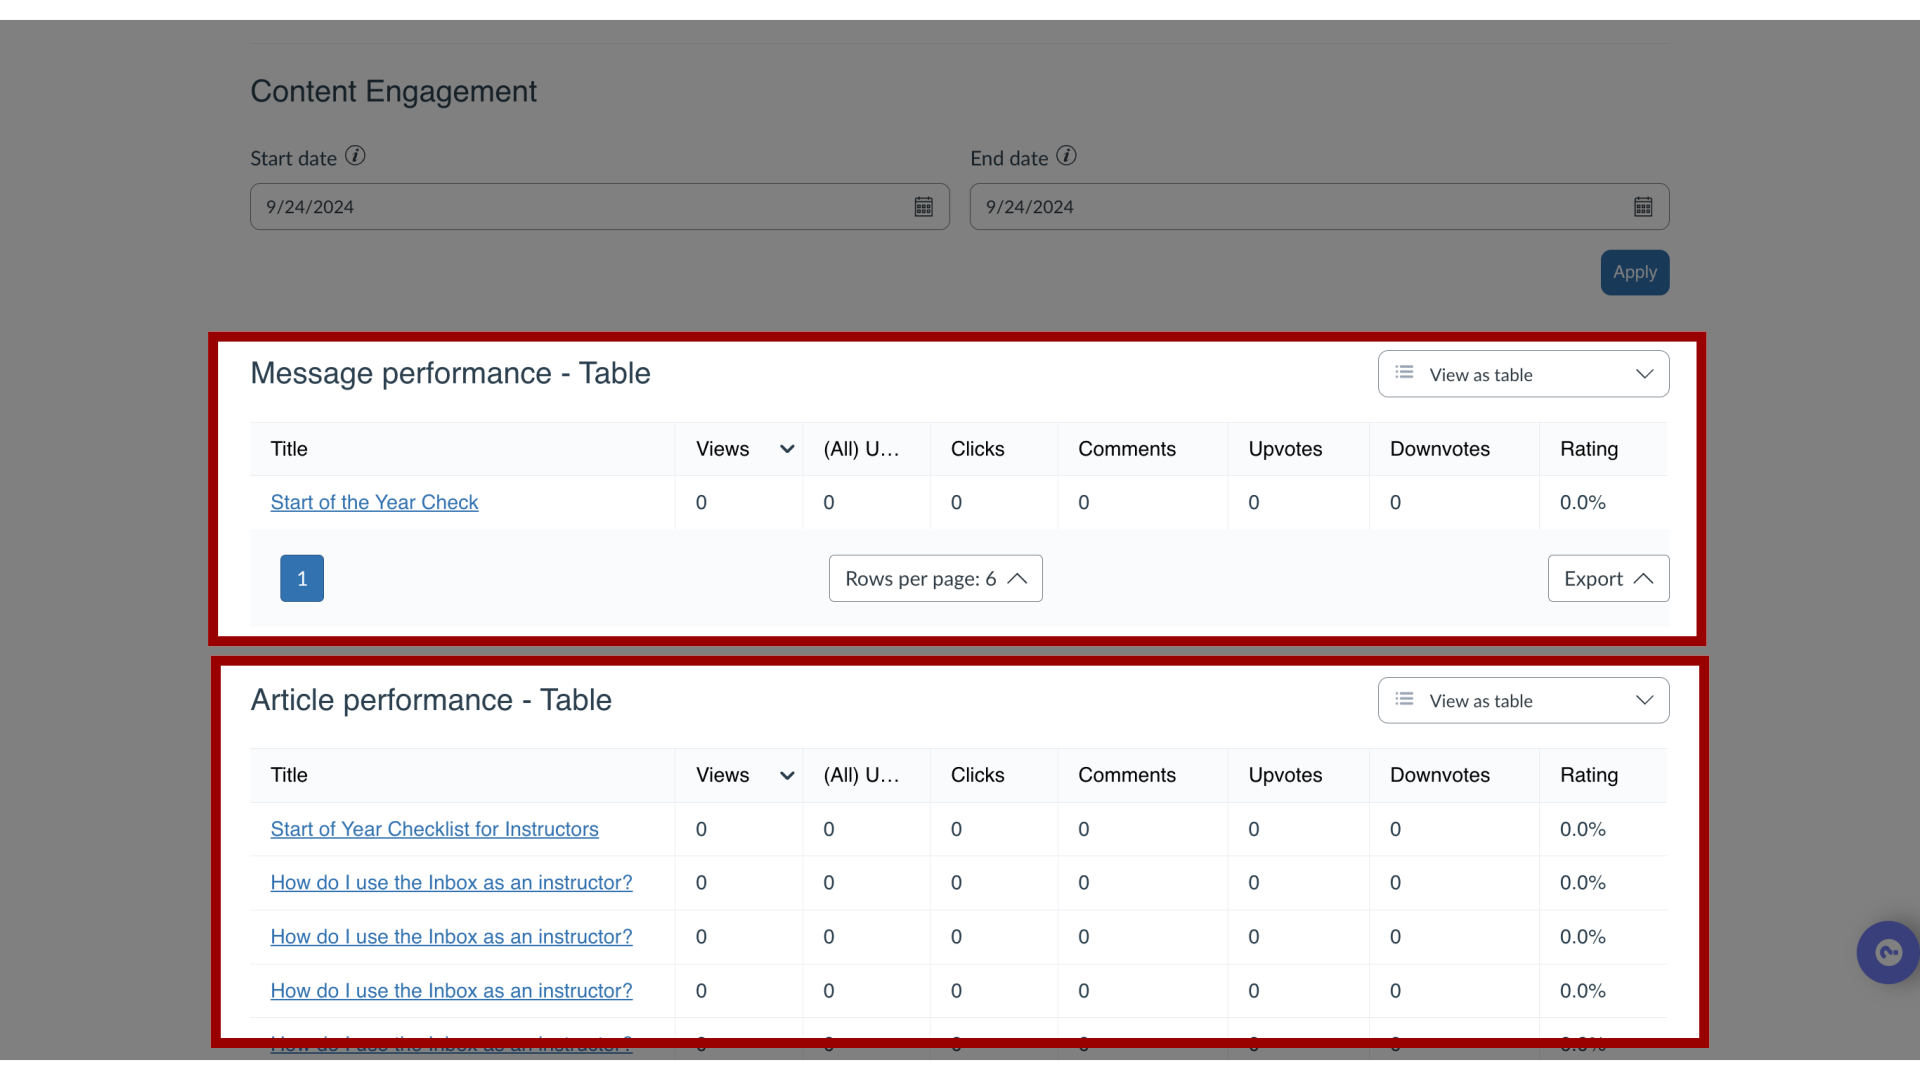
16. Track User Engagement

17. View User Performance
You will be able to see for example, how many users viewed the message, how many clicked through the article links, and how many clicked through the walkthrough providing you with useful insights into the effectiveness of the campaign.