In the Monitor tab of Canvas Apps, you can create and save filter presets to easily access specific views of your app data without having to re-select the same criteria each time. This guide shows you how to select data such as app names, courses, roles and date ranges, and save those selections as a named preset for future use.
View App Data
In the Apps page, click the Monitor tab [1].
To open the filter and preset options, click the Filter button [2].
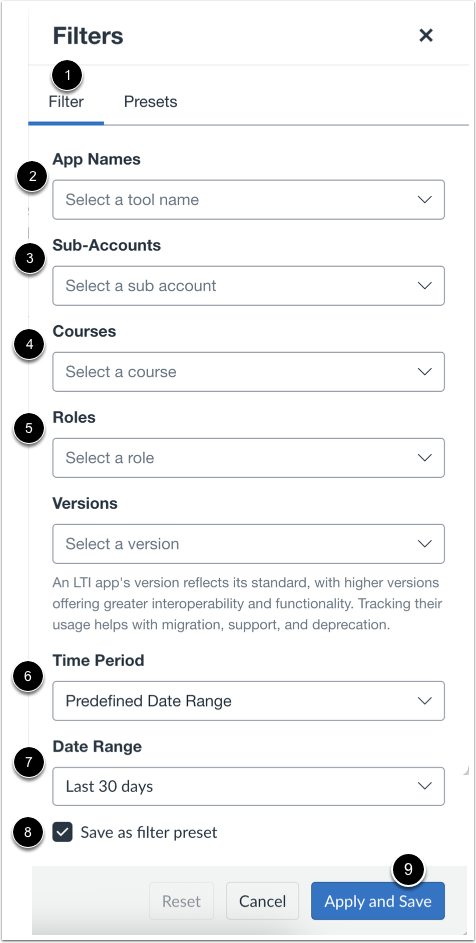
Create Preset Filter
To create a preset filter, select data by app names [1], sub-accounts [2], courses [3], roles [4], LTI app version [5], time period [6], and date range [7].
To save filter options as a preset, click the Safe as filter preset checkbox [8].
Click the Apply button [9].
Save Filter Preset
To save a filter preset, enter the filter name in the Filter preset name field [1]. Then click the Save button [2].
View Preset Filters
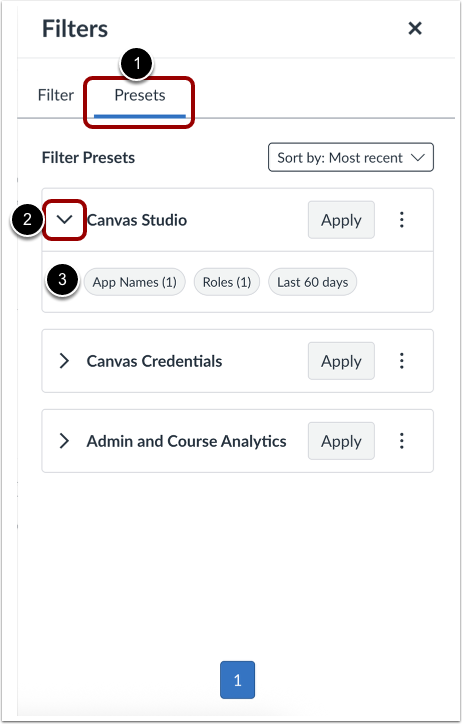
To view preset filters, click the Presets tab [1]. To view filters set for a preset filter, click the Filter Preset dropdown arrow [2]. The filters saved for the preset display [3].