Embedded guides offer a seamless, user-friendly approach to delivering information within the application. Unlike overlay guides, which can temporarily block the interface, embedded guides integrate messaging directly into a web page so that your visitors can access help or instructions without losing focus or being interrupted. This method enhances usability by providing contextual information exactly where and when it’s needed, allowing for a more intuitive learning experience and reducing potential frustration. Guide builders can create content that contributes to a cleaner, more consistent design, improving both engagement and overall user satisfaction.
For information on creating guides that overlay your Page, see Create a guide.
Best practices
When building embedded guides, we recommend the following:
- While designing, keep in mind the dimensions of the container. Content might be affected by the CSS of the container in the app.
- Use Replace only if you have a background image in the container that you’re using to target your embedded guide.
- Consider creating embedded guides with multiple steps instead of targeting multiple embedded guides containers to the same location. There’s no content ordering, so if you target multiple embedded guide containers to the same location, there's no guarantee in which order the content displays.
Use cases
We recommend using embedded guides if you want your content to flow with the rest of your Page. It's not recommended to use embedded guides if you want your users to see important information; if you need a step-by-step walkthrough; or if you need to guide your users to specific elements in the application.
Here are some recommended use cases for when to use embedded guides:
- Deliver routine messages or legal notices such as server maintenance, new terms of service, or updated privacy policies, without covering critical navigation at the top of the application.
- Provide extra information to users filling out a form that can be written for (and targeted to) specific segments.
- Advertise new features, events, and webinars on your login Pages or homepage to drive excitement and increase inbound interest.
- Remind users of actions that they need to take by a specific date.
- Establish a designated informational space in the application to surface information that might otherwise be hidden in a Resource Center, which can't be embedded.
Requirements
- Minimum required agent version for the owner of the application is 2.252.0.
- User permissions for creating embedded guides are the same as the user permissions for creating guides. For more information, see the Permissions section in Create a guide.
Create embedded guides
In the left-side menu, go to Guides > Guides and:
- On the Guides page, select Create guide.
- On the Create Guide page, if you have multiple web applications set up in your Pendo account, choose the application where you'd like the content to display.
- Select a category for the embedded guide. This lets you see recommended layouts for this category.
- Choose Embedded to set the content to appear inline with the Page's content.
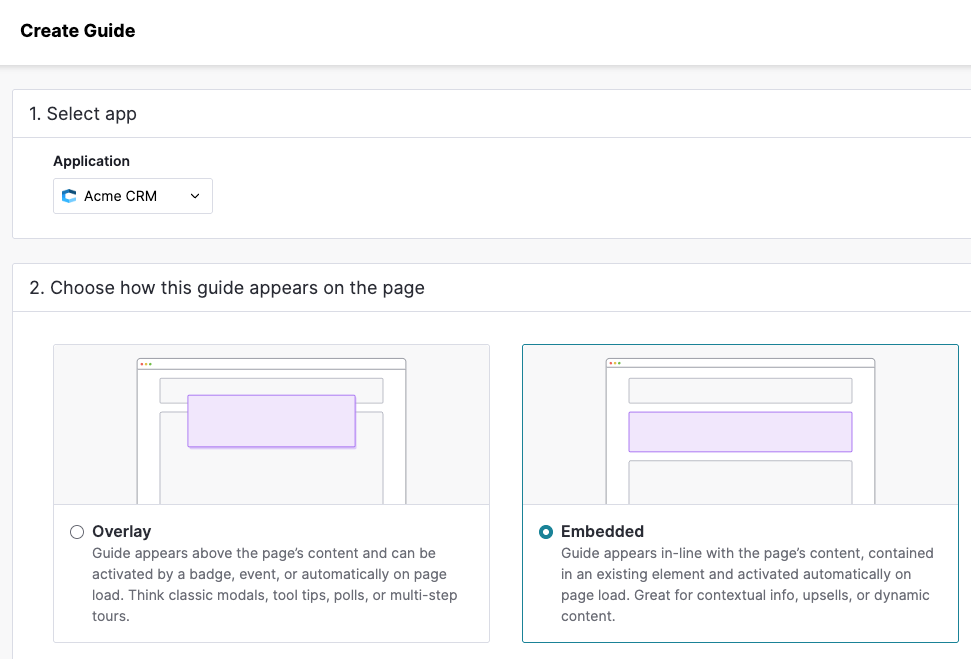
- In the Layouts section, select a layout. You can choose from the default layouts that are provided or a saved layout that you've used in the past to create content.
- In the Settings page, enter a name for the embedded guide.
- Continue to create your content as you would a guide. For more information, see Create a guide.
Embedded guides versus overlay guides in the Visual Design Studio
Embedded guides differs from overlay guides in a number of ways. Differences include:
- Embedded guides only support First Time Views. Repeat Views isn’t currently supported.
- The Autofocus, Backdrop, and Caret elements in the Advanced options of the guide container styles aren't available.
- Embedded guides can't be used for creating a poll.
- Activation is set to Automatic by default in the Activation settings. The content is always visible and doesn't disappear after it's been viewed. The content can be dismissed if users have the ability to dismiss the content.
- Void and canvas elements can’t be targeted in embedded guides.
- Void elements. These elements don’t have any child nodes and so can’t have content embedded in them.
- Canvas elements. The HTML <canvas> element is used to draw graphics, on the fly, using JavaScript. The <canvas> element is only a container for graphics, so content can’t be embedded in it.
In addition, there are differences in positioning, container height, and top-level margins.
Positioning
An embedded guide is part of your Page and is always positioned inside the selected element on the Page. In the Location tab of the Edit Container window, Position on Page is always Inside Element.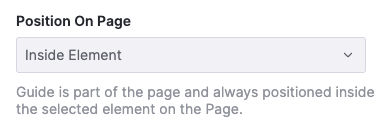
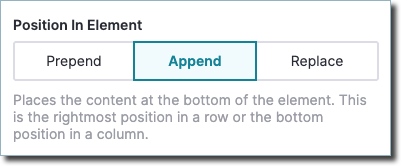
You can select where to position the content inside the element:
- Prepend. Places the guide at the top of the element. This is the leftmost position in a row or the top position in a column.
- Append. Places the guide at the bottom of the element. This is the rightmost position in a row or the bottom position in a column.
- Replace. Replaces the element’s existing content. This option can't be used if the selector uses a 'contains' rule.
Container height
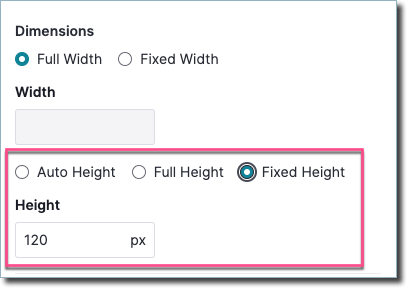
The default container height for an embedded guide is Auto, which matches the behavior of overlay guides. This means that the container height adjusts itself as you add more content.
Embedded guides have two other height options:
- Full height. The embedded guide is full height relative to the defined height of the container. For example, if the embedded guide default height is 200 pixels and the container is 500 pixels, the height of the embedded guide will be 500 pixels.
- Fixed height. You can specify the number of pixels for the container height.
Margin padding for embedded guides
Unlike overlay guides, embedded guides are placed directly inside the app. This might sometimes require the embedded guide to be moved slightly to the sides to fit your design. You can configure padding for the top, right, bottom and left margins of the embedded guide container to change the container positioning.