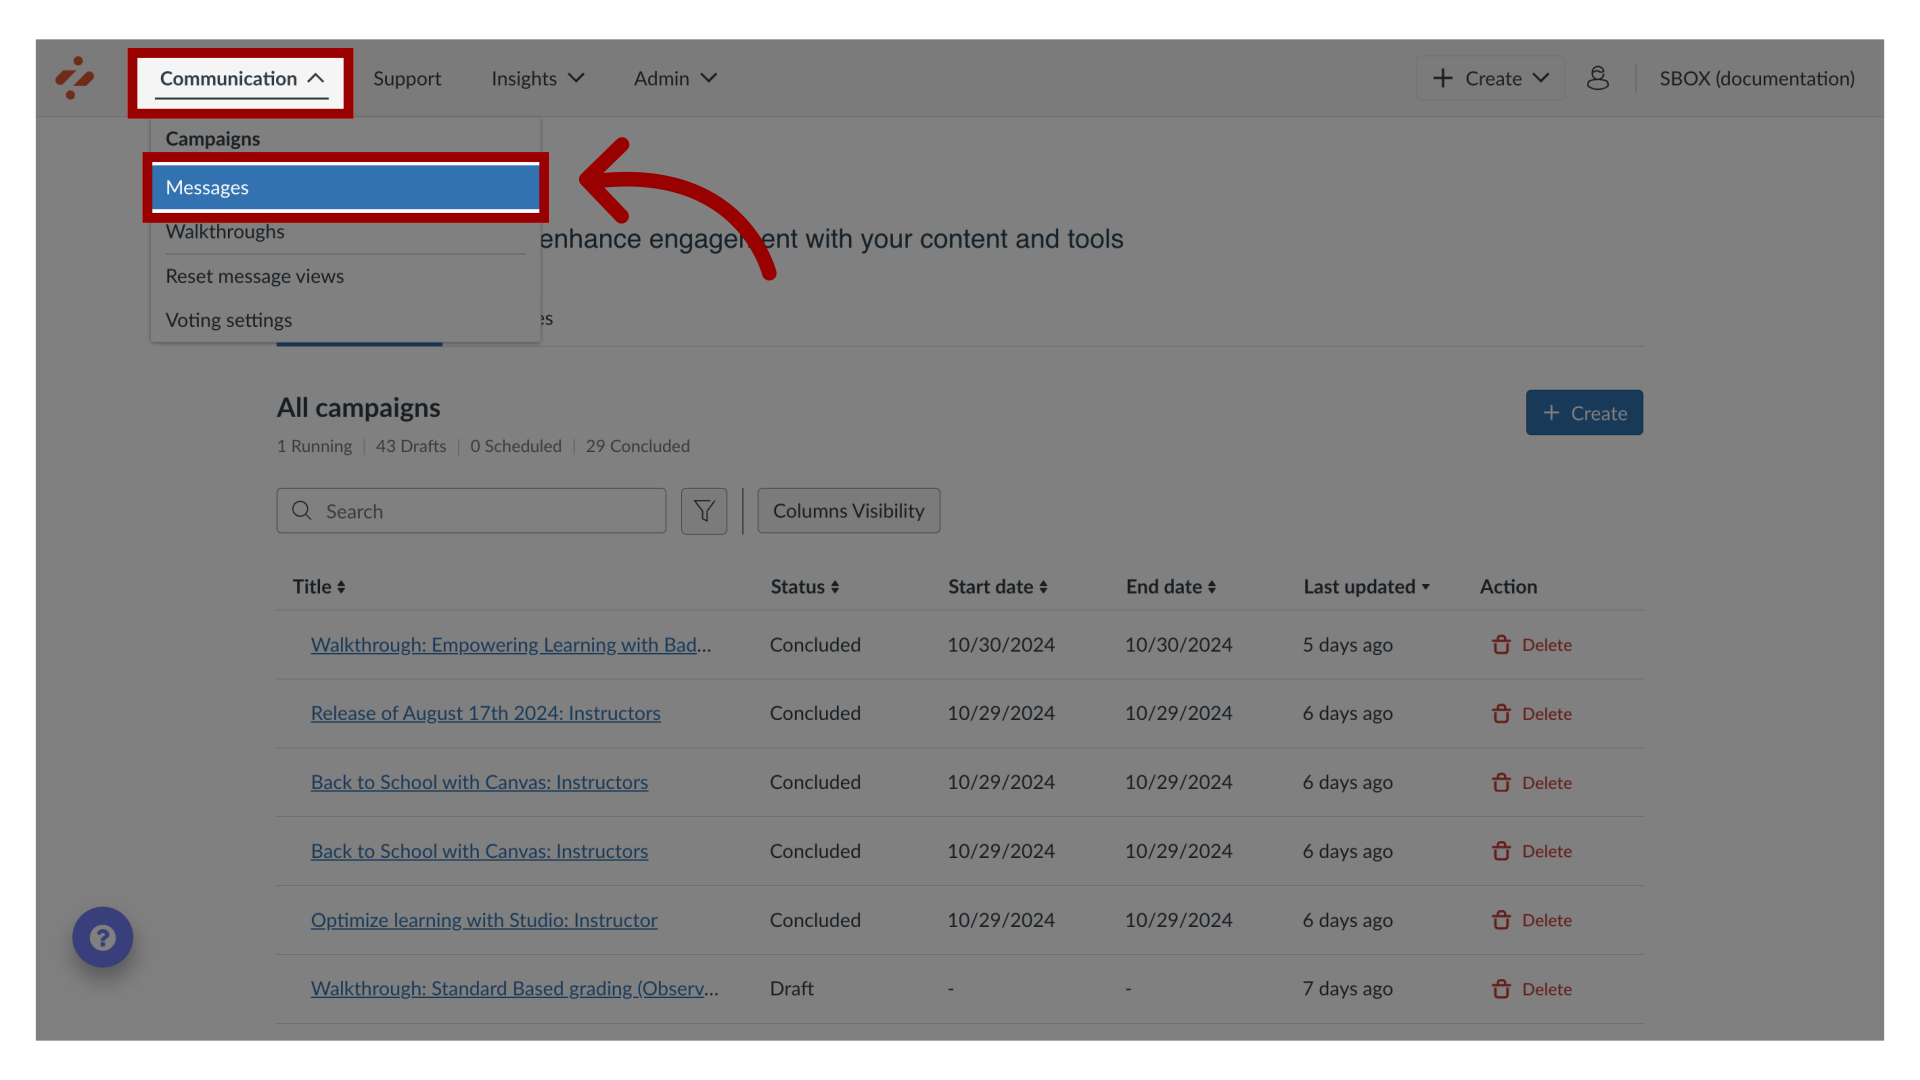
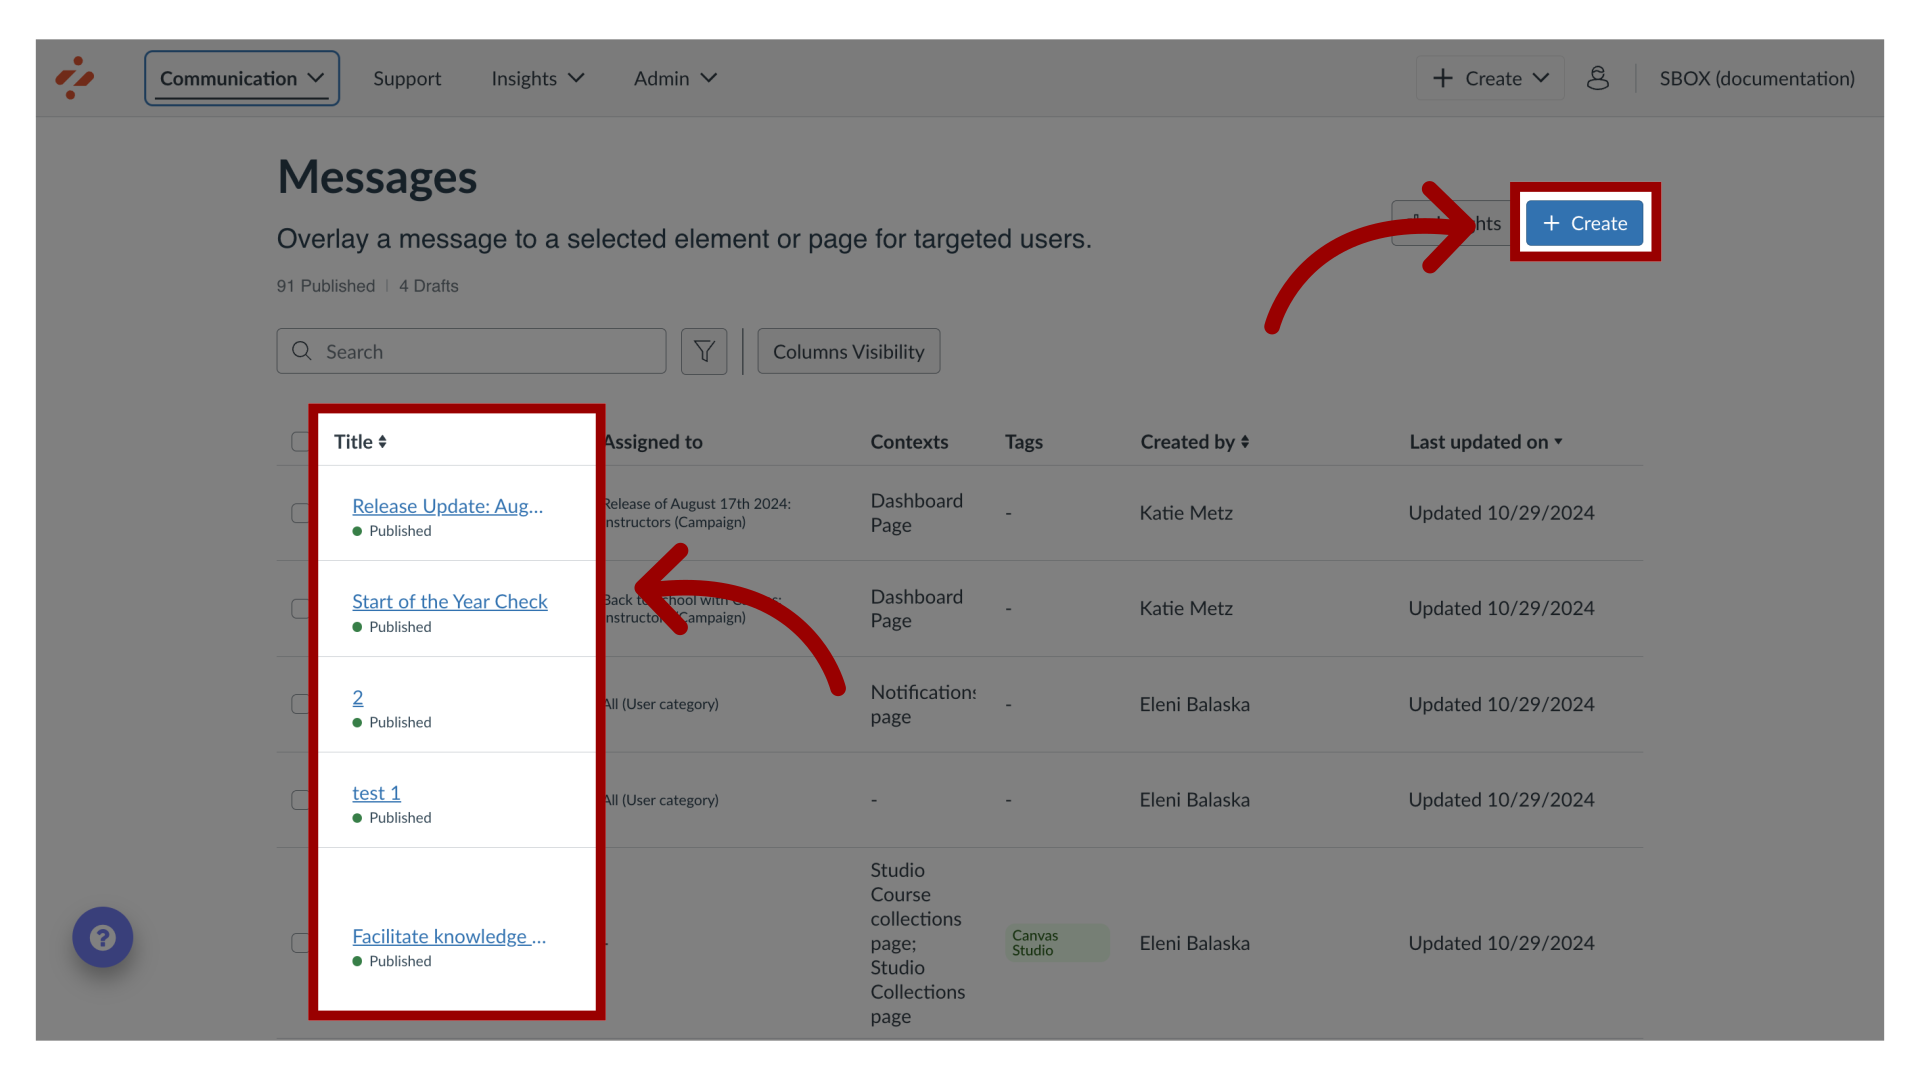
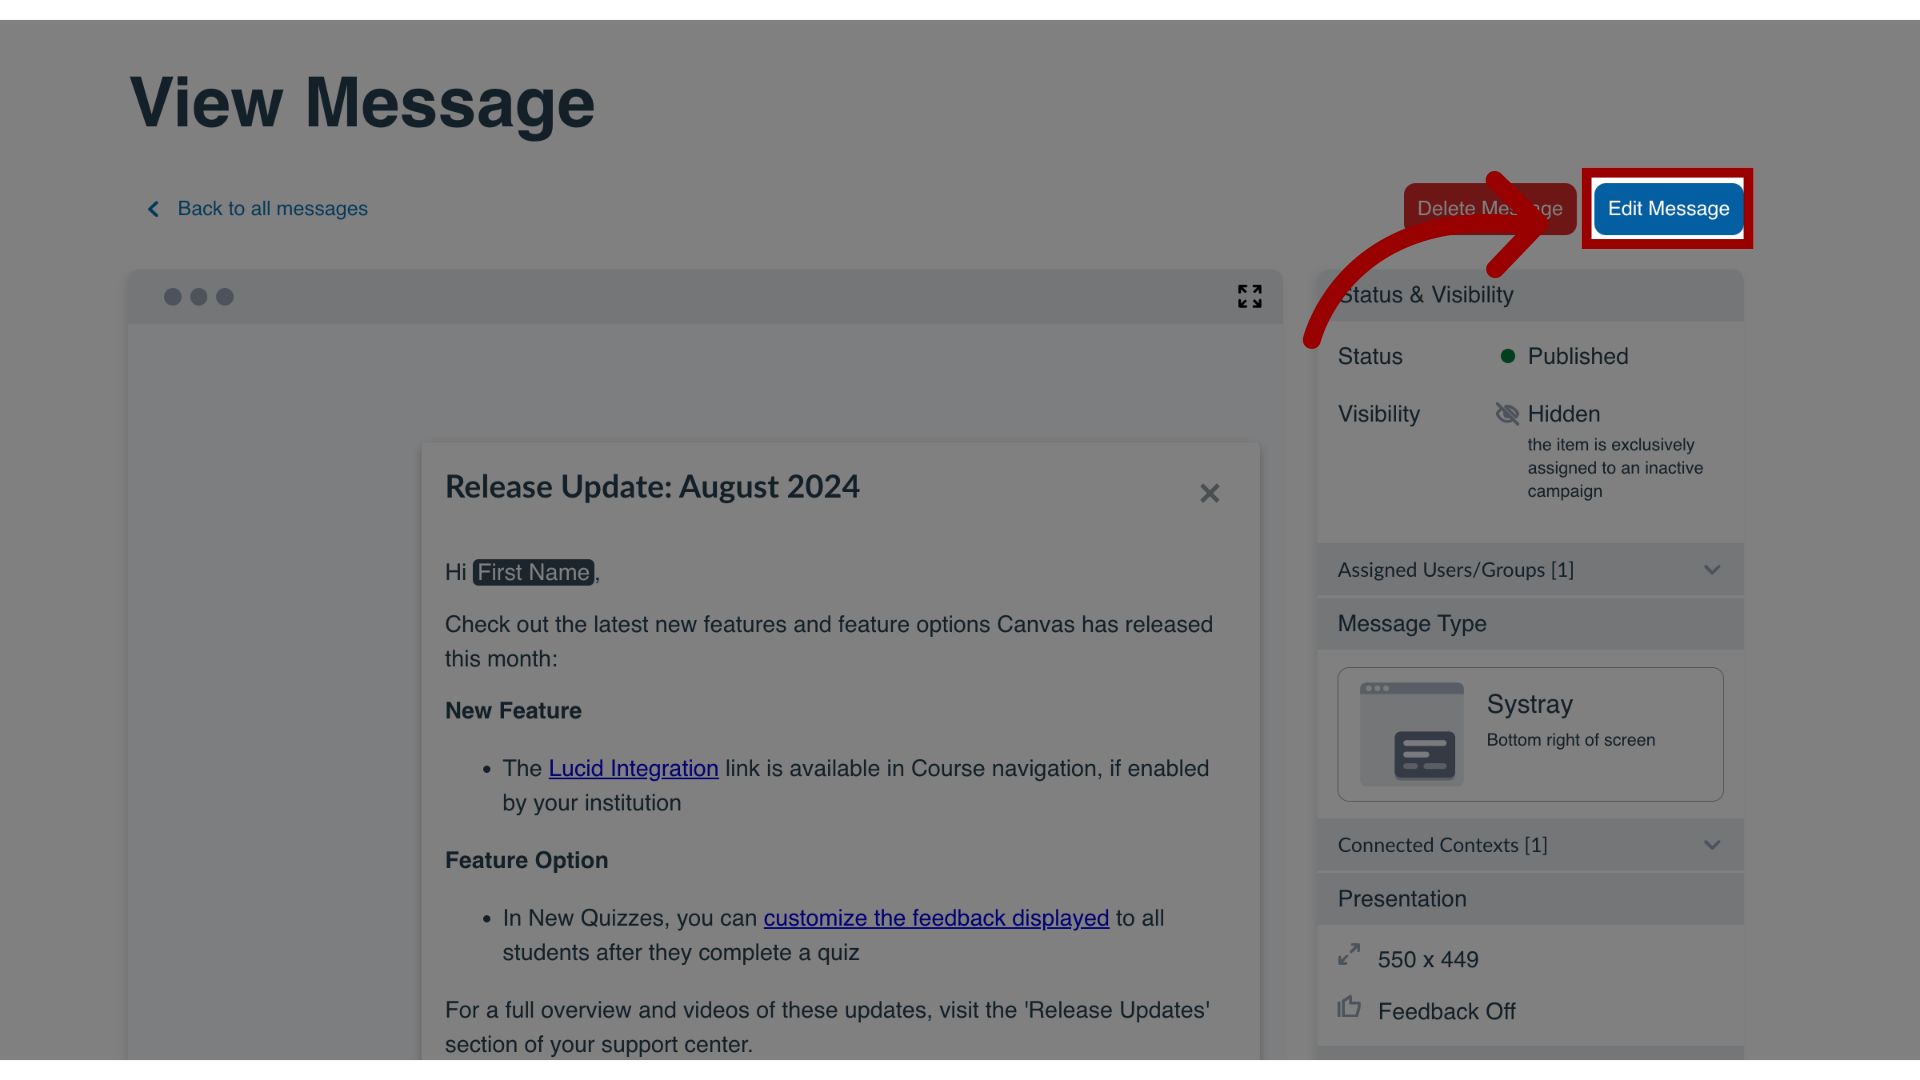
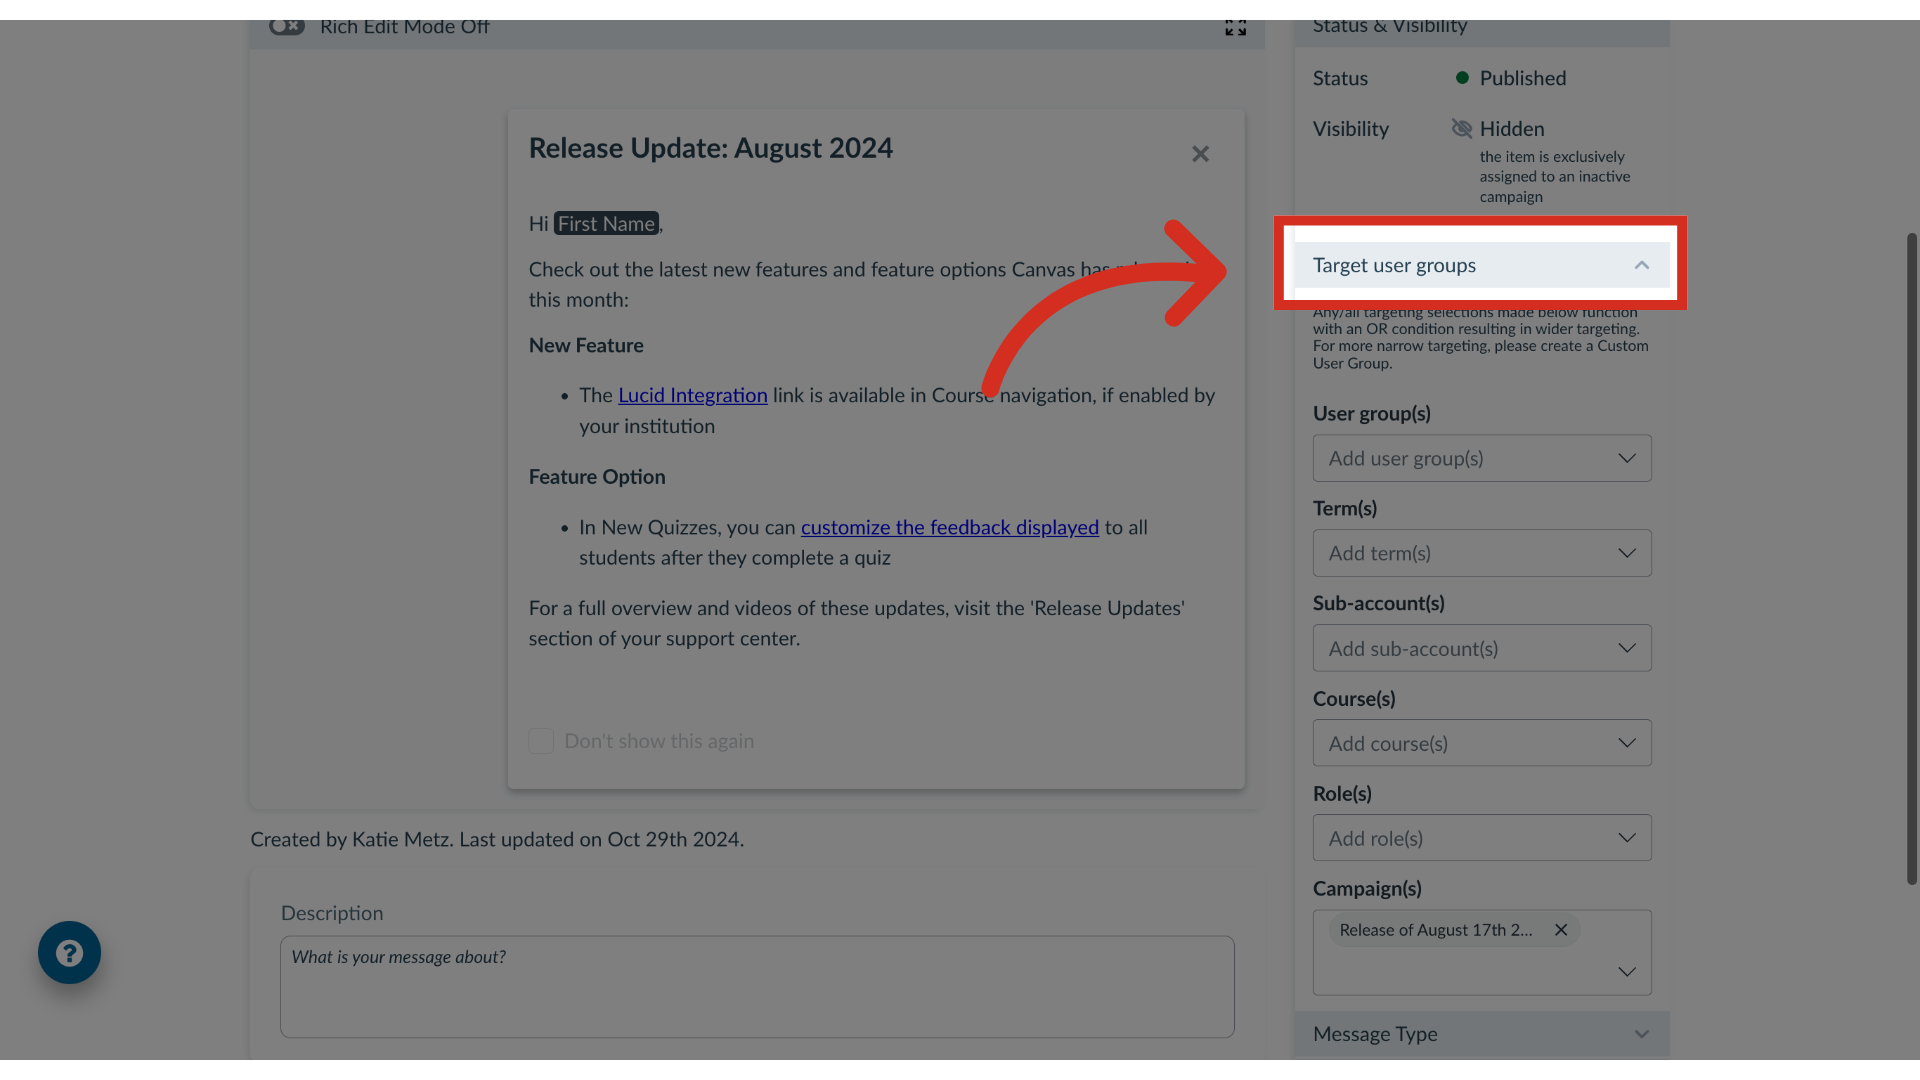
You can effectively target users within a course, term, or sub-account when sending messages. By navigating the messaging features, you can add custom user groups or Out of the Box User Groups to ensure a message reaches the intended audience.How do I target users of a course, term, or sub-account in a message?1. Open MessagesIn Global Navigation, click the Communication dropdown menu. Then click the Messages link.2. Manage MessagesTo edit an existing message, click the name of the message. To create a new item, click the Create button.3. Edit MessageIn the View Message page, click the Edit Message button. If you are creating a new message, the Edit Message button does not display.4. Open Target User GroupsIn the sidebar, locate and open the Target User Groups section.5. Open User GroupsThen click the User Group(s) dropdown menu.6. Add Custom User Group Use the User Group(s) search bar to search custom user groups. Custom user groups can be created to include one or multiple courses, terms, or sub-accounts in one group.7. Add Out of the Box User GroupUse the User group(s), Term(s), Sub-account(s), course(s), or Role(s) drop-down menus to select Out of the Box user groups by your institution without having to create a Custom User Group.