As a LearnPlatform administrator, you can automate a provider application. Automation options allow you to configure how applications are reviewed and how applicants, reviewers, and organization admins are notified.
Open Provider Applications
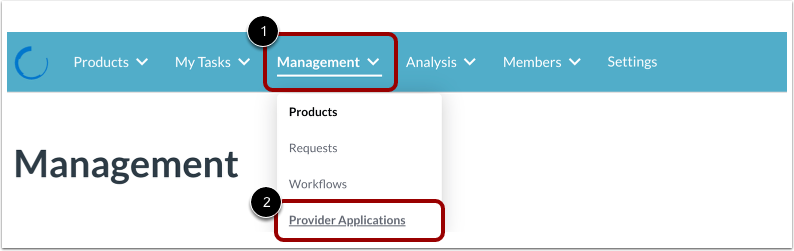
To create a provider application, click the Management drop-down menu [1], then click the Provider Applications link [2].
Open Create Provider Application
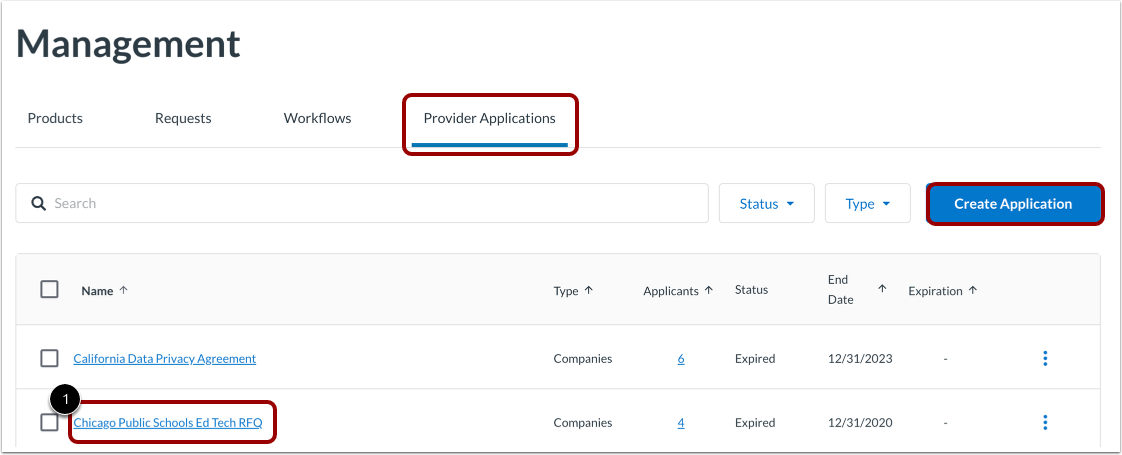
The Management page defaults to the Provider Applications tab [1].
To open a provider application, click a provider application name link [2].
Note: You can also create a provider application.
Open Automation Tab
Click the Automation tab.
Manage Invitation Email Message
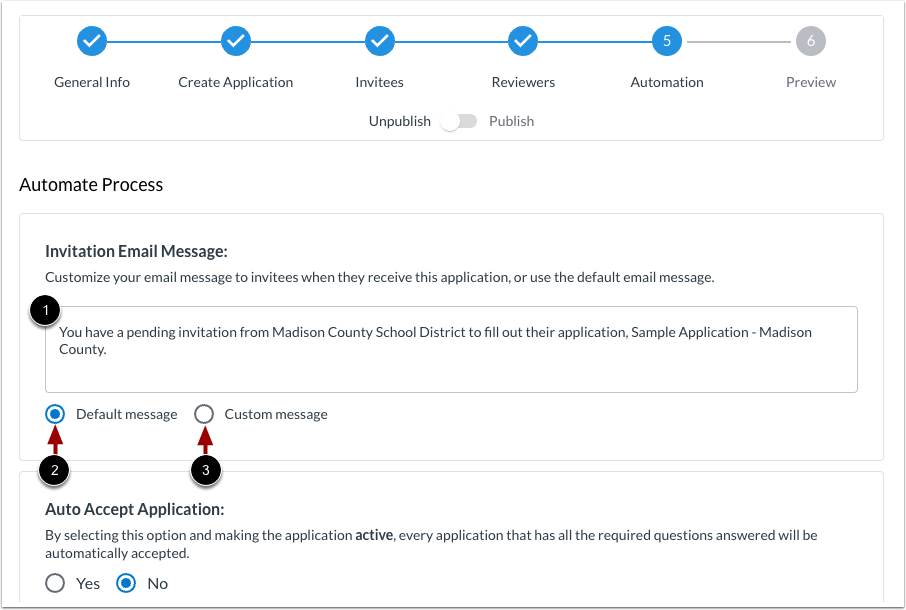
On the Automate Process page, the Invitation Email Message area displays the message that goes to providers [1]. To select what message goes to providers, select one of the following radio buttons:
- Default message [2]: Email message is the default message: "You have a pending invitation from [your district] to fill out their application, [Application Name]."
- Custom message [3]: Email message is customized. Enter your own message in the message field.
Auto Accept Application
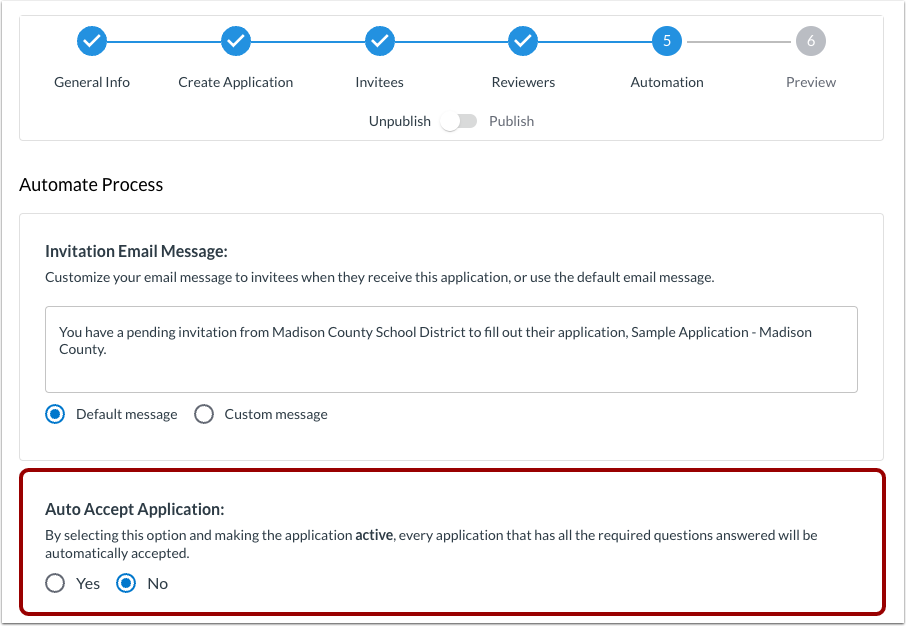
In the Auto Accept Application area, you can choose to automatically accept applications that have all the required questions and fields filled out. Click the Yes or No radio button.
Define Behavior for Submitted Application
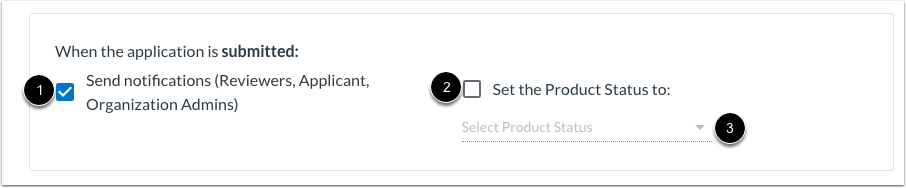
When the application is submitted, you can send notifications or change the product status.
To send notifications when an application is submitted, click the Send notifications (Reviewers, Applicant, Organization Admins) checkbox [1].
To change the product status when an application is submitted, click the Set the Product Status to checkbox [2], and select a status from the Select Product Status drop-down menu [3].
Define Behavior for Accepted Application
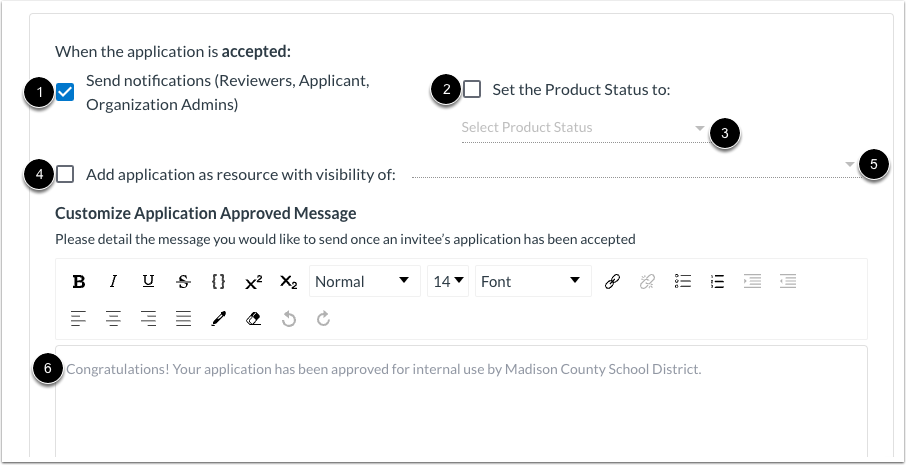
When the application is accepted, you can send notifications, change the product status, add the application as a resource, or customize the message to the invitees.
To send notifications when an application is accepted, click the Send notifications (Reviewers, Applicant, Organization Admins) checkbox [1].
To change the product status when an application is accepted, click the Set the Product Status to checkbox [2], and select a status from the Select Product Status drop-down menu [3].
To add the application as a resource, click the Add application as resource with visibility of checkbox [4]. Then, select a visibility [5].
Enter a message for an accepted application [6].
Define Behavior for Denied Application
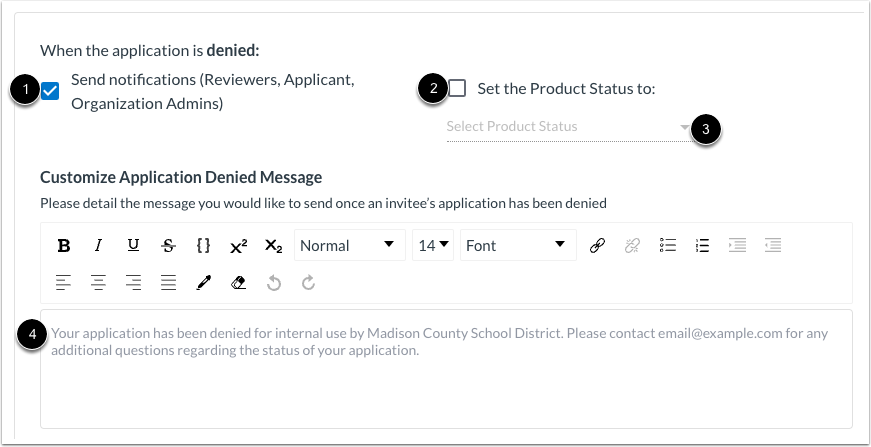
When the application is denied, you can send notifications, change the product status, or customize the message to the invitees.
To send notifications when an application is denied, click the Send notifications (Reviewers, Applicant, Organization Admins) checkbox [1].
To change the product status when an application is denied, click the Set the Product Status to checkbox [2]. Then, select a status from the Select Product Status drop-down menu [3].
Enter a message for a denied application [4].
Save Application
To save the automation settings, click the Save Application button.