As an administrator, you can create tag-based filters to help easily sort products by specific information.
You can:
- Use lists to sort products by key data elements about specific edtech tools to meet your own compliance needs, whether local, state or federal.
- Example: You can create a list of student data elements a given tool may access and show them per individual product page (i.e., attendance, demographic, conduct, etc. elements)
- Create custom checklists to meet specific internal process needs.
- Example: You can configure a custom checklist for your district’s edtech product approval process, advancing internal transparency and team alignment (i.e., failed curriculum alignment, not budgeted, data privacy approved, etc.)
- Add contextual, district-specific information to a product label, easily sharing the intended use of a product with educators and families.
- Example: You can indicate if a particular product aligns best with certain elementary grades based on evidence, demonstrating the value of that tool in that context to teachers. You can also publish this information for just your educators, publicly or both.
Filters use tags, tag definitions, and tag groups as components. Visit the following guides to get started with those components:
Note: To create tag-based filters, you need to have an Organization Administrator role.
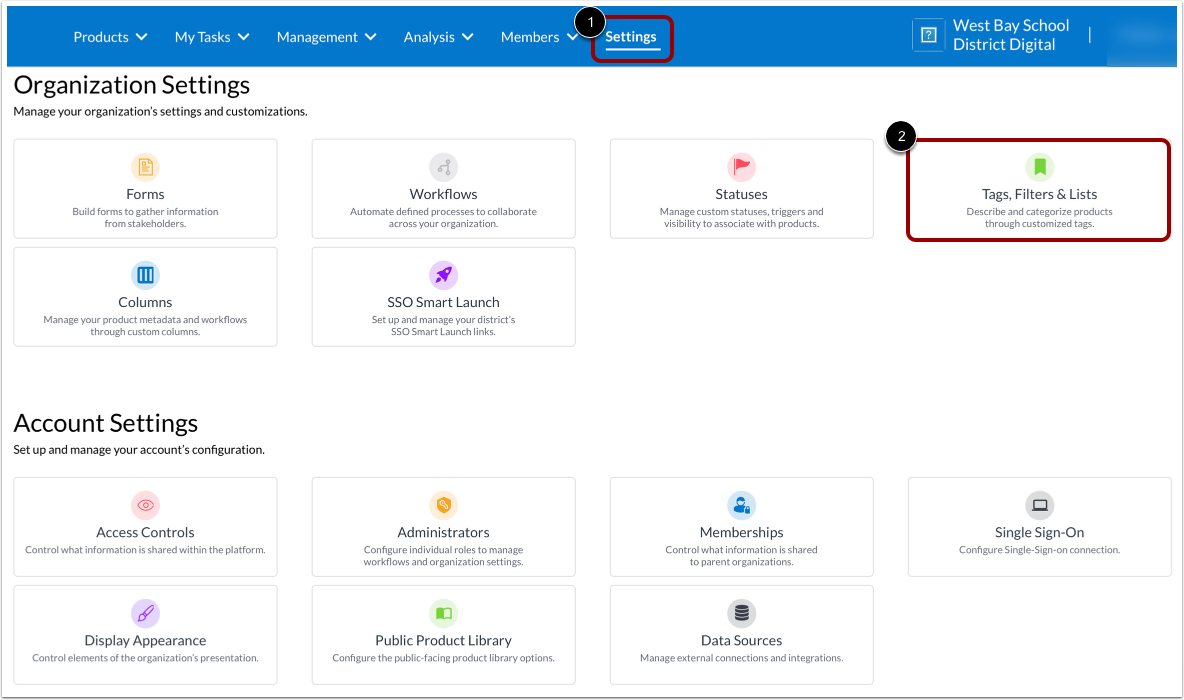
To create a tag-based filter, click the Settings tab[1]. Then, click the Tags, Filters & Lists tile [2].
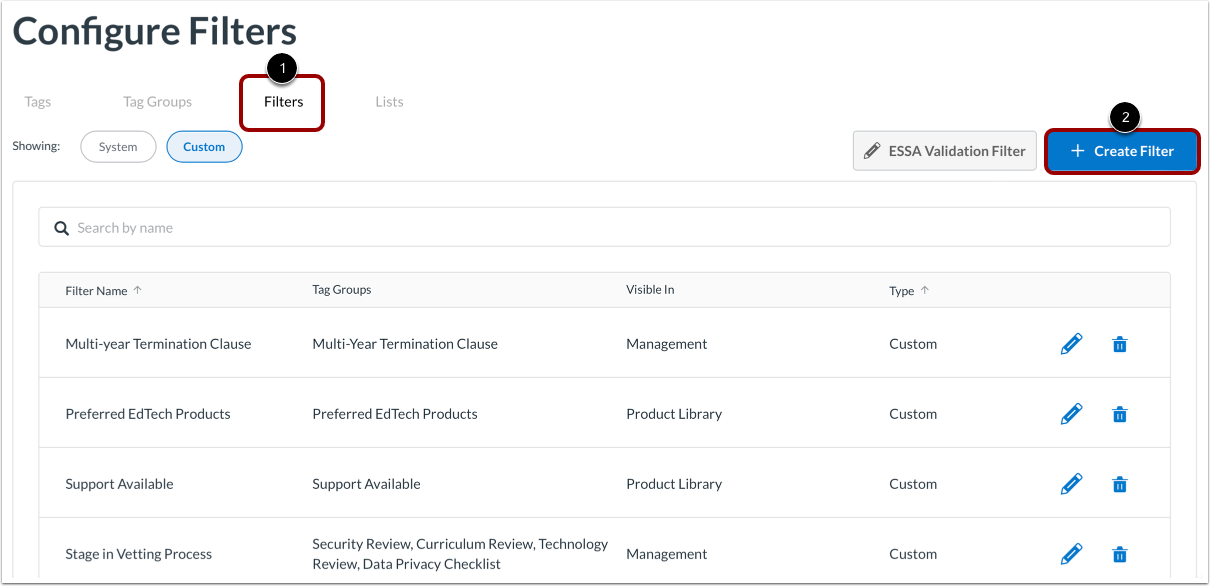
Create Filter
In the Filters tab [1], click the Create Filter button [2].
Add Filter Details
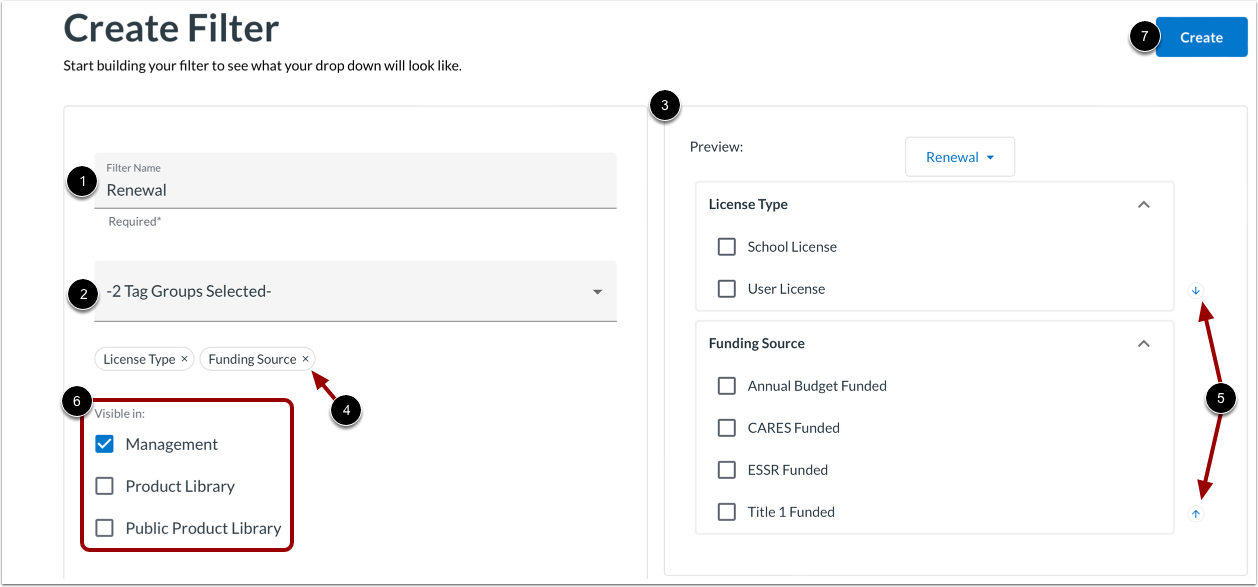
In the Create Filter page, add a name for your filter [1]. This will also be the content of the heading/title for the filter.
Select the tag group(s) that you want to include in your filter [2]. The tag group names will be the section headings in the list. As you select the tag groups, they display in the Preview box [3].
To remove a tag group from the selection, click the Delete icon [4].
To change the order of tag groups in the Preview box, click either the Arrow Up or Arrow Down icon [5].
Set the visibility of the filter [6]. Each filter element will still respect its visibility limits, but the filter will show in the places you select.
To save the filter, click the Create button [7].
Note: Make sure to create a tag group before creating a filter.
Edit or Delete Filters
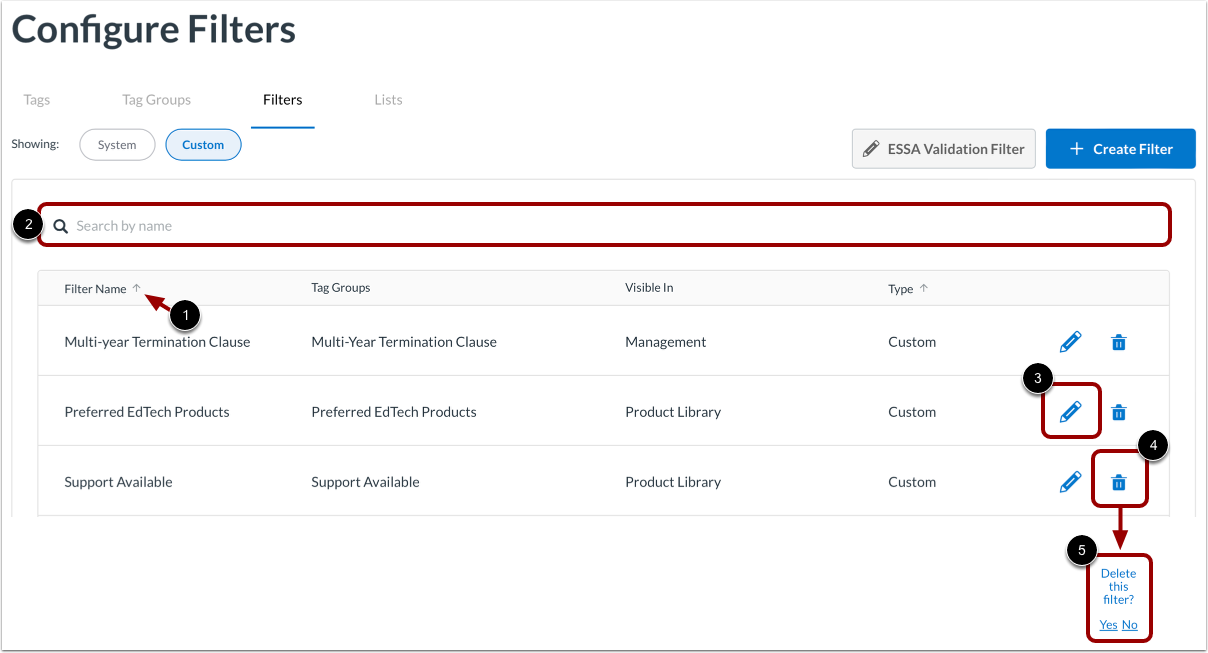
Filters display in the order they were created. To sort the filter items alphabetically, click the Arrow icon in the Filter Name column [1].
To search for a specific filter, enter the filter name in the Search by name field [2].
To edit an existing filter, click the Edit icon to the right of the filter item [3].
To delete an existing filter, click the Delete icon [4]. Then, confirm that you want to delete the filter [5].
Understand List Item Visibility
Since the items that make up a filter are based on tags, they follow the tags’ visibility settings; similarly, sub-sections follow the tag groups’ visibility settings; and the filter is shown according to its visibility settings.
For example, you have three tags (Red, Blue, and Yellow), and they belong to a tag group (Primary Colors) which is part of a filter (Colors). If Colors is visible everywhere (management, organization library & public product library), but the tag Red is only visible in management and the organization library, then in the public product library, the list will only show Blue and Yellow.