As a LearnPlatform administrator, you can add products to your organization's product library from the LearnCommunity Library by using the Management tab or the Inventory dashboard.
If a product is not listed in the LearnCommunity Library, you can create a custom product.
Note: Educators can request products to be added to their district's library. Learn how to manage product requests.
Open Product Management
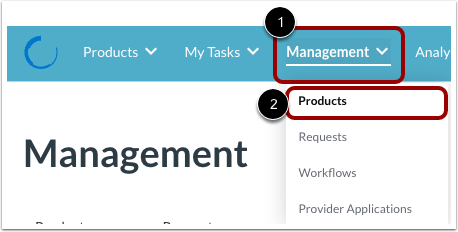
Click the Management drop-down menu [1]. Then click the Products link [2].
Add Product
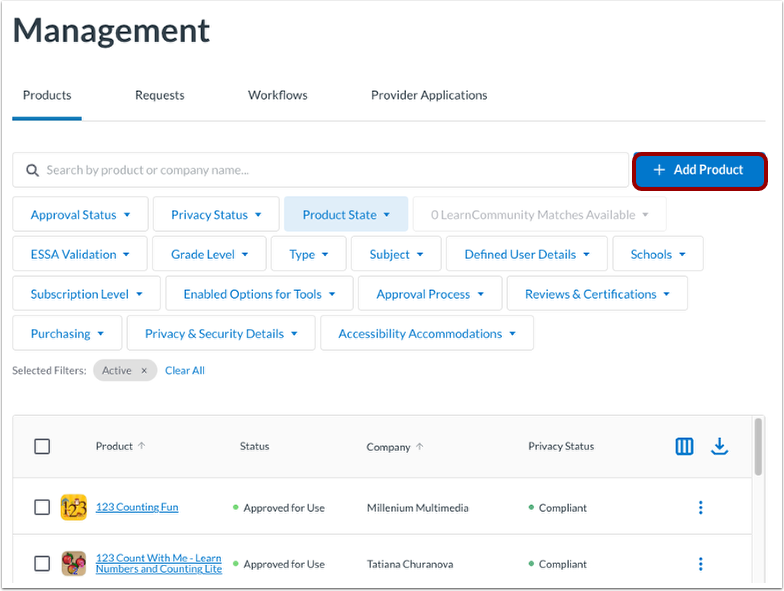
Click the Add Product button.
Find and Add Product
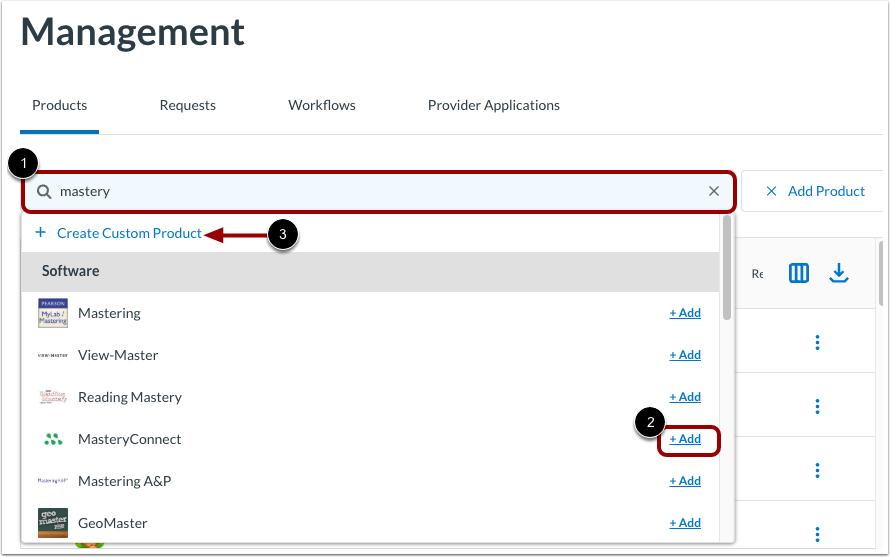
In the Search bar, enter the name of the product you would like to add [1]. Then, click the product's Add link [2].
If the product you want to add is not available, you can create a custom product. Learn how to create a custom product.
View Confirmation and Update
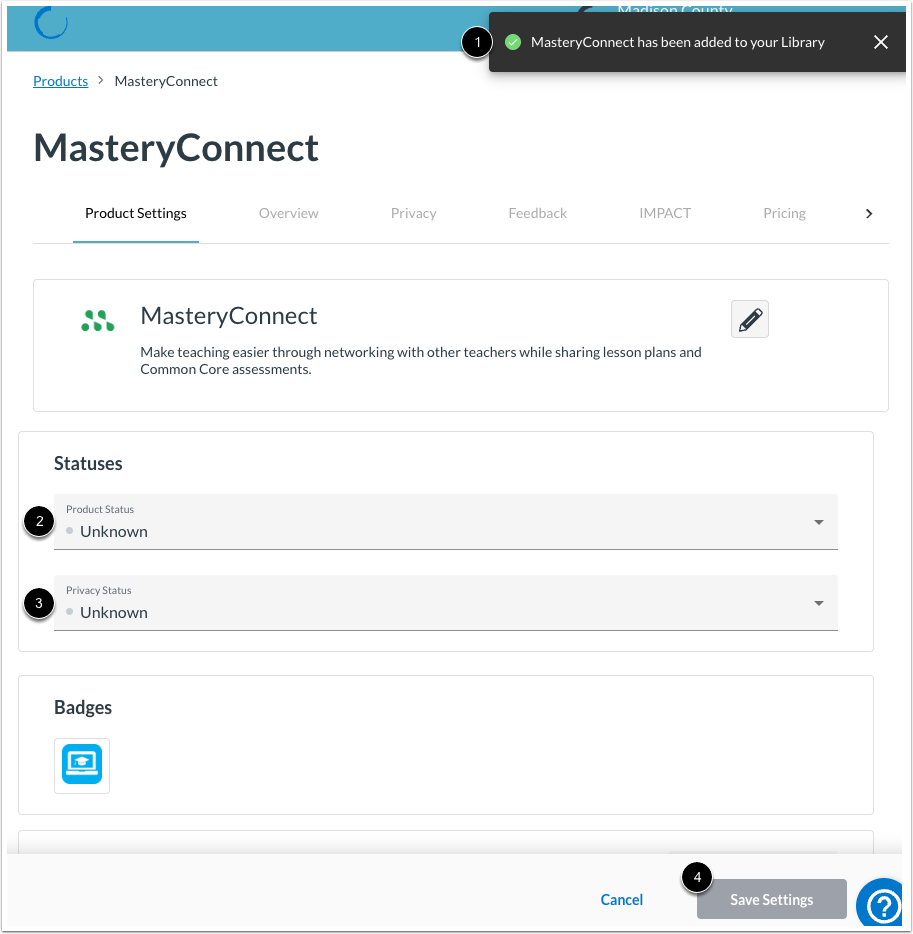
A confirmation message displays and the product is added to your organization's library [1].
View the product's detail page. If you know the product approval status or privacy status, click the Product Status drop-down menu [2] or Privacy Status drop-down menu [3] and select statuses.
In addition you can include other information specific to the product.
To save any changes, click the Save Settings button [4].
Note: Once you have added a product to your library, you can set statuses and add additional information in the Product Overview tab. Learn more about managing resources.
TIP: To ensure that products with a particular status are visible to your educators, manage status settings to include products with the status in the organization product library or the Public Product Library. Learn more about custom statuses.
Add Products from Inventory
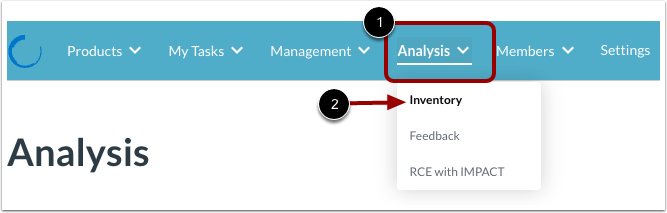
You can also add products from the Inventory page. To add products from the Inventory page, click the Analysis drop-down menu [1]. Then click the Inventory link [2].
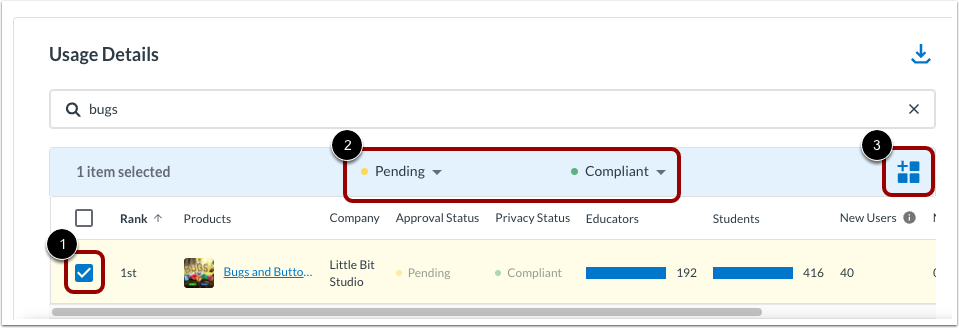
In the Usage Details section, select one or multiple products to add to your product library by clicking the checkbox [1]. Set the product statuses [2]. Then, click the Add items to the Product Library button [3].
Note: Products must have an Approval Status and Privacy Status in order to be added to the library.
Troubleshooting: If added products do not display in your organization's library, double-check the visibility options for statuses as well as the “Sharing with Educator” Access Controls in Settings.
Also in Settings, go to Access Controls, then Data Sharing with Educators - Would you like to share your Inventory data with Educators? Make sure to check the Yes, share with Educators checkbox is selected.