Your tracker contains the standards you selected when you created the tracker. You can add additional standards from other grades or sets of standards as needed.
Open Tracker
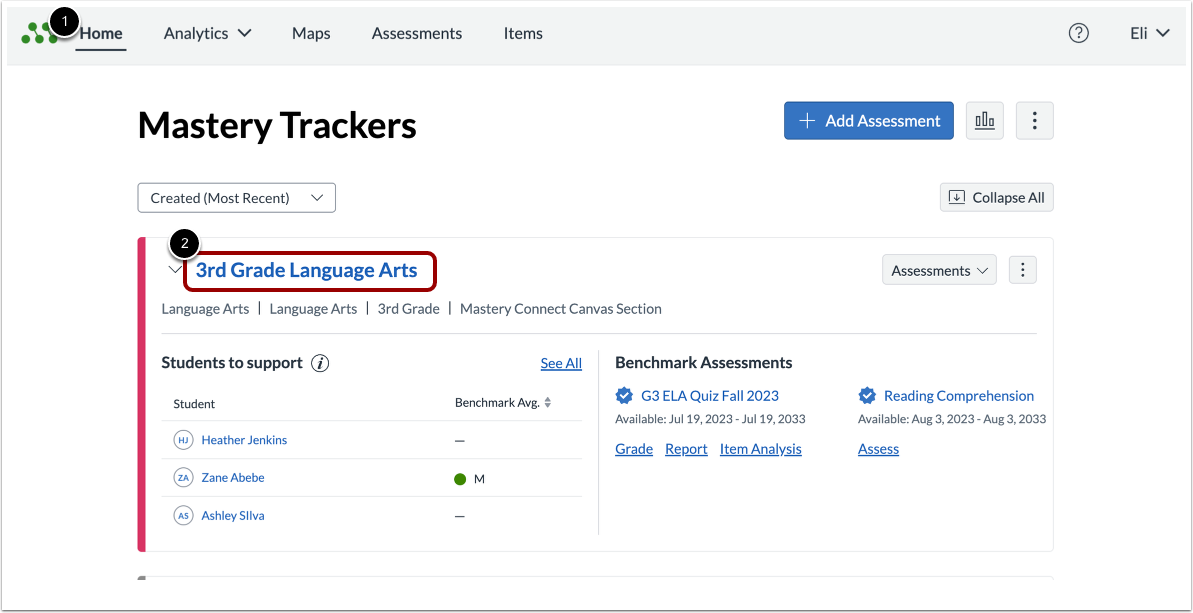
In the Mastery TrackersHome page [1], click the tracker name link [2].
Open Standards Menu
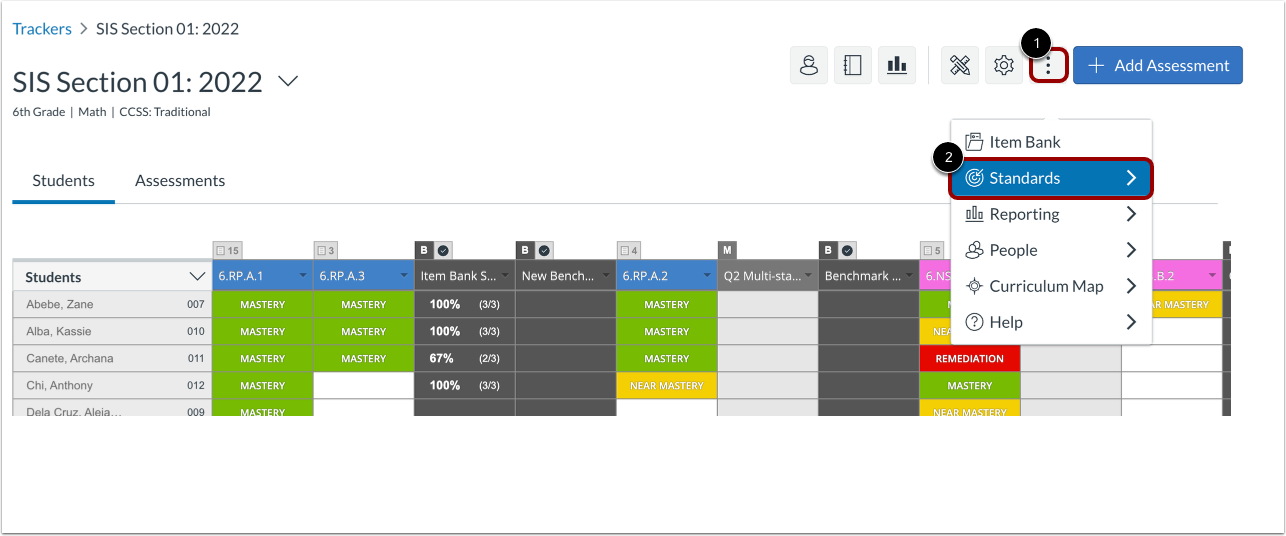
In the Tracker View page, click the More button [1], then click the Standards link [2].
Open Add Standard
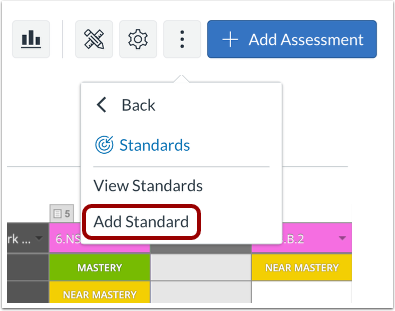
From the Standards menu, select the Add Standard link.
Select Existing Standard
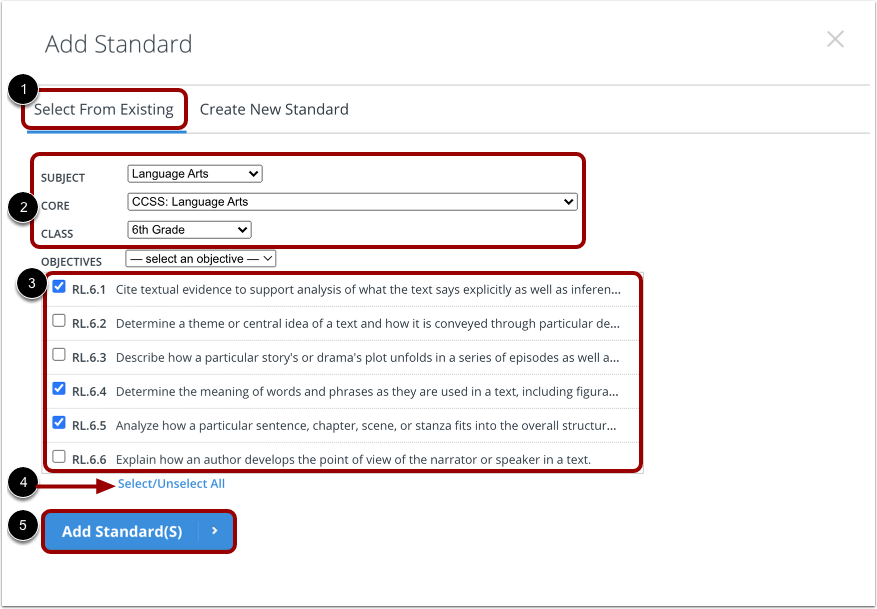
To add an existing standard to the tracker, click the Select From Existing tab [1]. Then, to select the standard you want to add, click the drop-down menus to select the Subject, Core, and Class [2].
To select the objectives you want to add to your tracker, click the checkboxes in the Objectives drop-down menu [3]. Alternatively, to select or unselect all objectives, click the Select/Unselect All link [4].
To add the standards to the tracker, click the Add Standard(s) button[4].
Note: To add an existing custom standard, click the Core drop-down menu and select the CSTM: [Your District] option.
Add New Standard
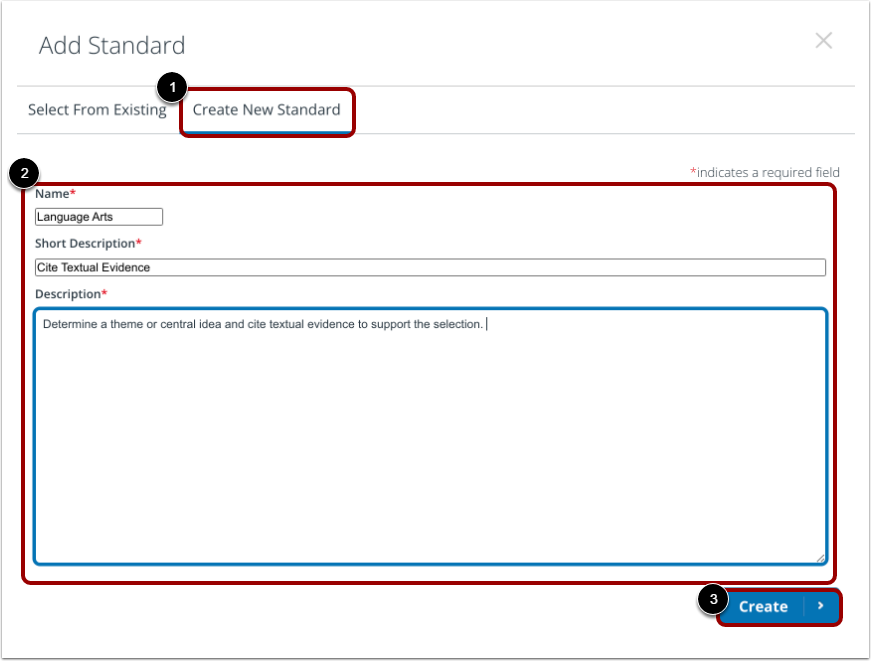
To add a new standard to the tracker, click the Create New Standard tab [1]. In the text boxes, type the name, short description, and complete description of the new standard [2].
To save your changes, click the Create button [5].
Reorder Standards
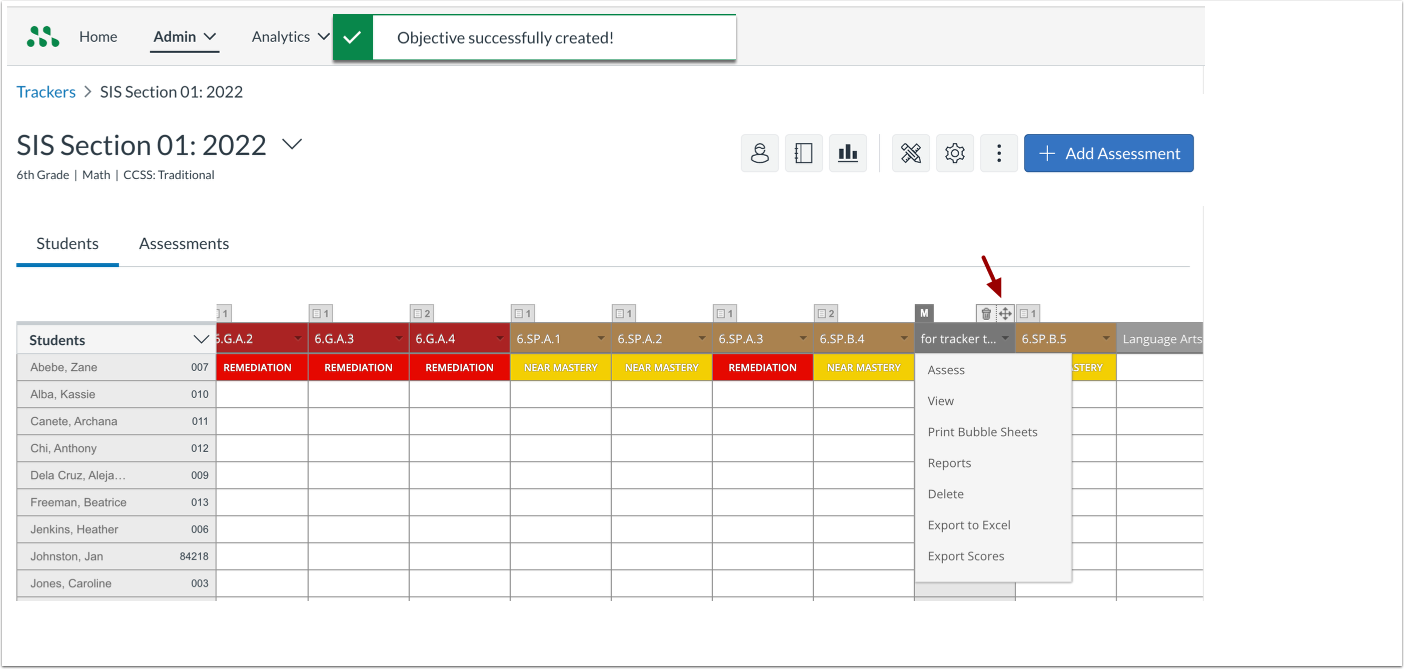
The standard you added displays at the end of the tracker.
To reorder the standards in the tracker, hover the cursor over the standard title and click the 4-way arrow to drag and drop the standard in a new location.